 International
 Singapore
 Malaysia
 Thailand
 Vietnam
Your shopping cart is empty!

Topic 5: Getting Started with Ender 3 V3 SE
- Khairul_Tajudin
- 20 Mar 2024
- Tutorial
- Beginner
- 414
Welcome to the world of 3D printing with the Creality Ender 3 V3 SE! Whether you're a seasoned maker or a curious beginner, the Ender 3 V3 SE offers an accessible entry point into the exciting realm of additive manufacturing.
In this guide, we'll walk you through the essential steps to set up and start printing with your Ender 3 V3 SE, unleashing your creativity and bringing your ideas to life.
5.1 3D Printer Specification
Take a closer look at the features and capabilities of the Ender 3 V3 SE. From its sturdy aluminum frame to the reliable Creality mainboard and silent stepper motor drivers, this printer is designed to deliver high-quality prints with precision and consistency.
Let’s visit our product page to know more about this 3D Printer.
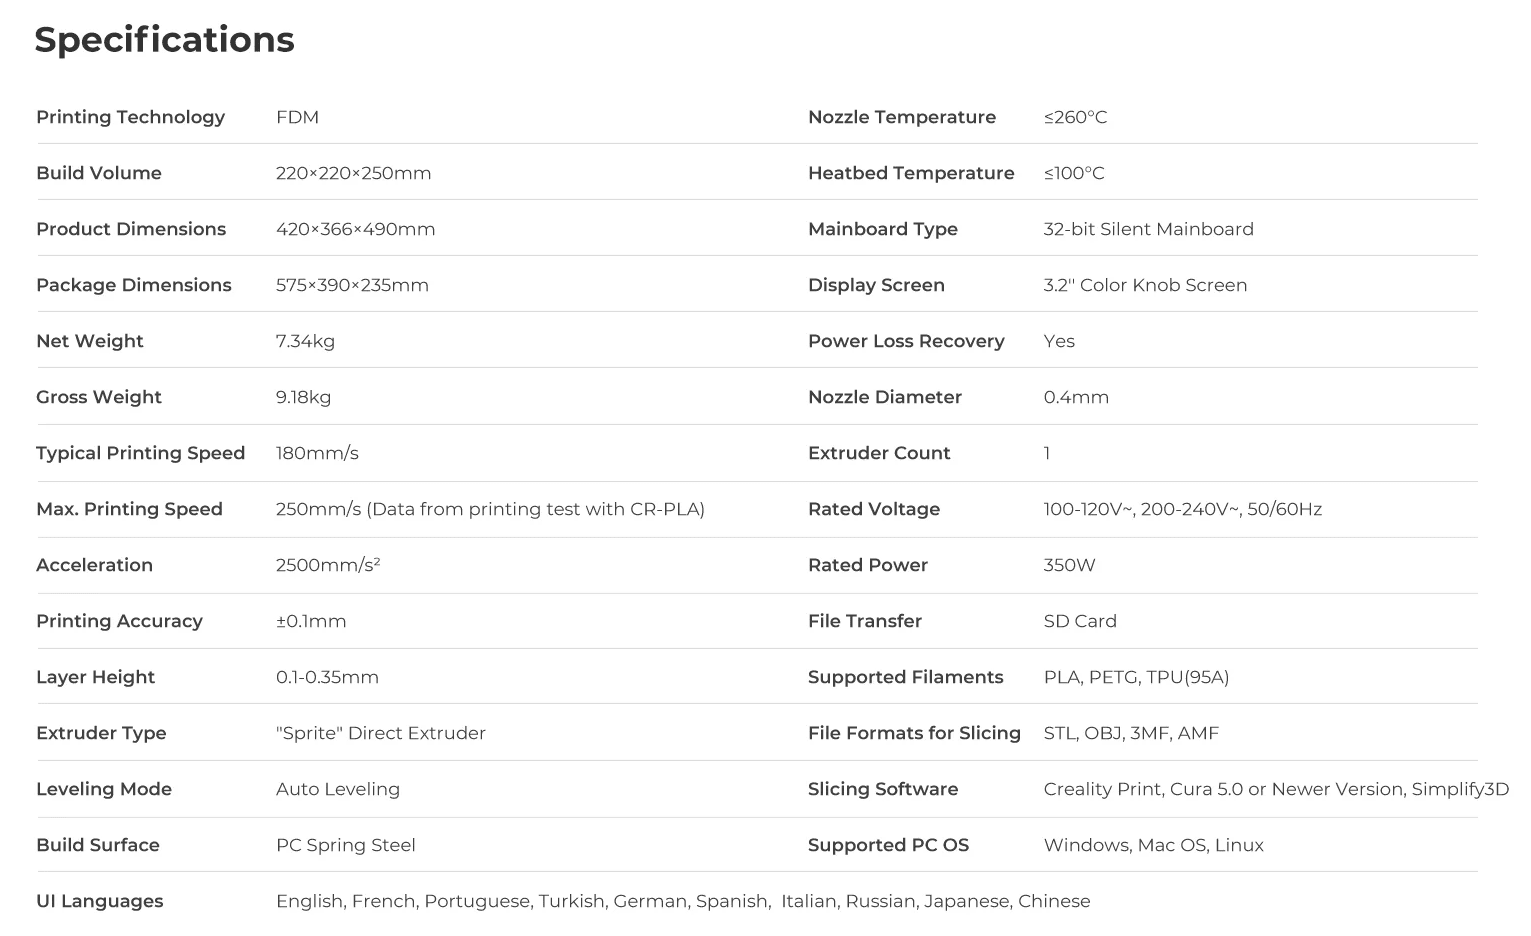
Important information to highlight
- Build Size: 220*220*250 - Ideal size for beginners to start discovering 3D Printing activities.
- Leveling Method: Auto-Leveling with CR Touch - “Must-have” Feature that helps a lot for any beginner to start their 3D Printer.
- Speed: Typical 180mm/s - This speed is actually the fastest speed among beginner level 3D Printers in the market nowadays. Normally speed only can reach 100mm/s only.
- Filament: PLA, TPU and PETG - Common material that is usually used in the learning process. This printer helps the user to make it more easy to use with this material.
5.2 3D Printer Assembly
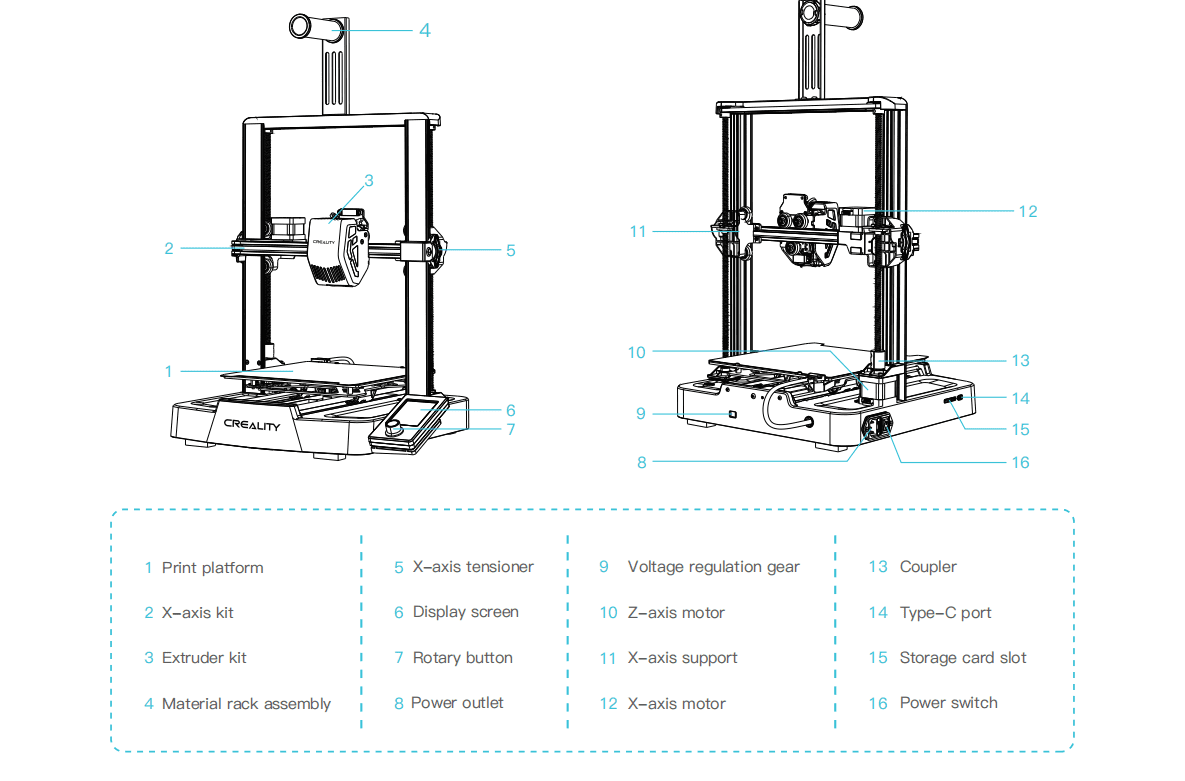
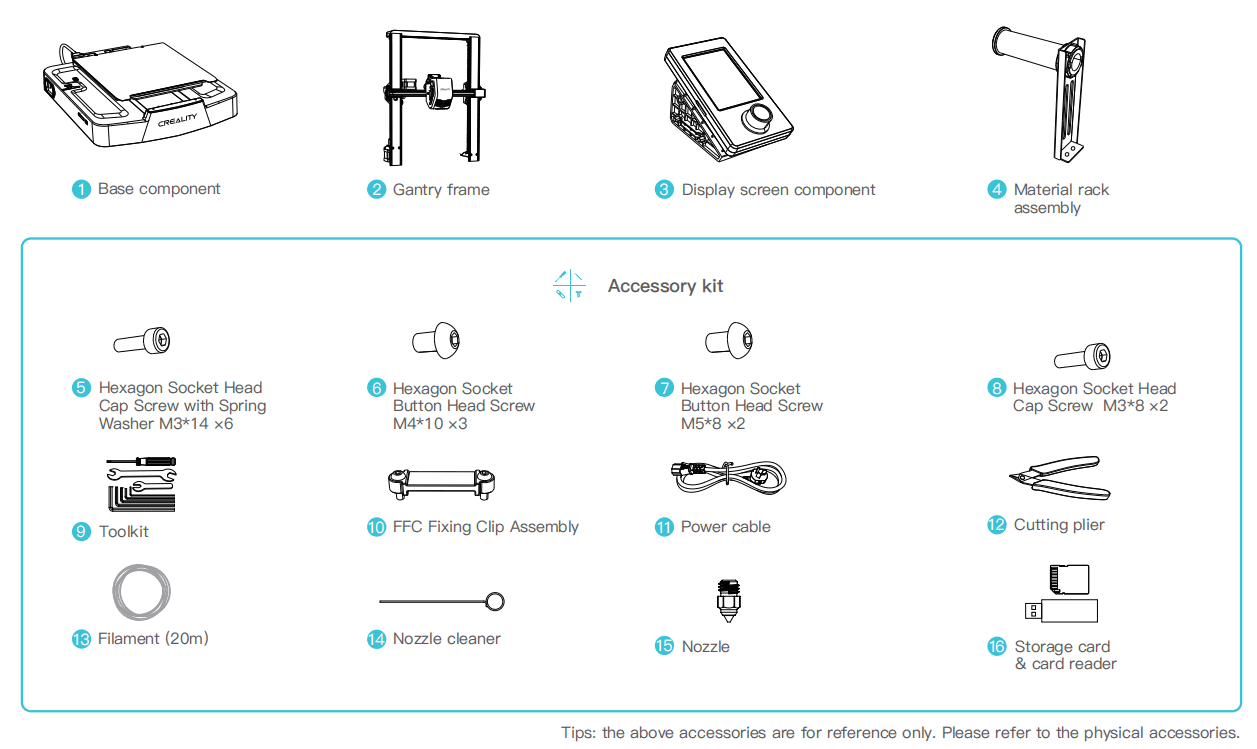
The journey begins with unboxing your Ender 3 V3 SE. Carefully unpack each component and familiarize yourself with the printer's main parts, including the frame, extruder, heated bed, and LCD Screen. Follow the detailed assembly instructions provided, ensuring proper alignment and secure fastening of all components
We have found there are good tutorials for us to follow in the unboxing step. You can refer to this website, Creality Ender 3 V3 SE Assembly Guide. Creality also provides us with an Official User Manual for us to refer to during the assembly process. I will derive some User Manual into this tutorial.
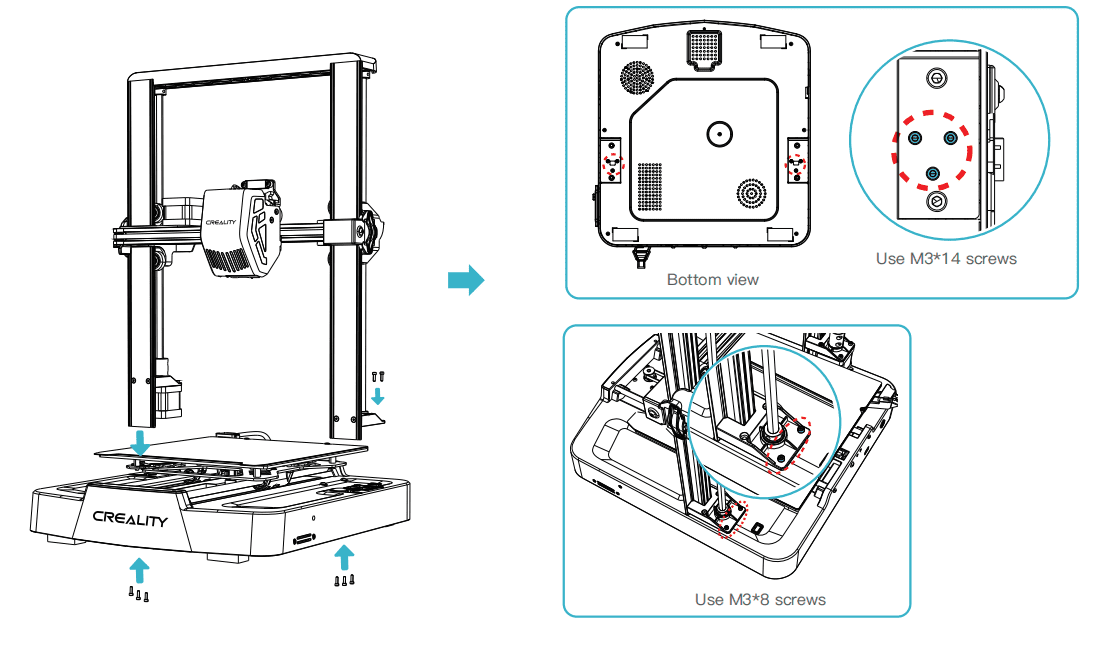
Step 1: Place the gantry frame in the slot of the base, tighten it first with M3*14 screws by aligning with the holes from the bottom, then use M3 *8 screws to secure it in place from the rear end of the gantry frame in the same way.
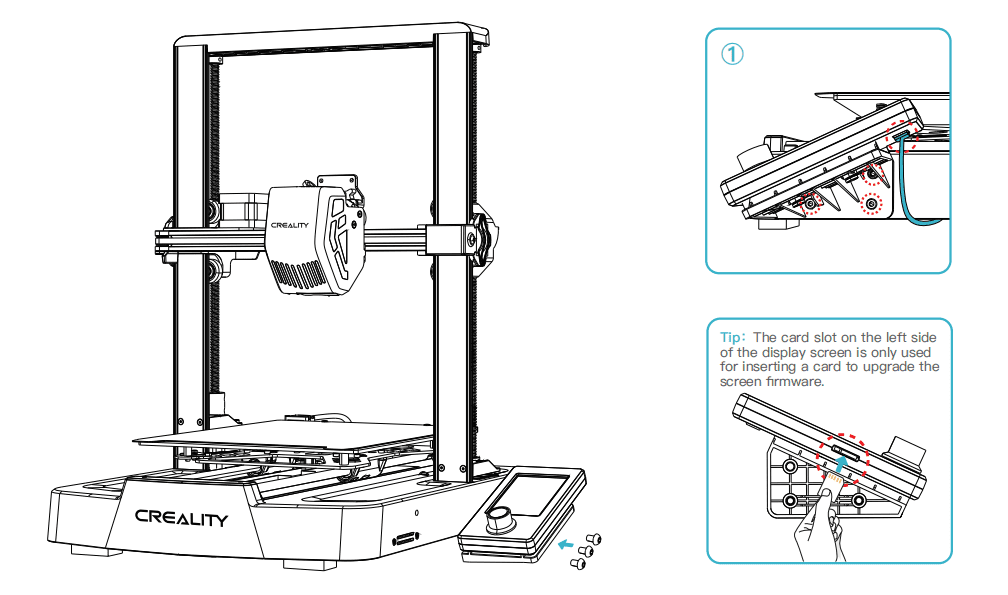
Step 2: Put the display screen on the right side of the bottom assembly, align the screw holes and secure with M4*10 screws, then connect the display wiring;
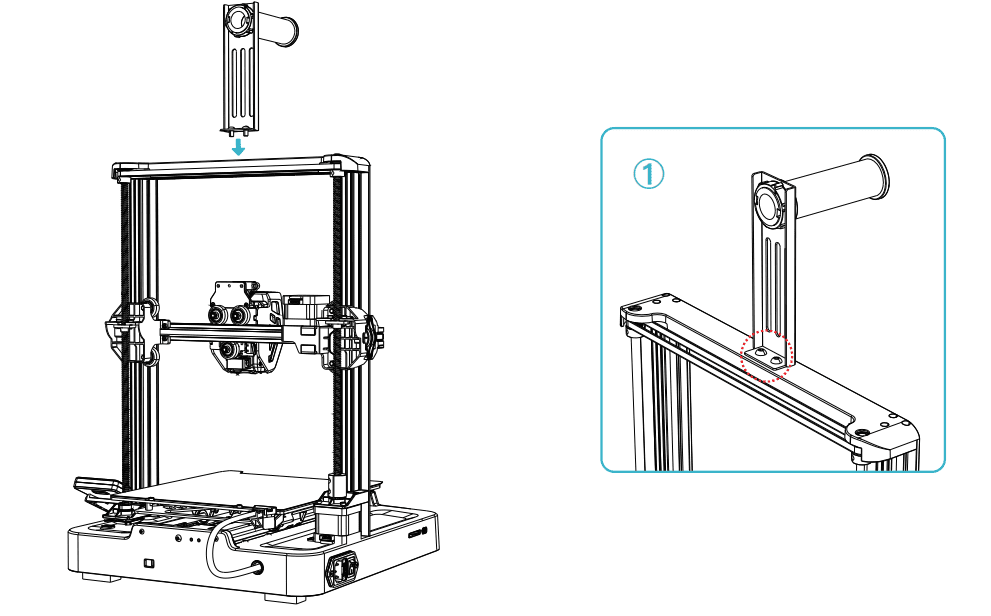
Step 3: Fix the material rack assembly to the gantry frame, align the screw holes and lock it with M5*8 screws;
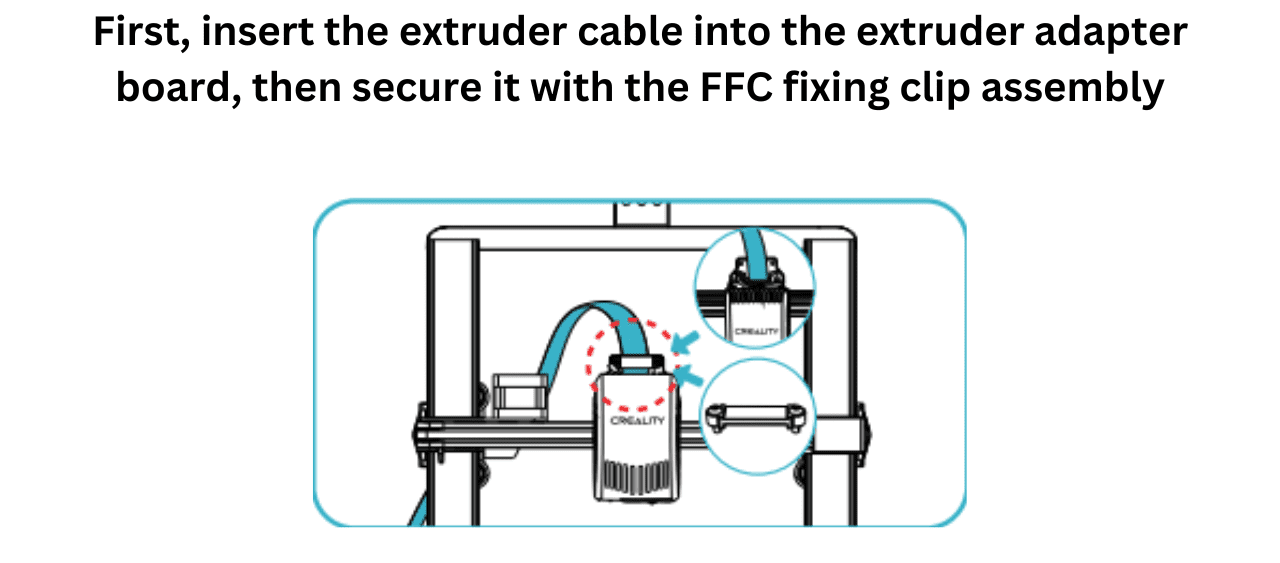
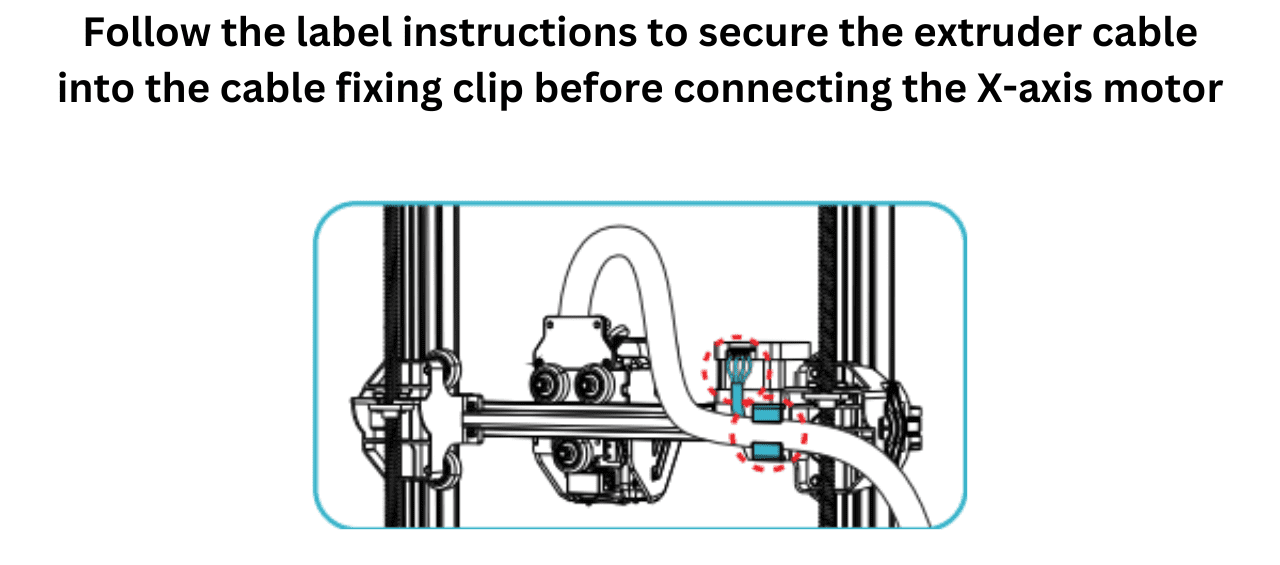
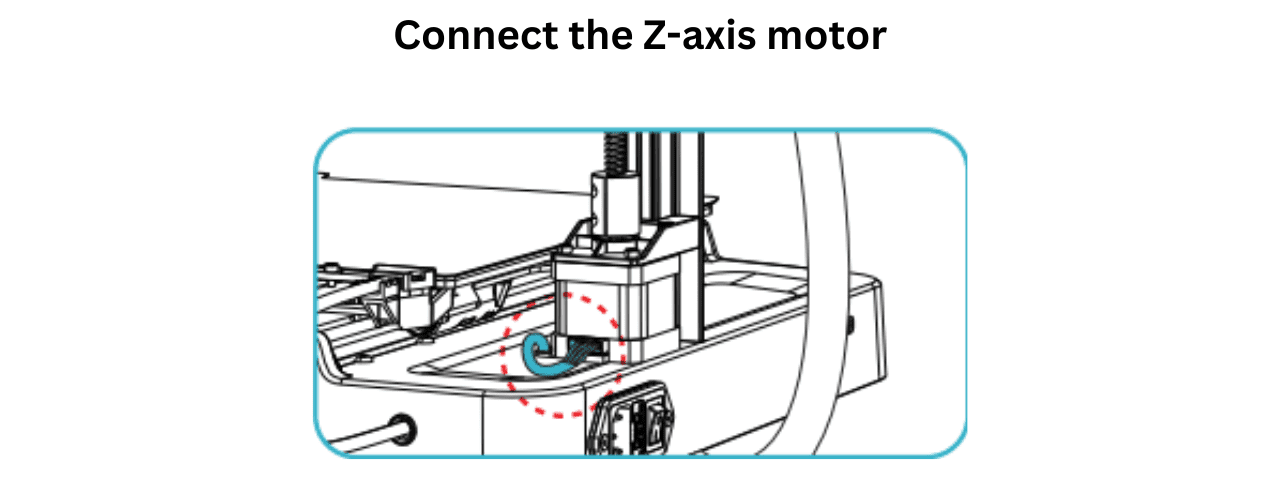
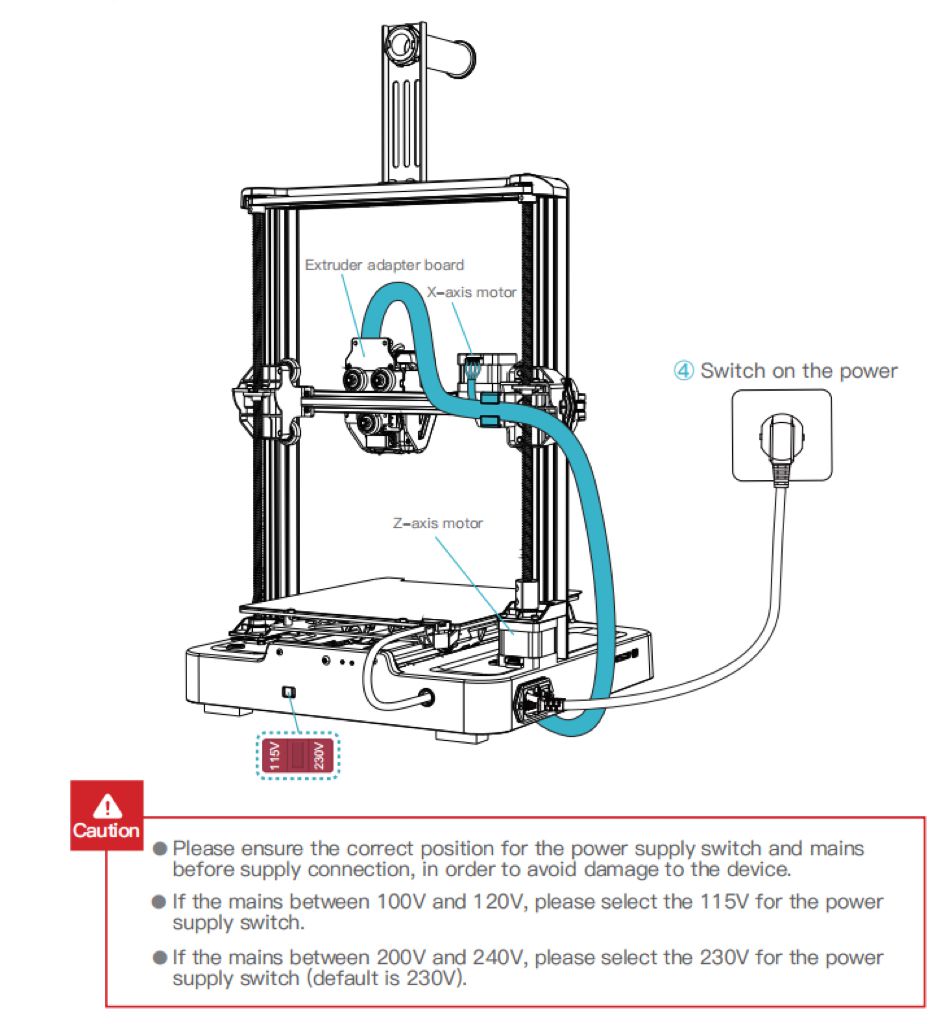
Step 4: Wiring the equipment of 3D Printer
Step 5: Switch on the power. For Malaysia user, power supply is 230V.
Done setup for 3D Printer assembly process. It may take around 15-20 minutes only to set up this 3D Printer. Next we will continue the Filament (Material) loading and Calibration process.
New to 3D Printing but not sure where to start?
You can start by being a part of our 3D Printing Community!

Hardware Components
 -7%
-7%Creality Ender-3 V3 SE 3D Printer + 1KG PLA
S$356.07 S$382.86 S$356.07
x 1 unit(s)