 International
 Singapore
 Malaysia
 Thailand
 Vietnam
Your shopping cart is empty!

Topic 8: 3D Printing Your First Item
- Khairul_Tajudin
- 28 Mar 2024
- Tutorial
- Beginner
- 202
Now that your Ender 3 V3 SE is assembled, leveled, and calibrated, it's time to prepare your first print. We can choose or design a 3D model using your preferred CAD software, export it as an STL file, and import it into your slicing software of choice.
Configure print settings such as layer height, infill density, and print speed, and generate G-code for your printer will be covered on the next topic.
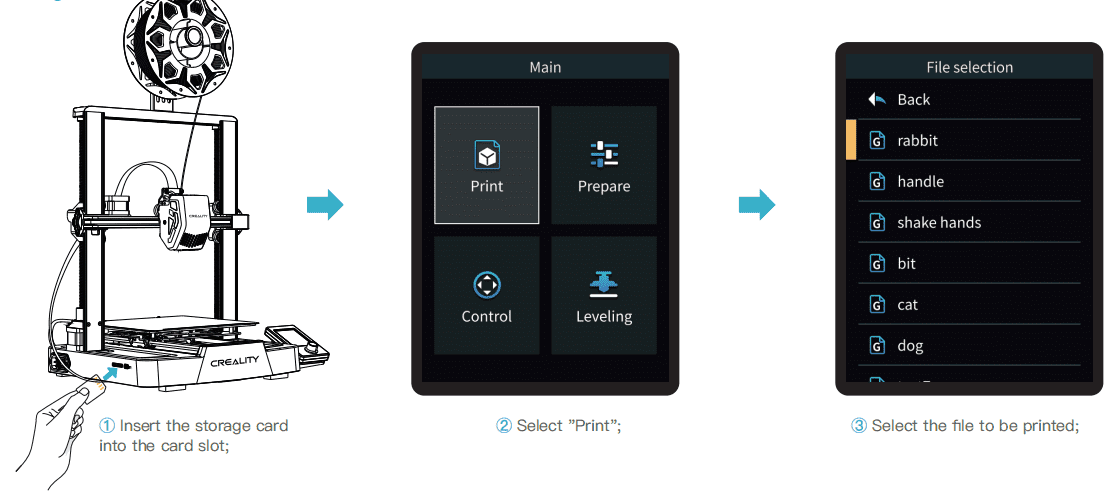
In 3D Printer Packaging, you are already prepared by an SD Card that already preloads with sample G-Code onto your Ender 3 V3 SE's SD card. Inserts it into the control unit. Navigate to the Print menu, select the file, and initiate the print.
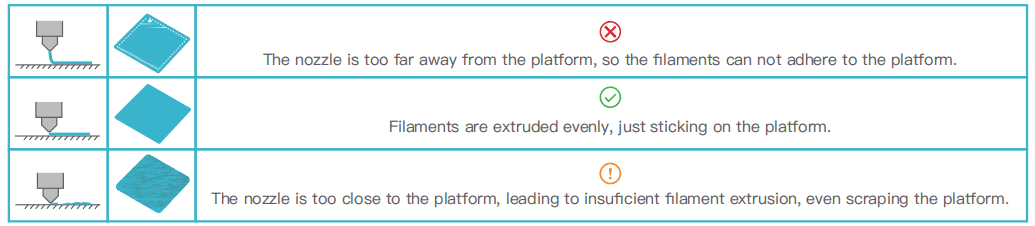
If the first layer of printing effect is overpressure or does not stick to the platform, you need to use the knob to select the setting, adjust the Z axis compensation, so that the printing platform and the nozzle fit as much as possible, and click OK to start printing.
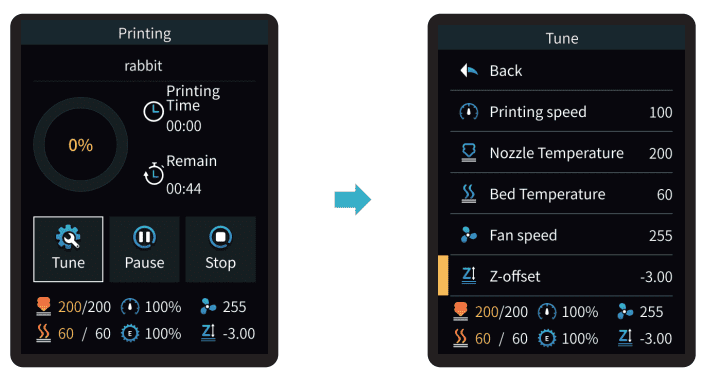
For leveling effect, please refer to the operation and try to maintain a distance of approximately 0.1 mm between the printing platform and the nozzle.
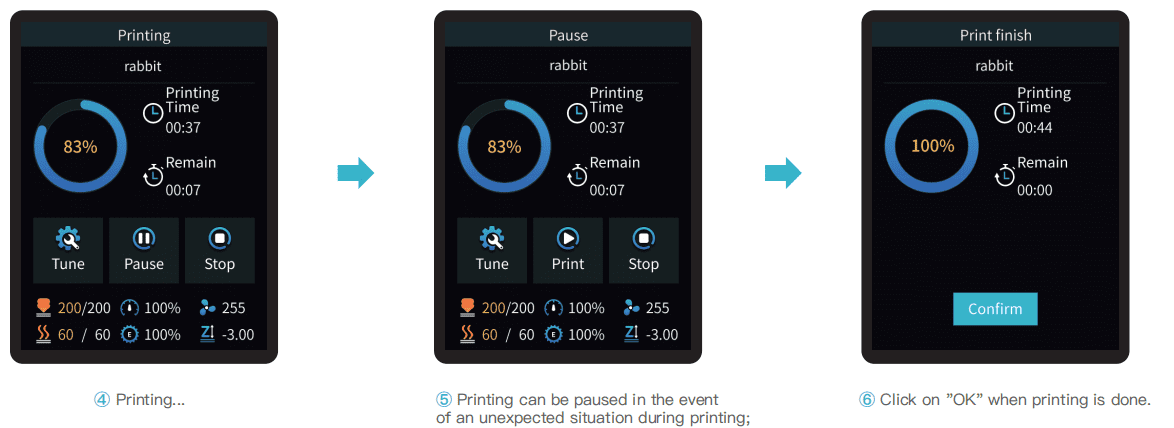
Sit back and watch as your Ender 3 V3 SE brings your creation to life, layer by layer, with precision and accuracy.
Next, we will enter the 3D Design world using TinkerCAD software and how to set the slicer to print the 3D Model.
New to 3D Printing but not sure where to start?
You can start by being a part of our 3D Printing Community!

Hardware Components
 -7%
-7%Creality Ender-3 V3 SE 3D Printer + 1KG PLA
S$356.07 S$382.86 S$356.07
x 1 unit(s)