 International
 Singapore
 Malaysia
 Thailand
 Vietnam
Your shopping cart is empty!

Object Detection with Edge Impulse Using Mobile Phone
- Khor Jia Yong
- 24 Jan 2024
- Project
- Beginner
- 415
Introduction
In this project, the Object Detection project is constructed utilising the Edge Impulse platform, wherein the primary device is a mobile phone. Using the camera functionality of the mobile phone device, the project focuses on gathering data by capturing objects through the phone's camera.
Hardware Requirement
- Mobile phone
Project Development
To create a project using Edge Impulse, seven stages need to be considered:
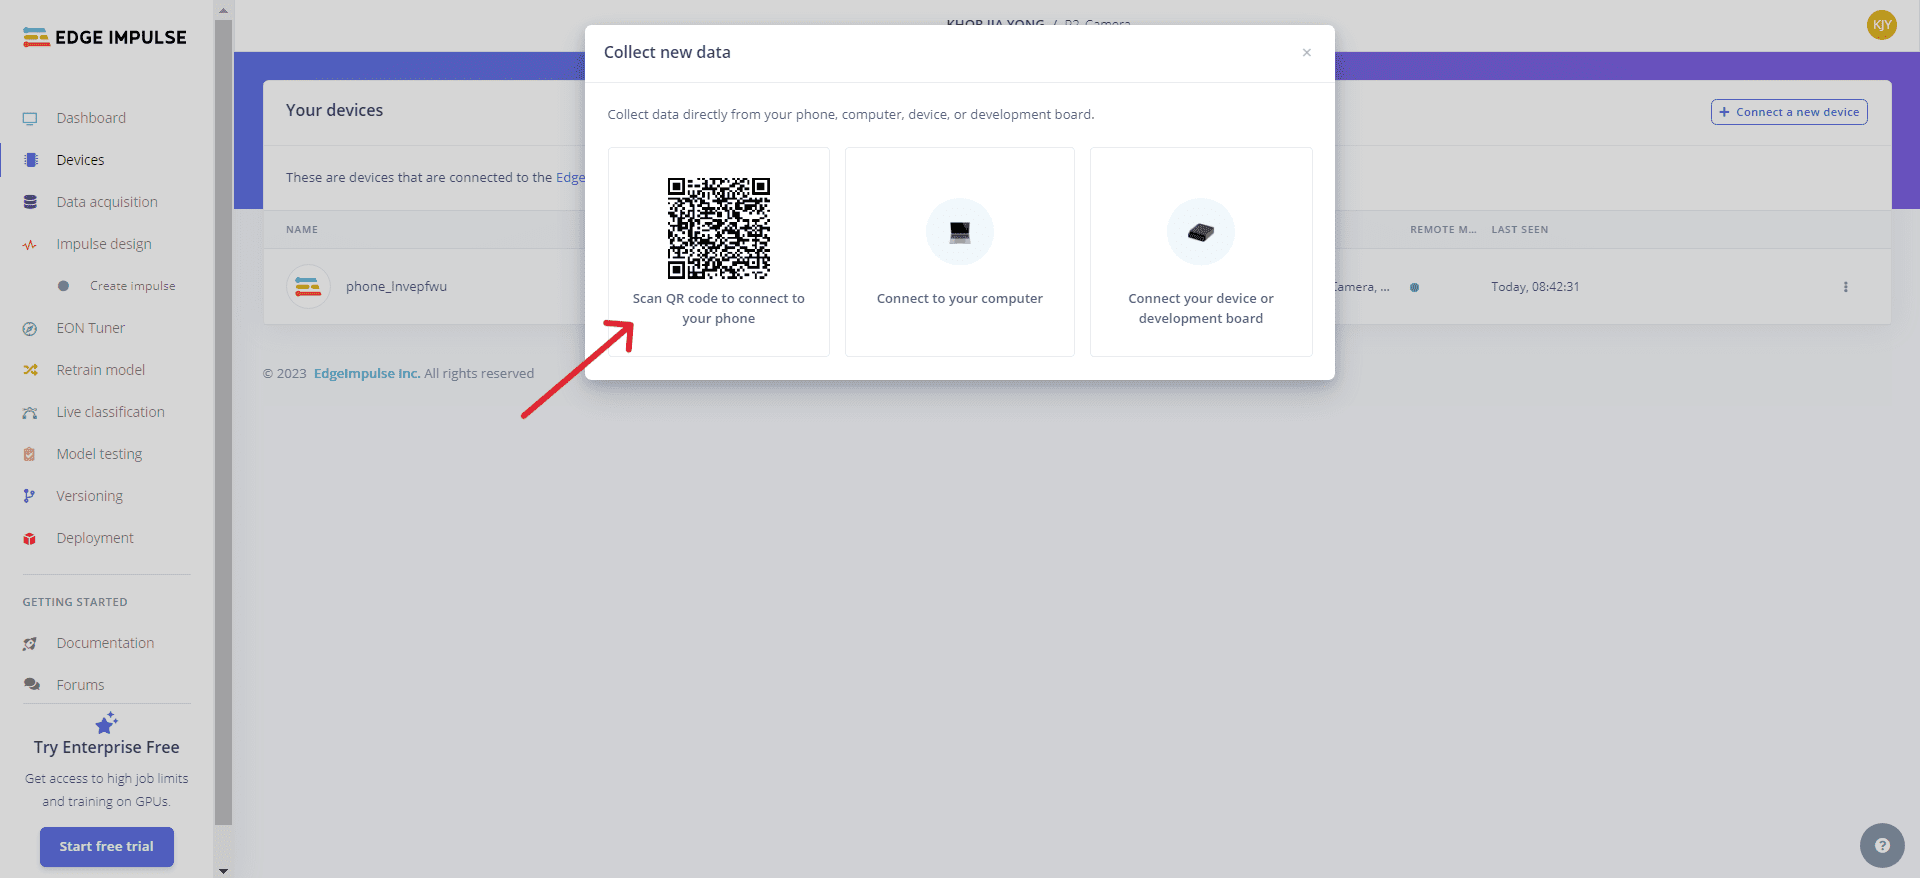
1. Device
Scan QR code to connect your mobile phone device to Edge Impulse
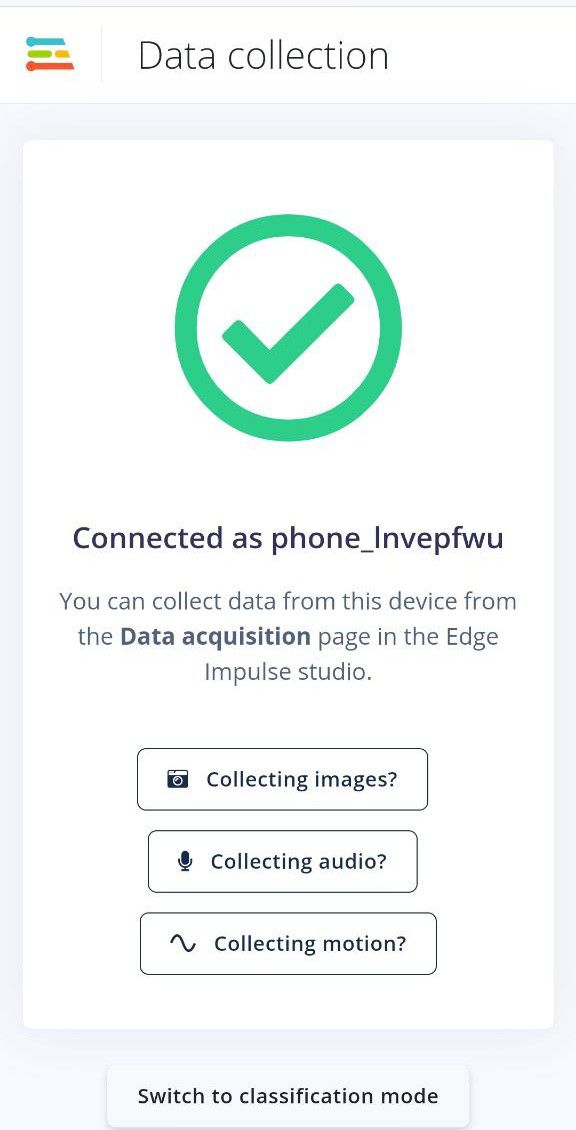
After scanning, the website will take you to the specified page. Make sure you see the message "Connected as..." to confirm that your mobile device is successfully linked to Edge Impulse.
2. Data Acquisition
Select the camera sensor type from the list and adjust the sample length on the same page.
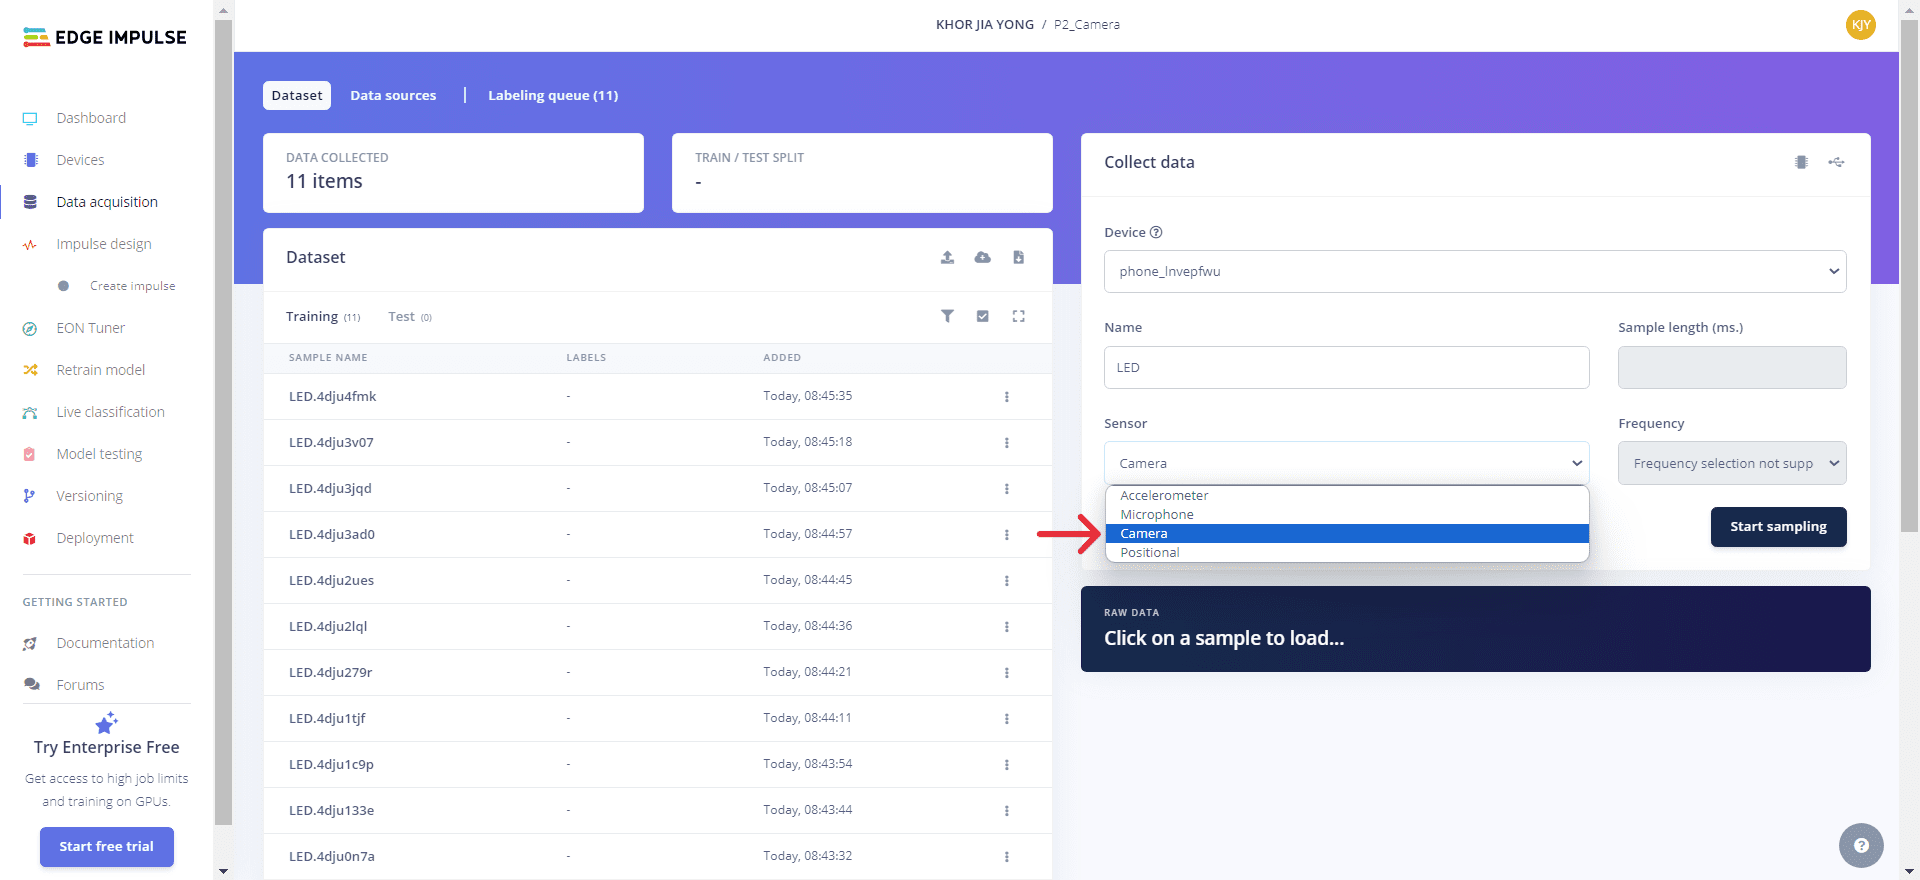
Clicking "Start sampling" records data and then press "Capture" on your mobile phone to capture the object. In this case, objects like "LED and ultrasonic sensor" are considered.
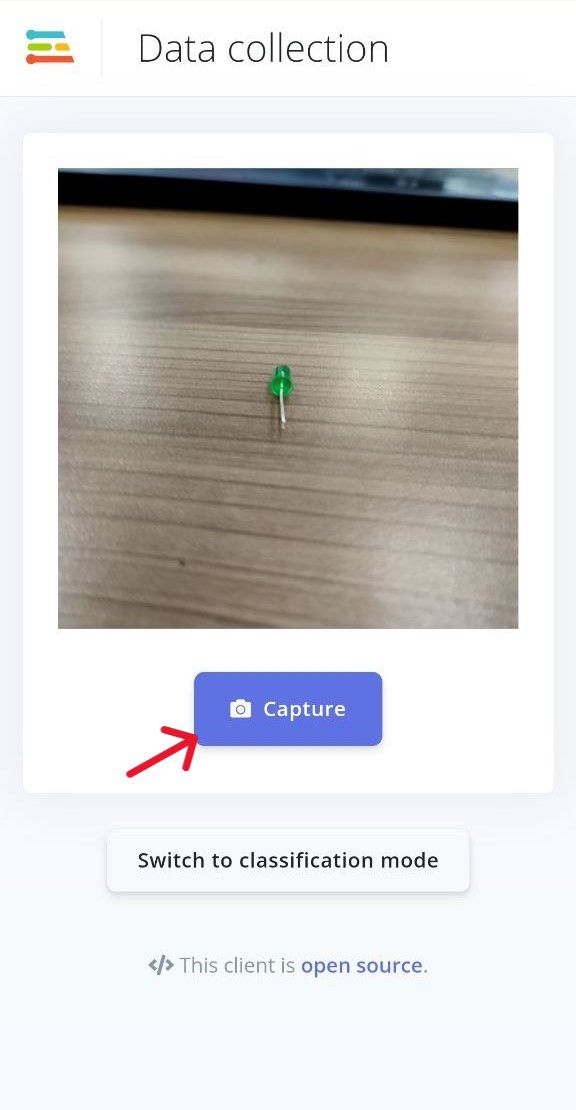
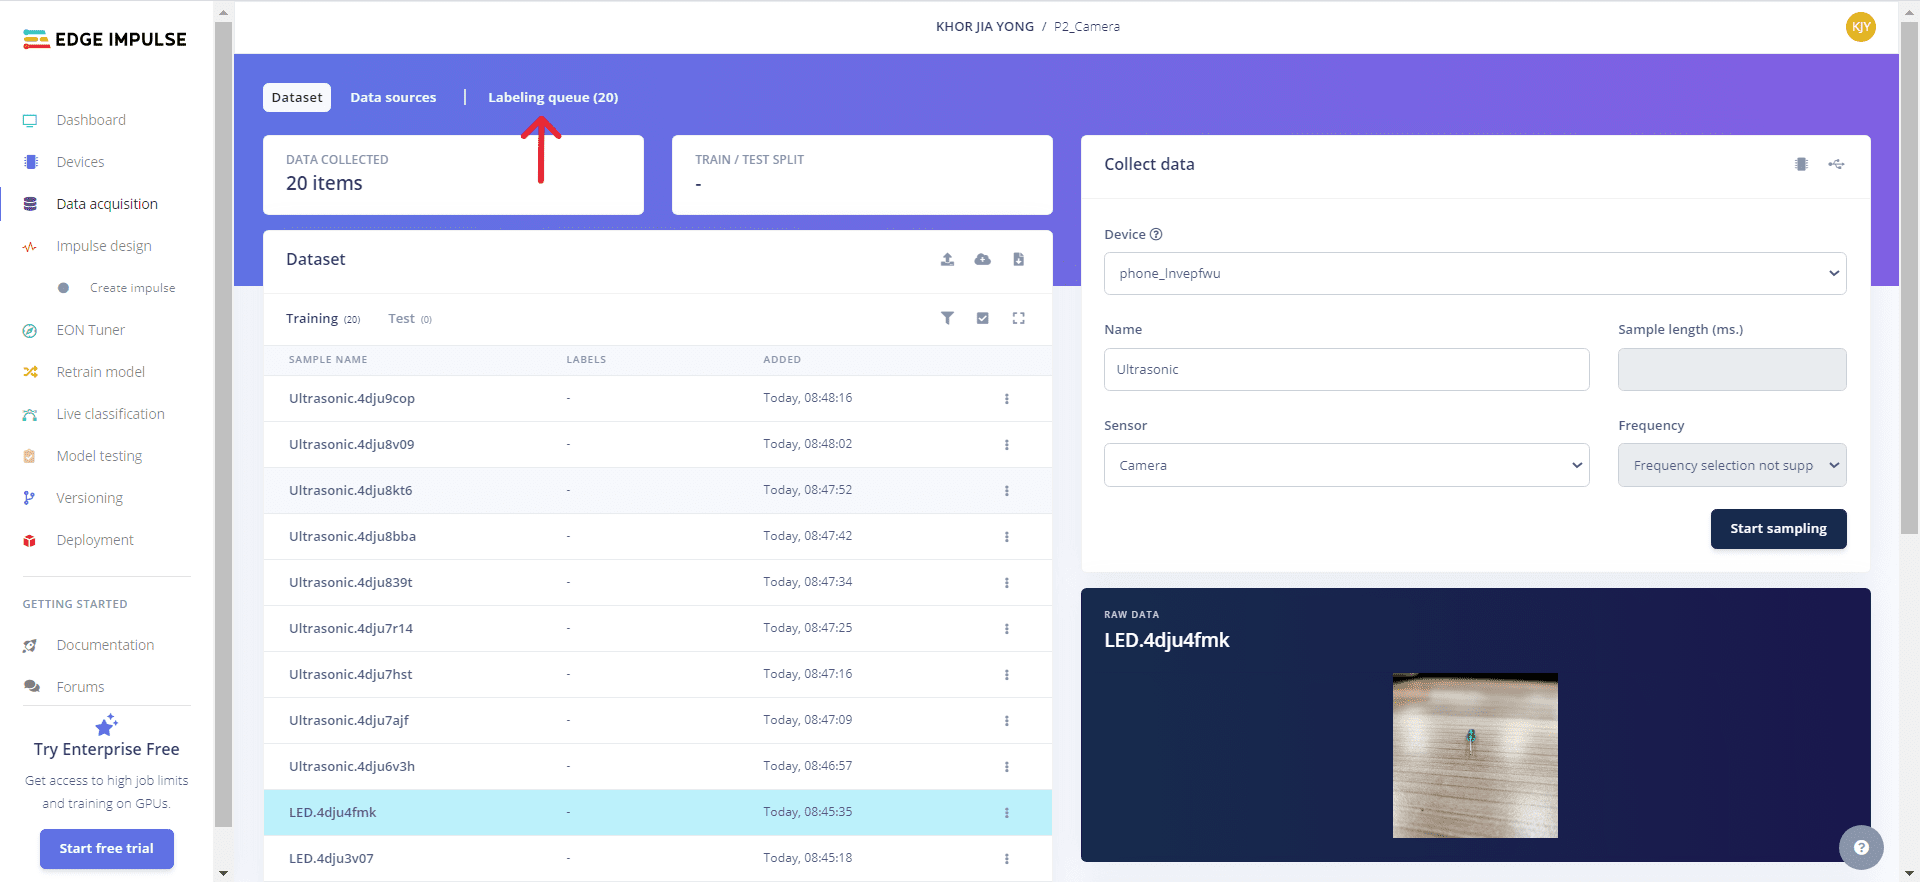
Change the "name" to modify the data type, and then the data collected is uploaded and saved to the same data acquisition page.
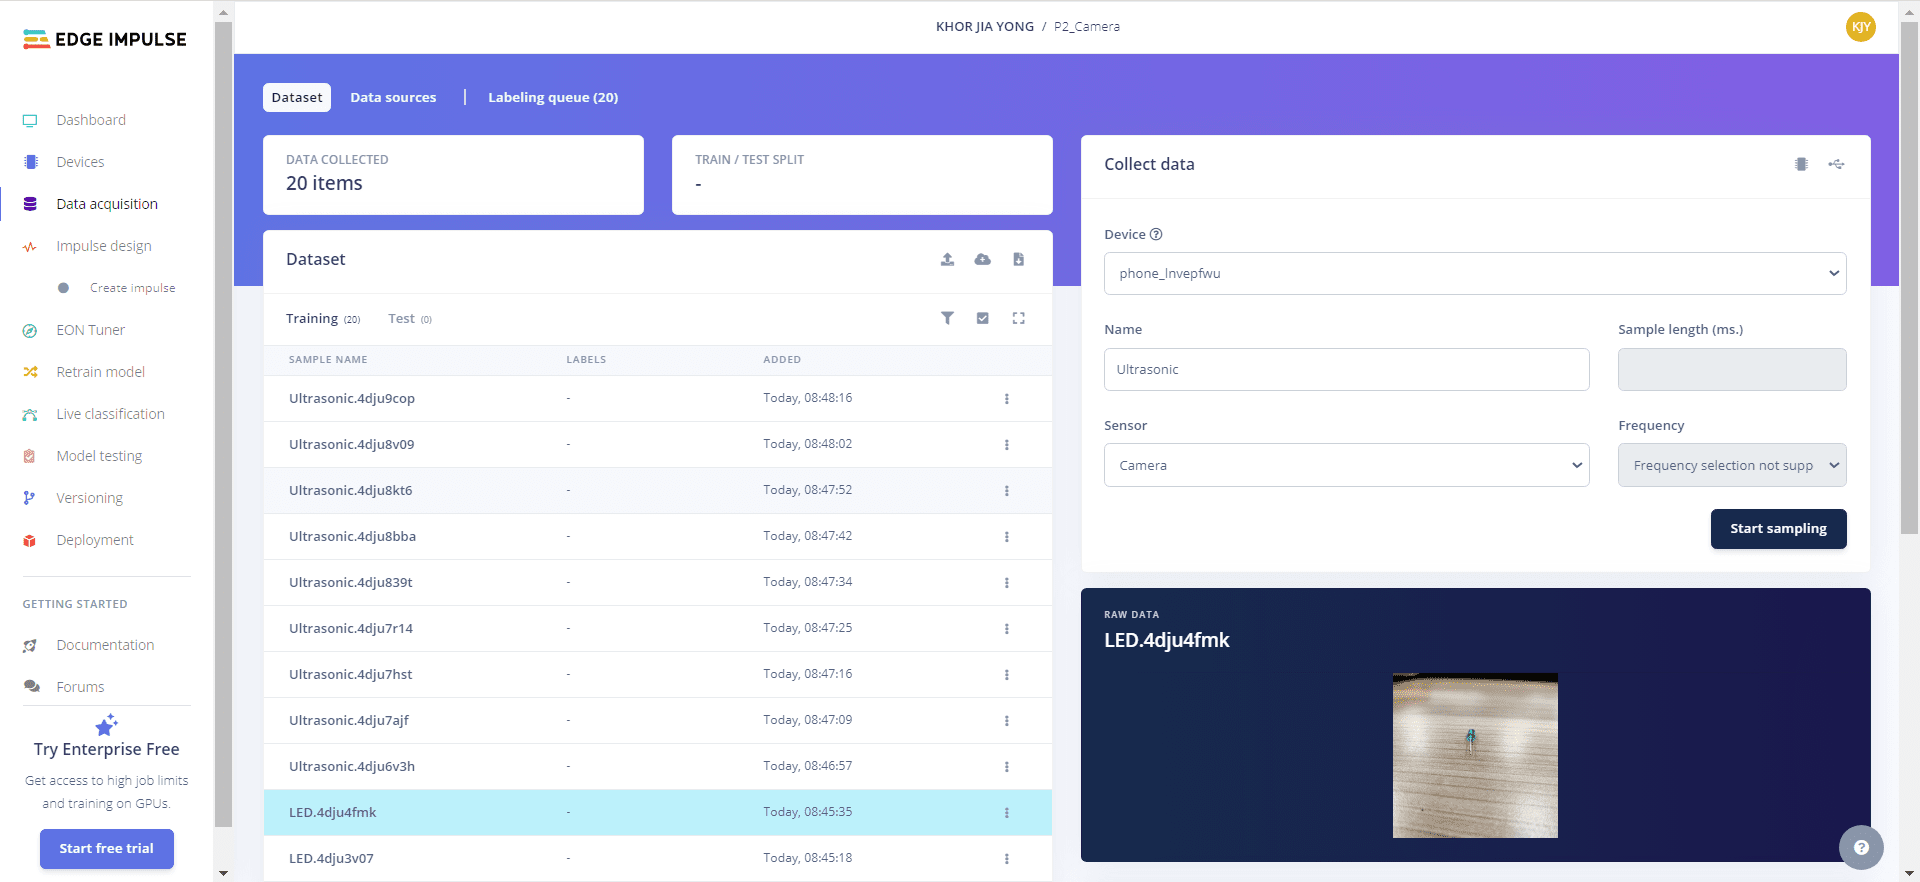
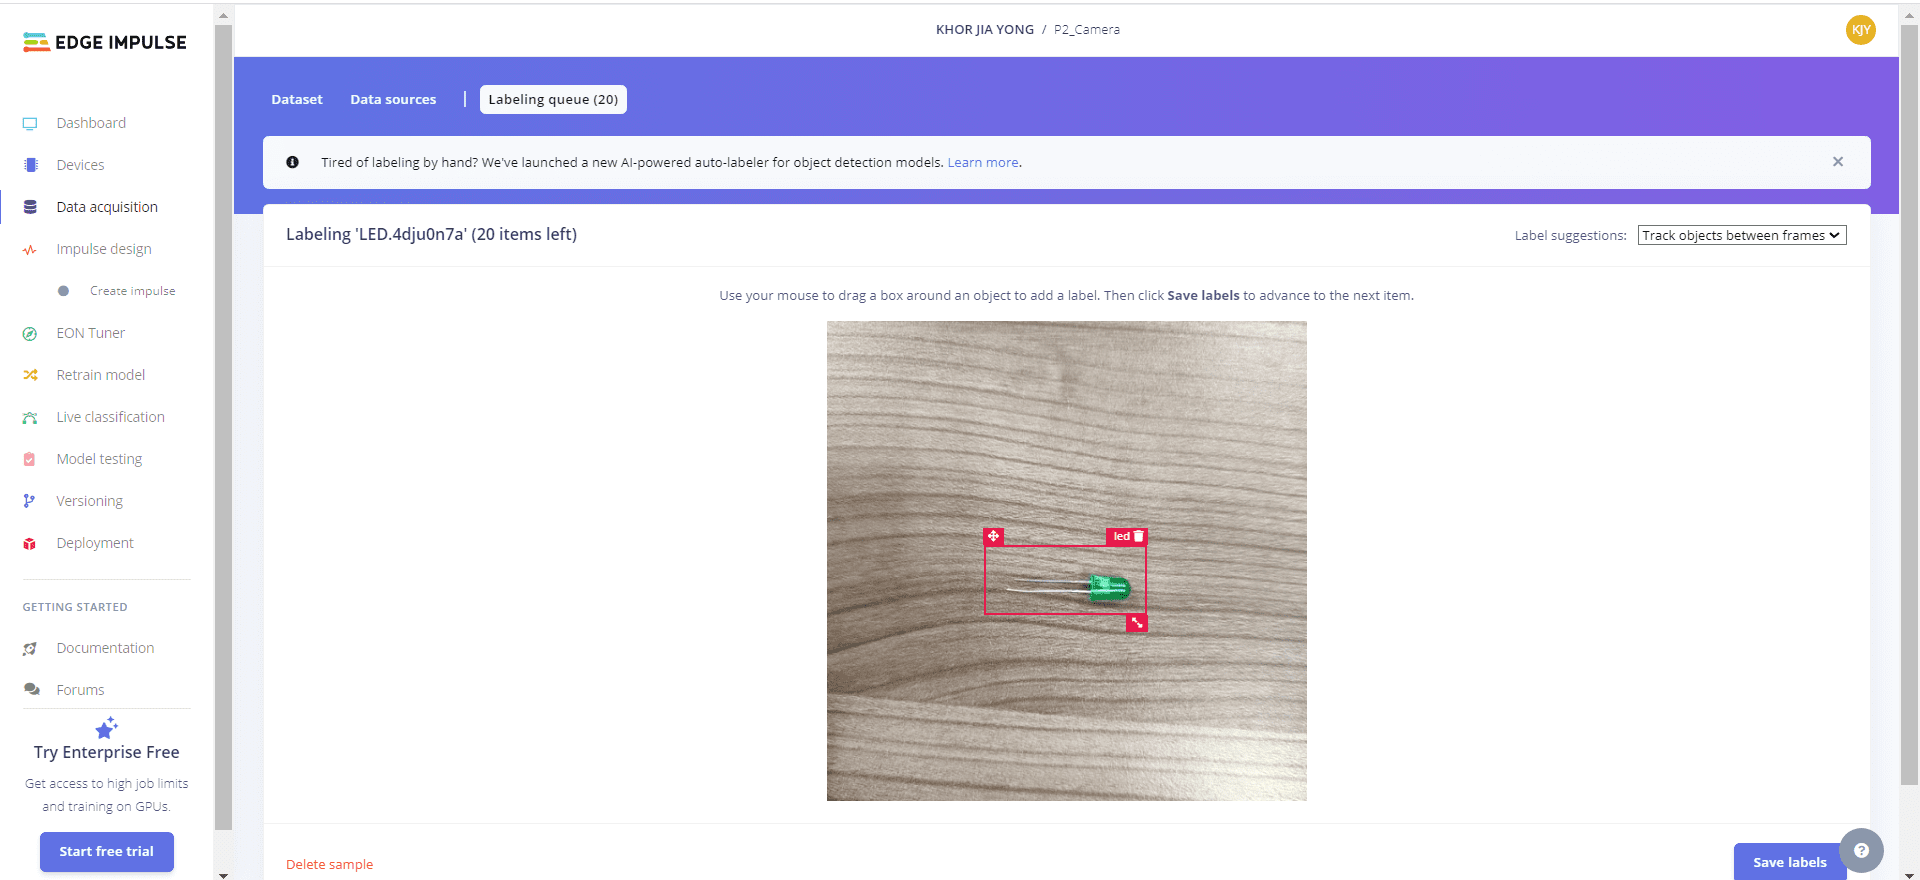
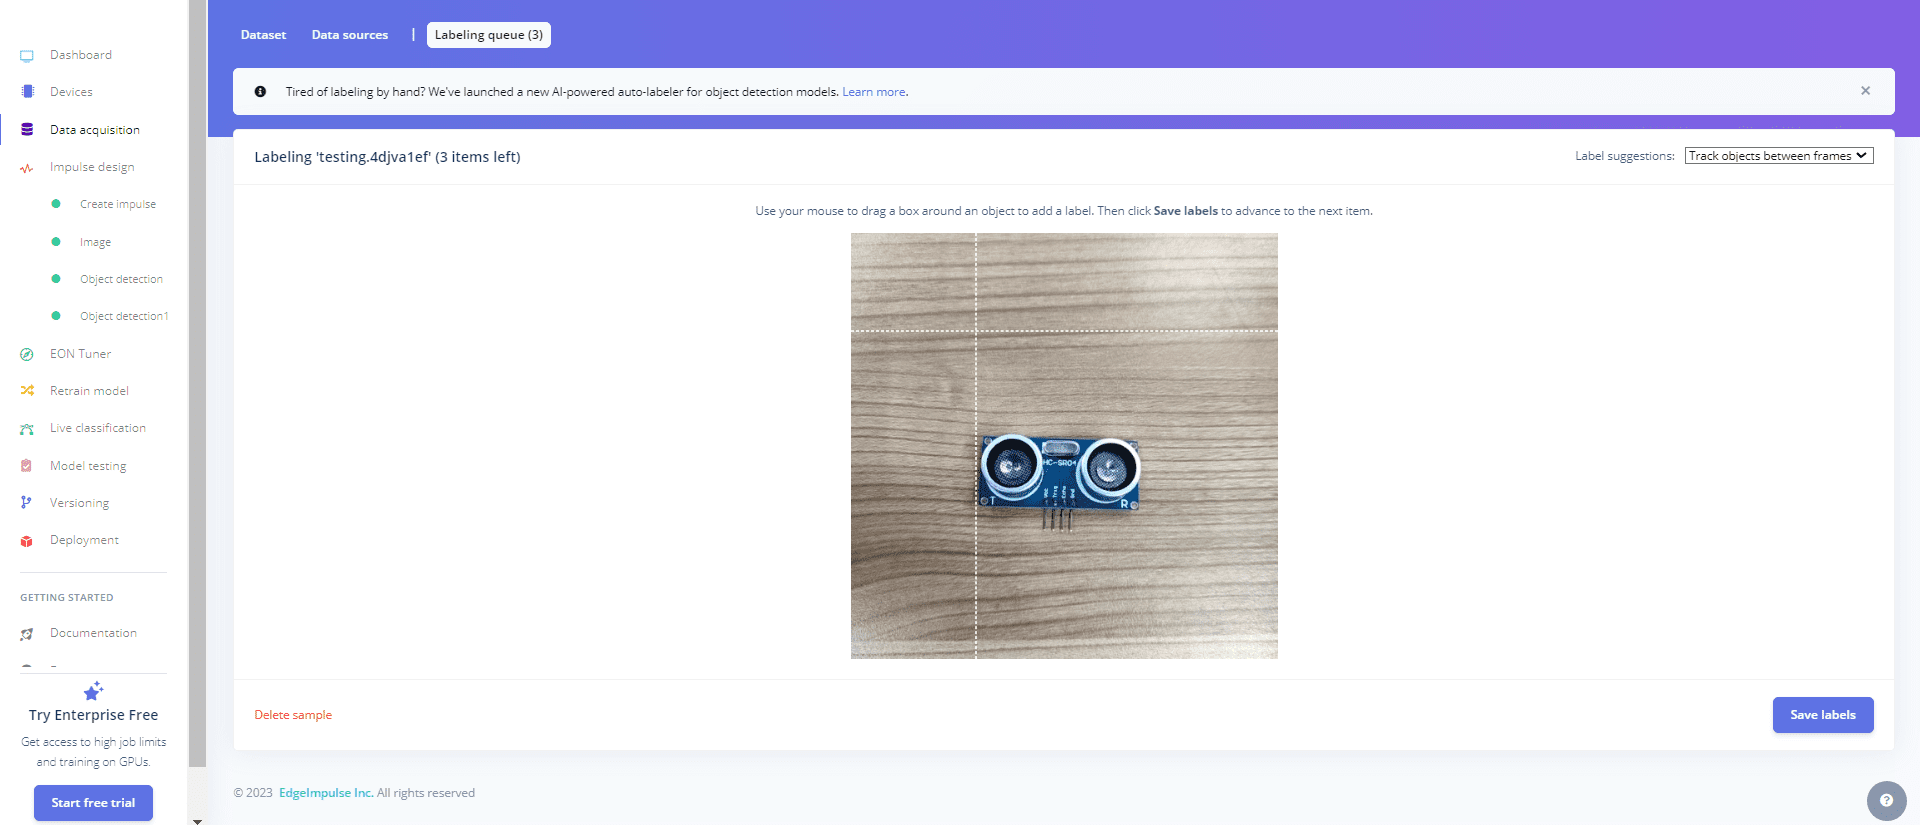
After gathering the data, select the "Labelling queue" option to frame and label the captured object.
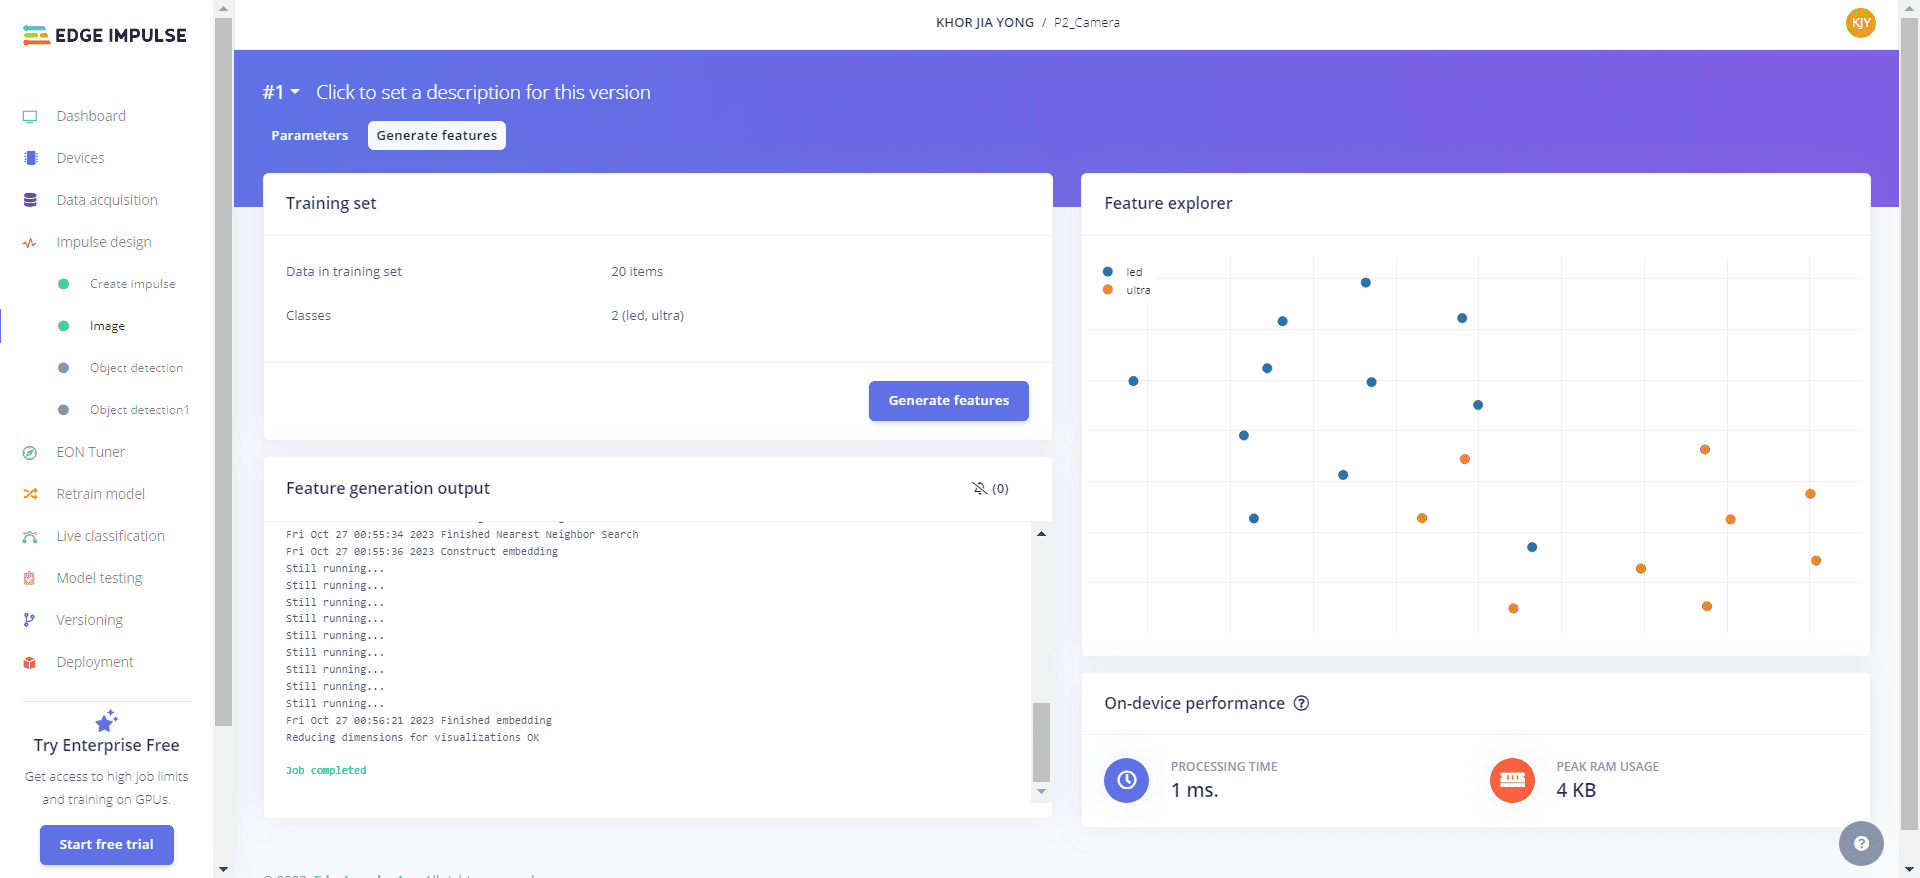
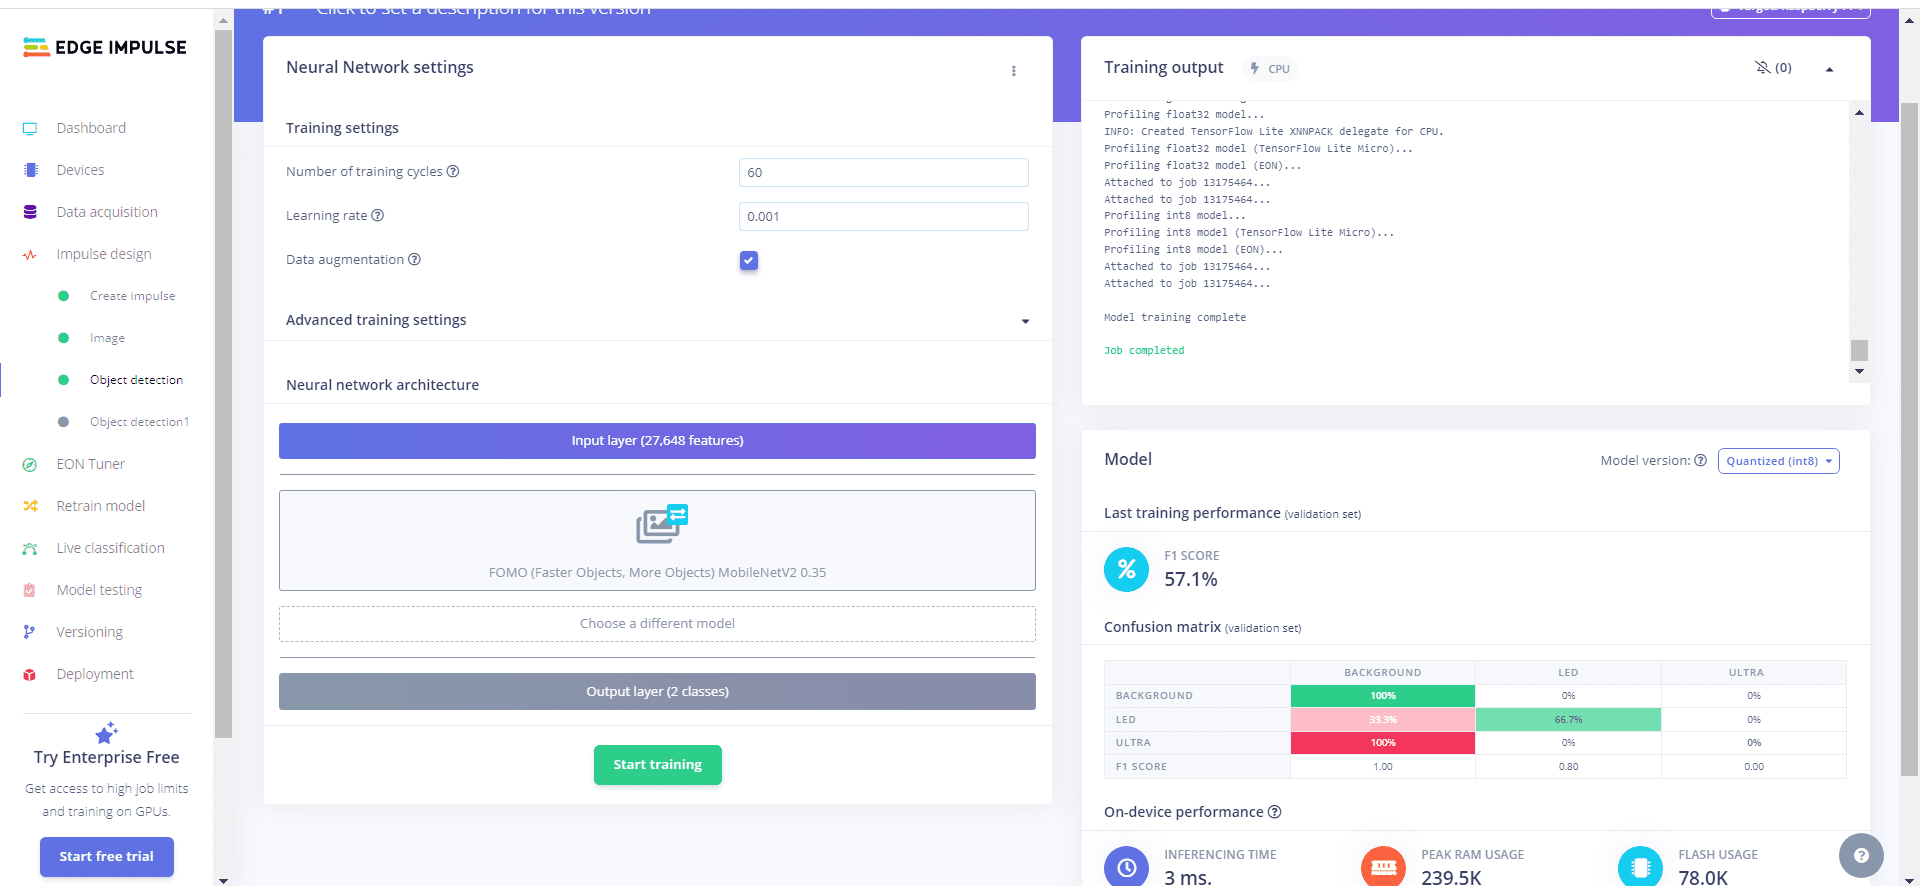
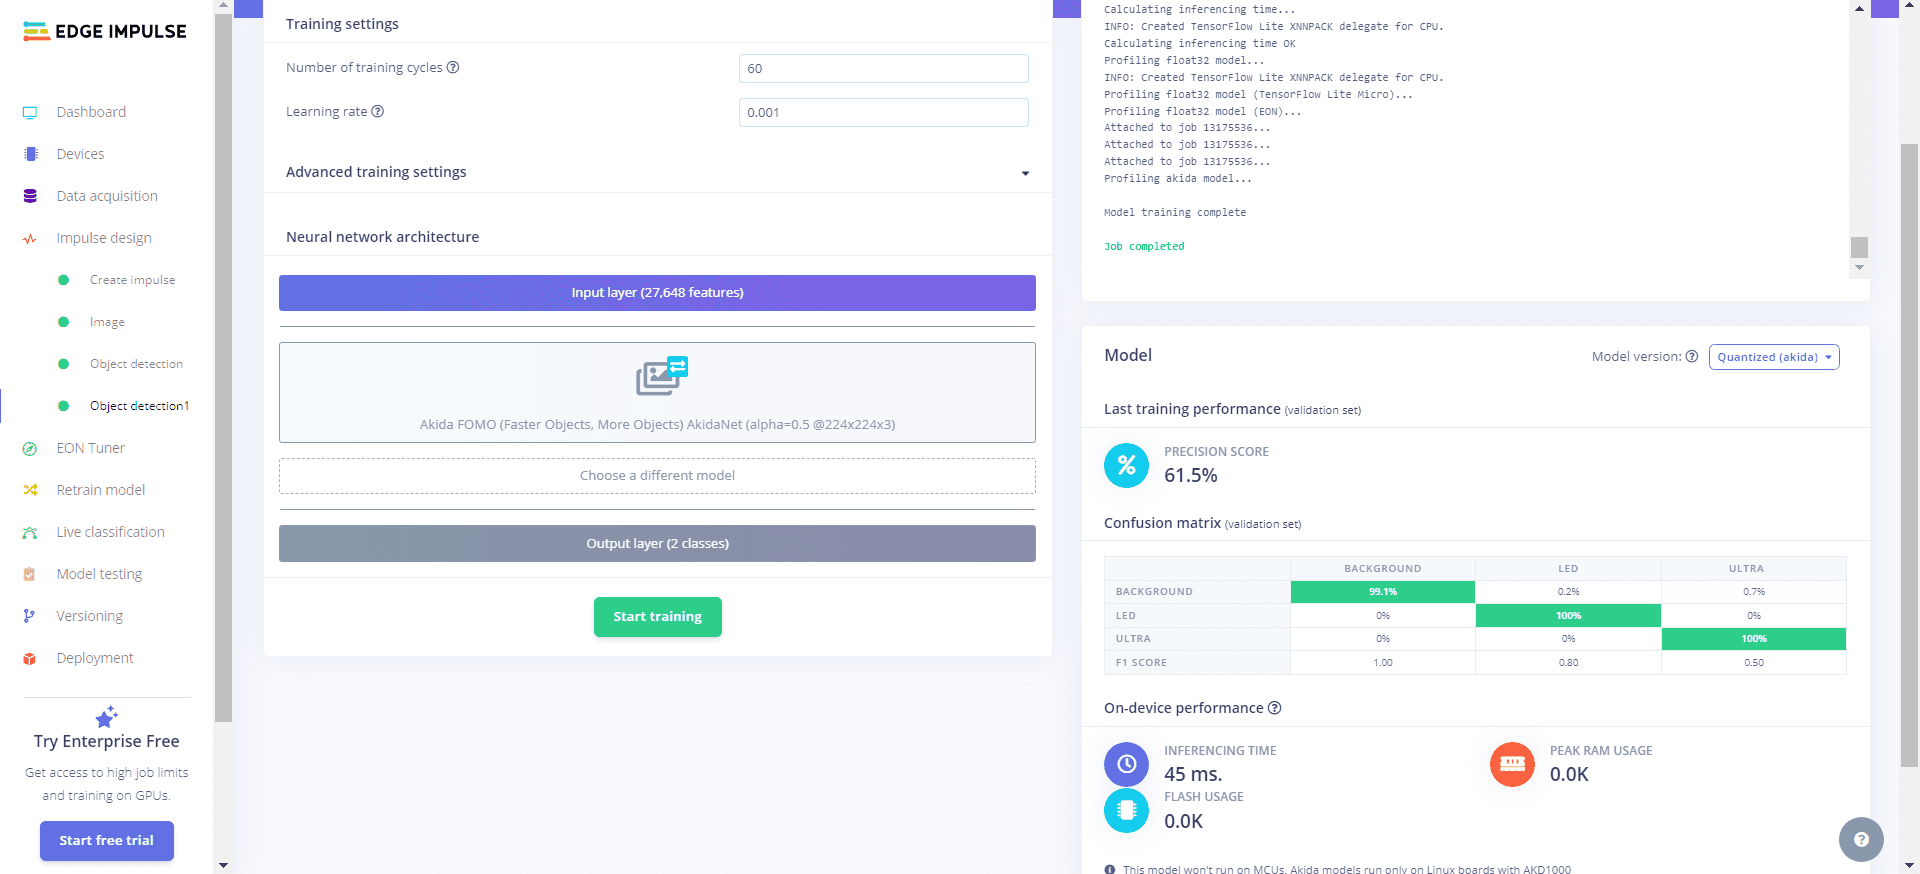
3. Impulse Design
You can display data graphically in charts or tables. Start by selecting and setting up impulses or features from the recommended list. Create two block models: the processing block and the learning block. (The quantity of each block model depends on what you need)
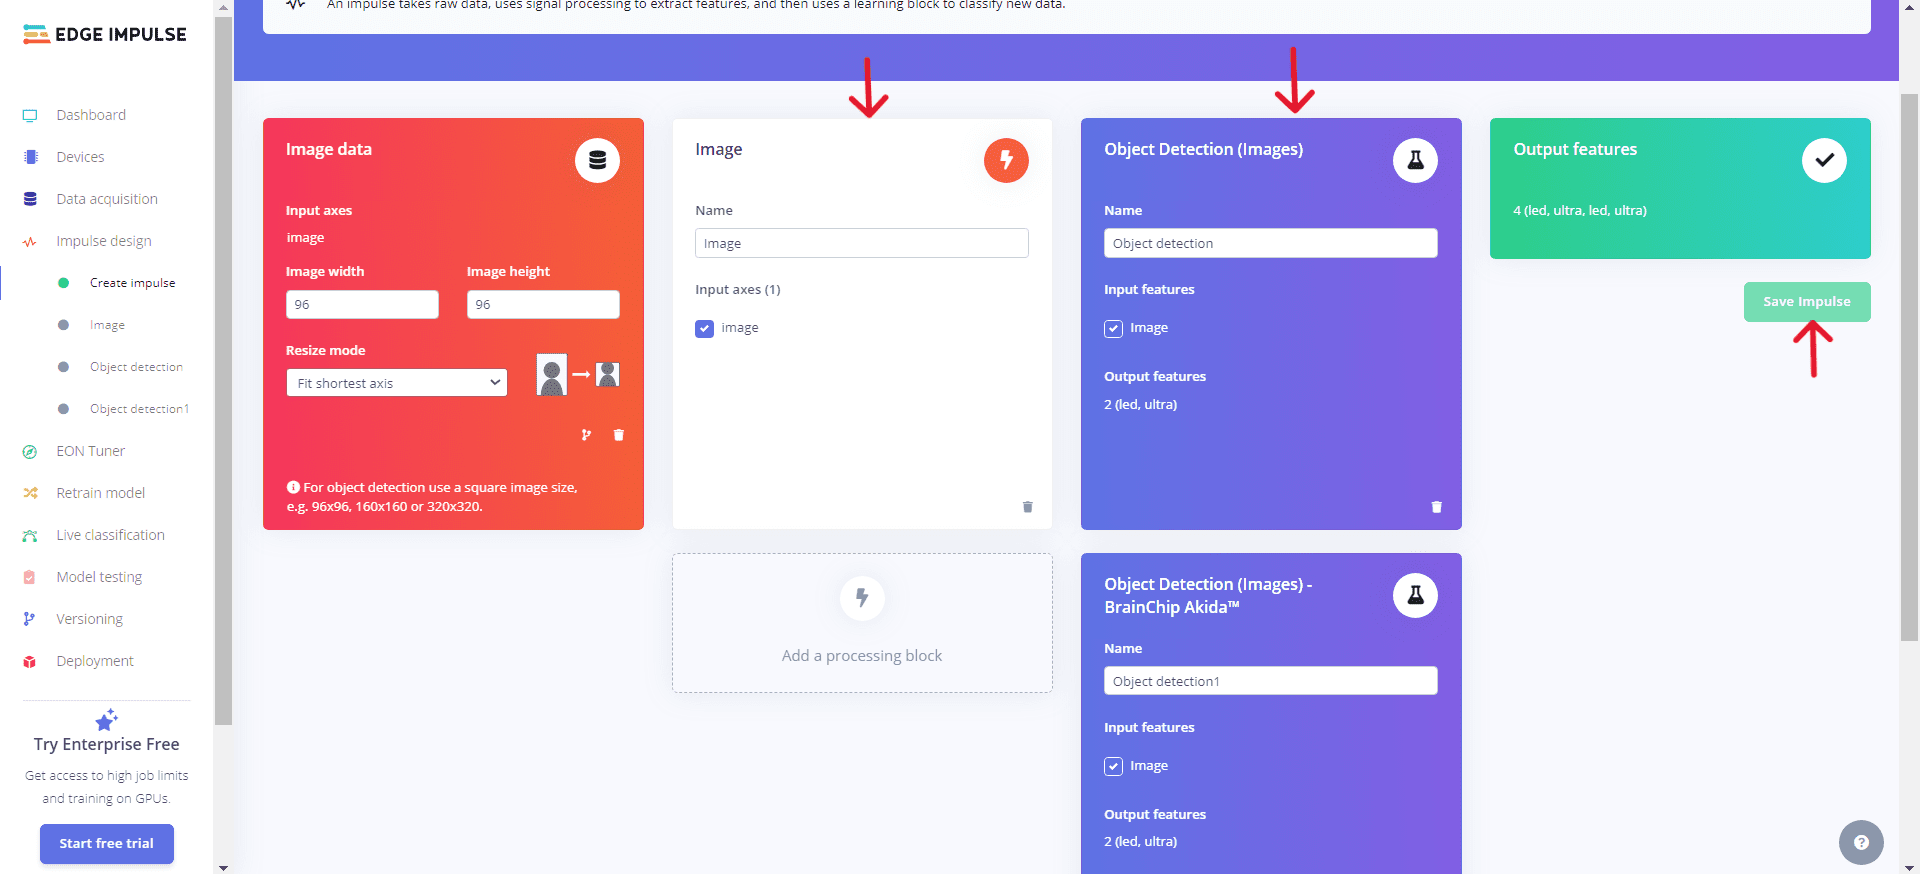
Note: Remember to save the created impulse
Each created impulse must be trained independently.
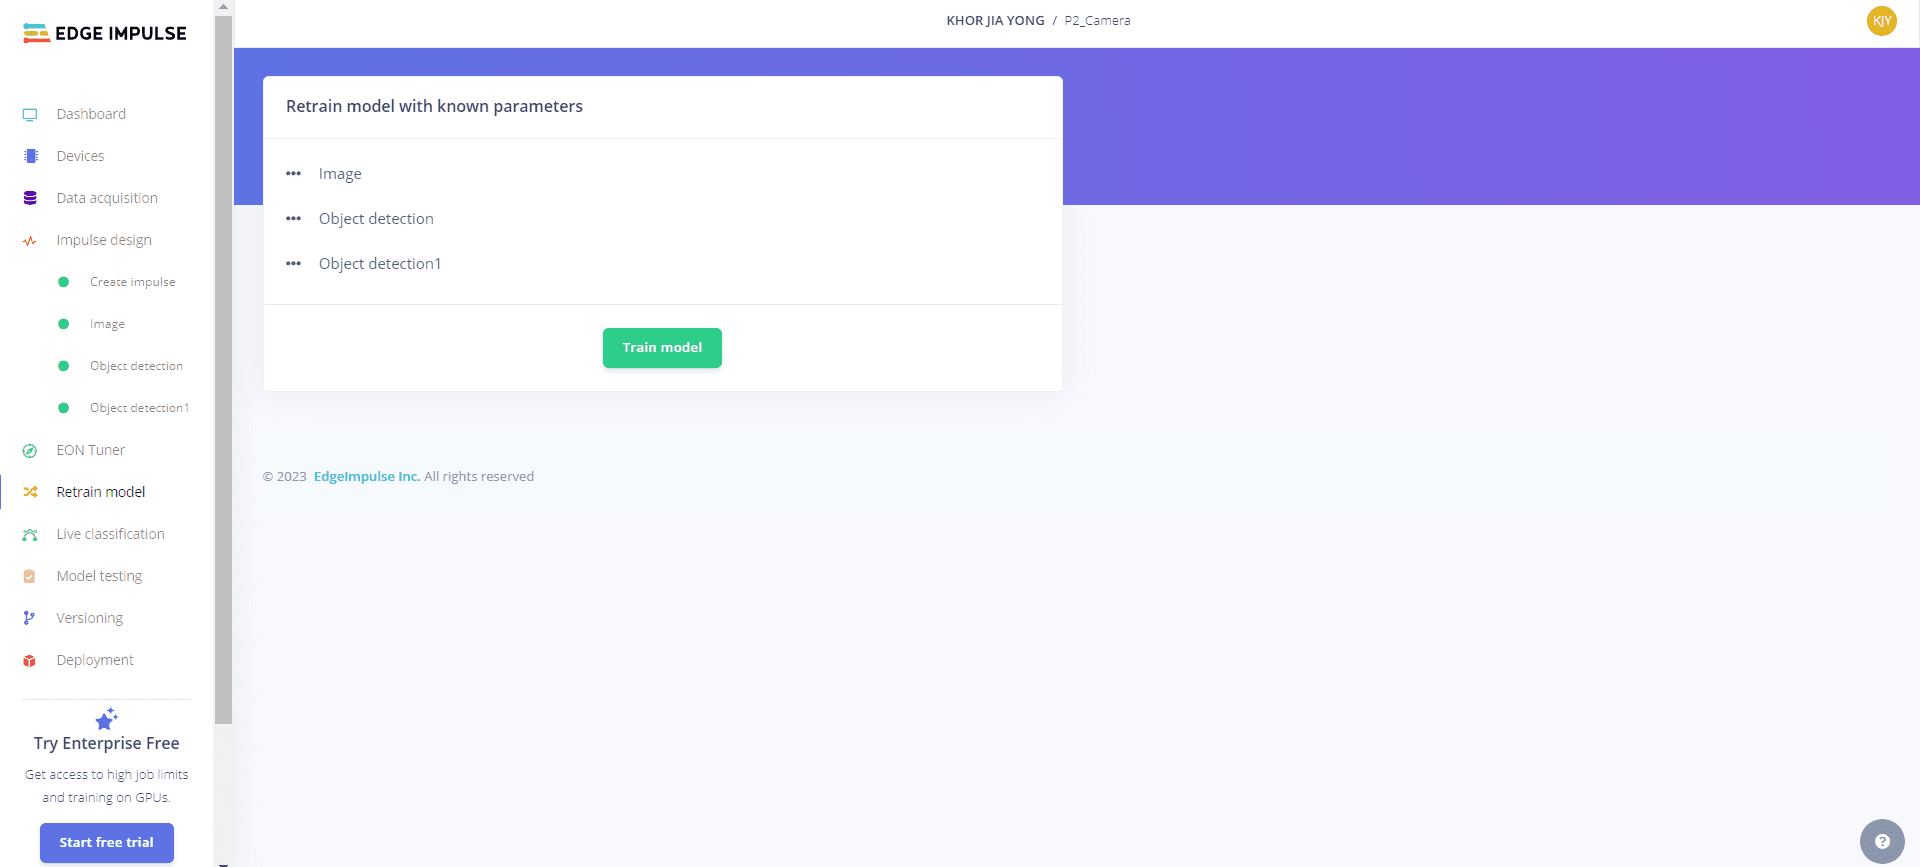
4. Retrain Model
The model can be retrained using the retrain model feature with specified parameters.
5. Live Classification
The live classification category enables users to use their phones to capture objects for the purpose of gathering and classifying test data by clicking "Start sampling".
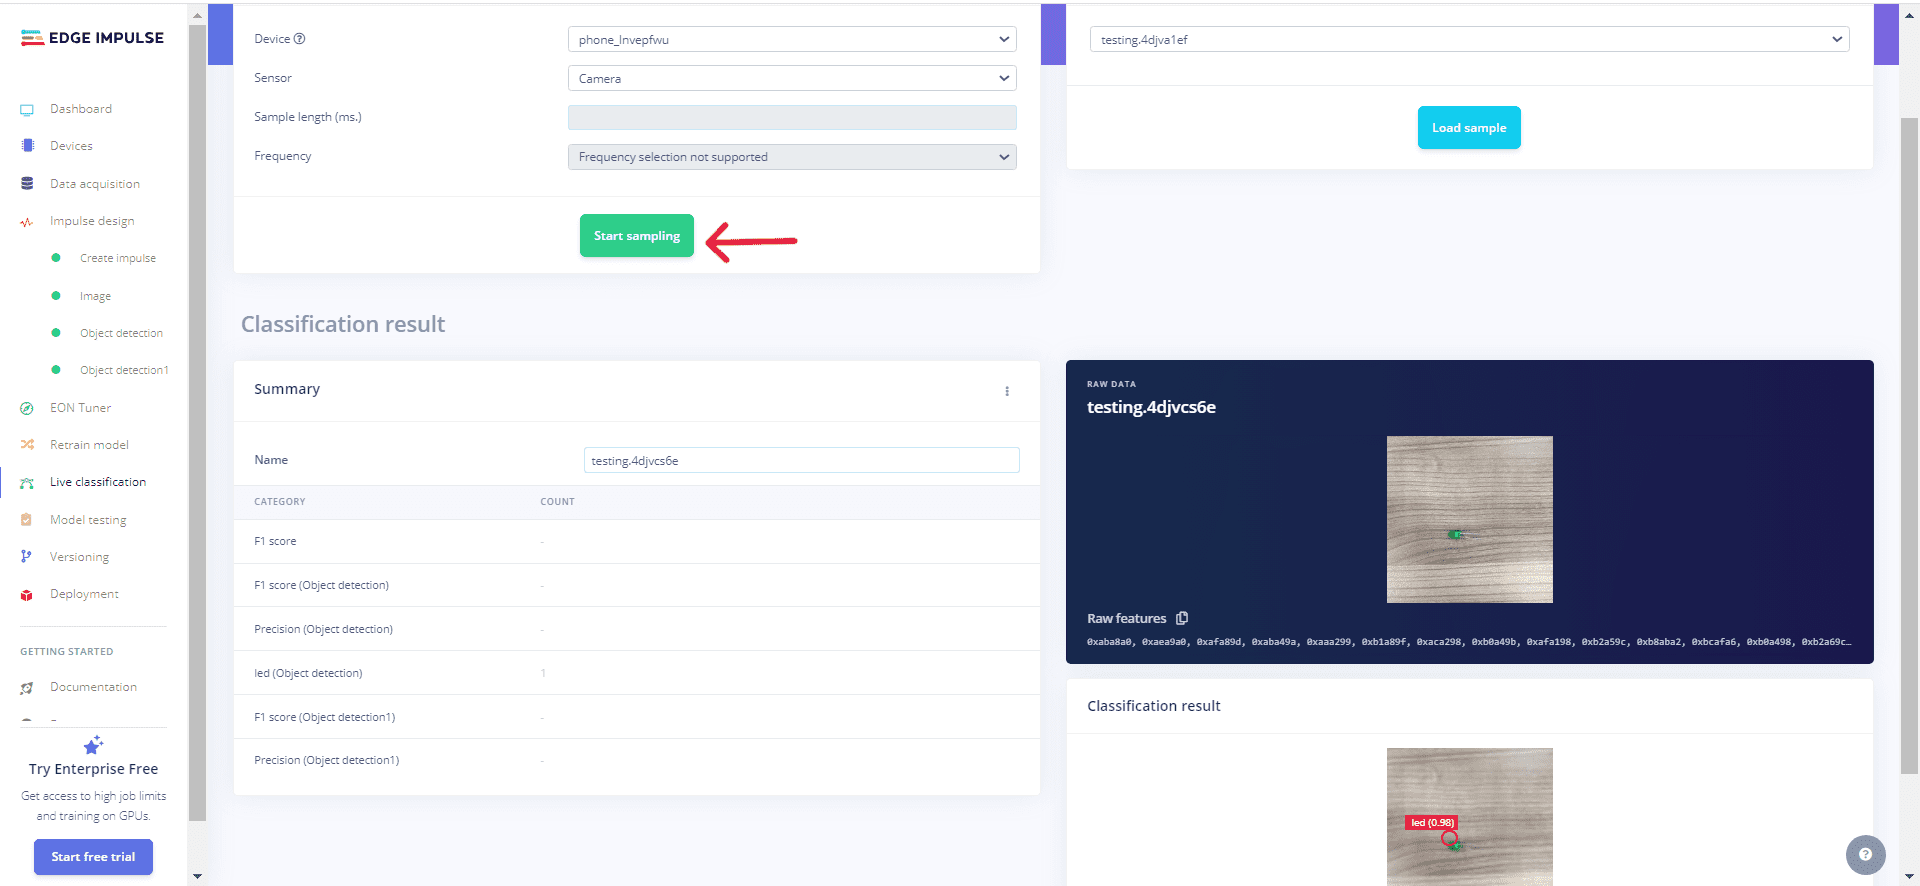
After capturing the test data, go back to the "Labelling Queue" page to frame and label the captured object.
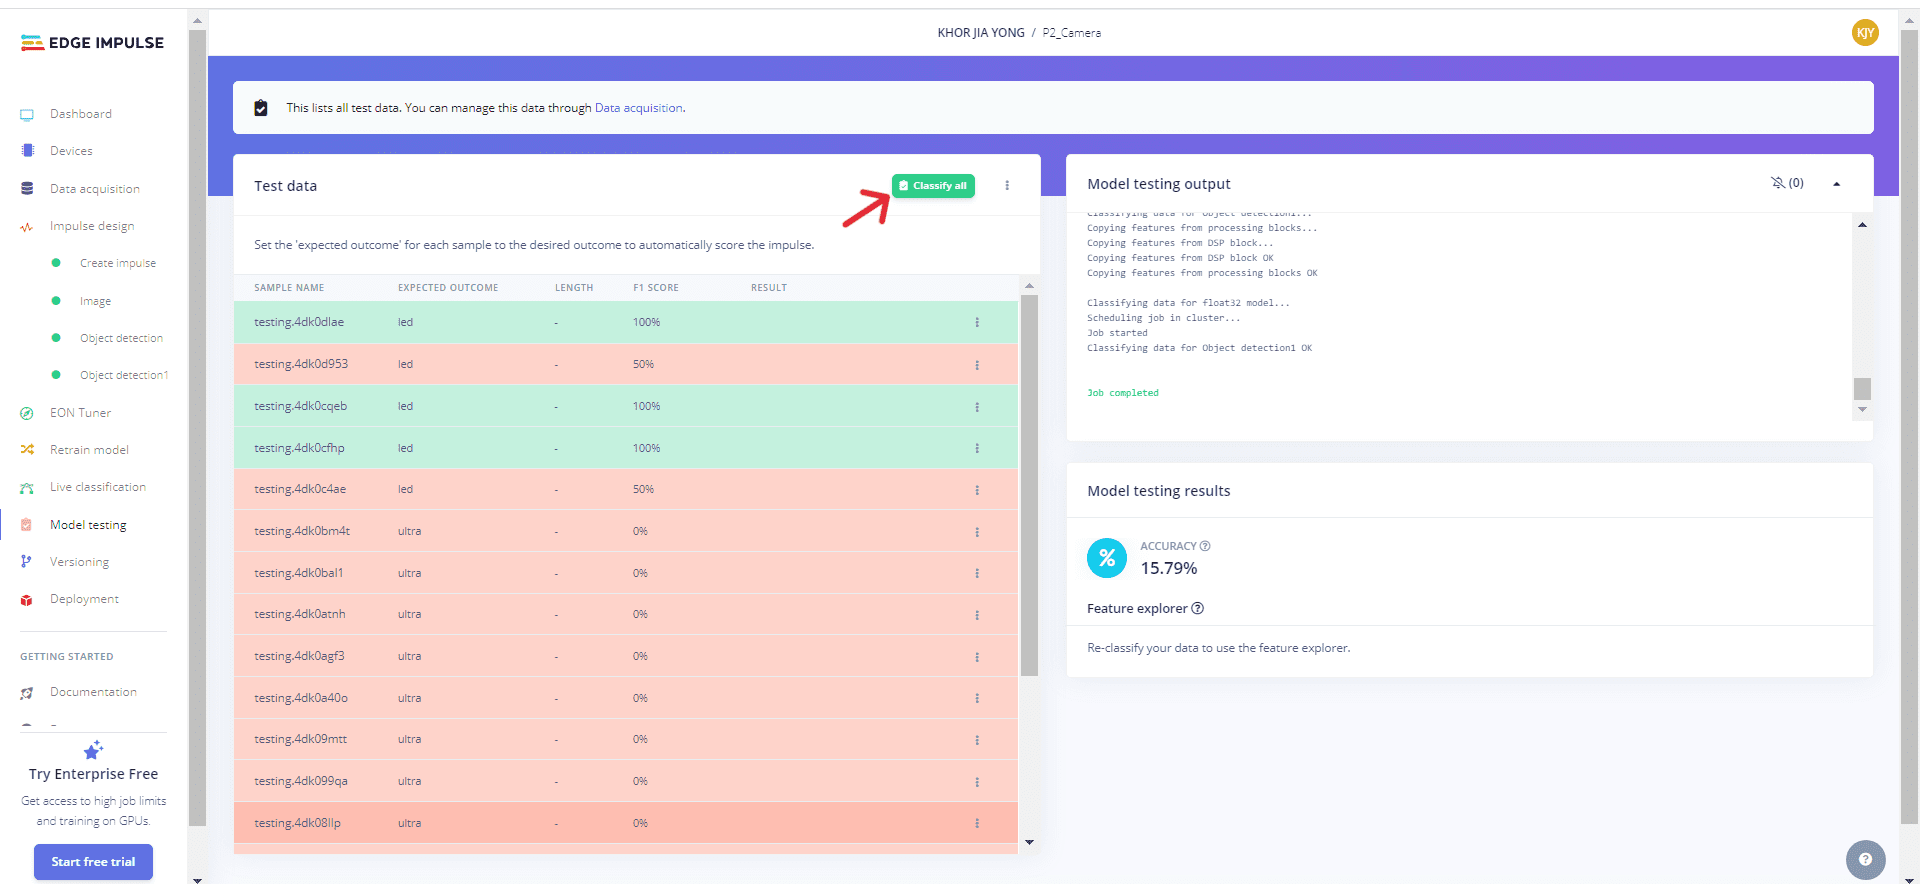
6. Model Testing
Model testing visually represents test data with the accuracy of the building model. After clicking "Classify all," you can view the output on the provided result.
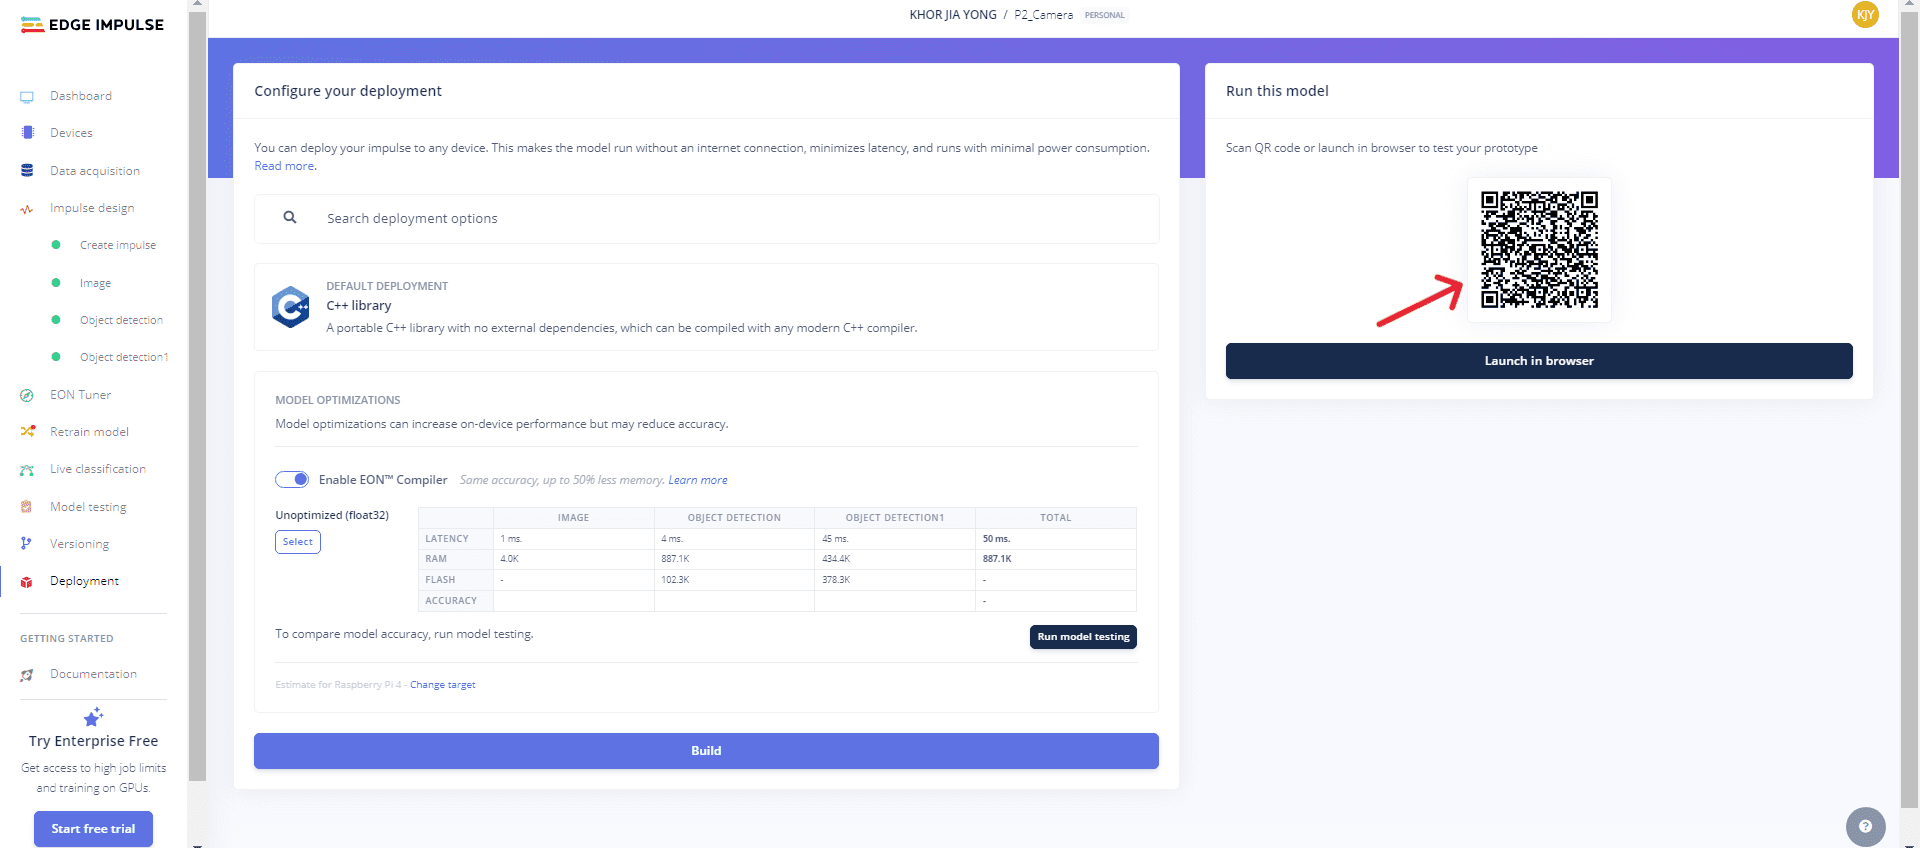
7. Deployment
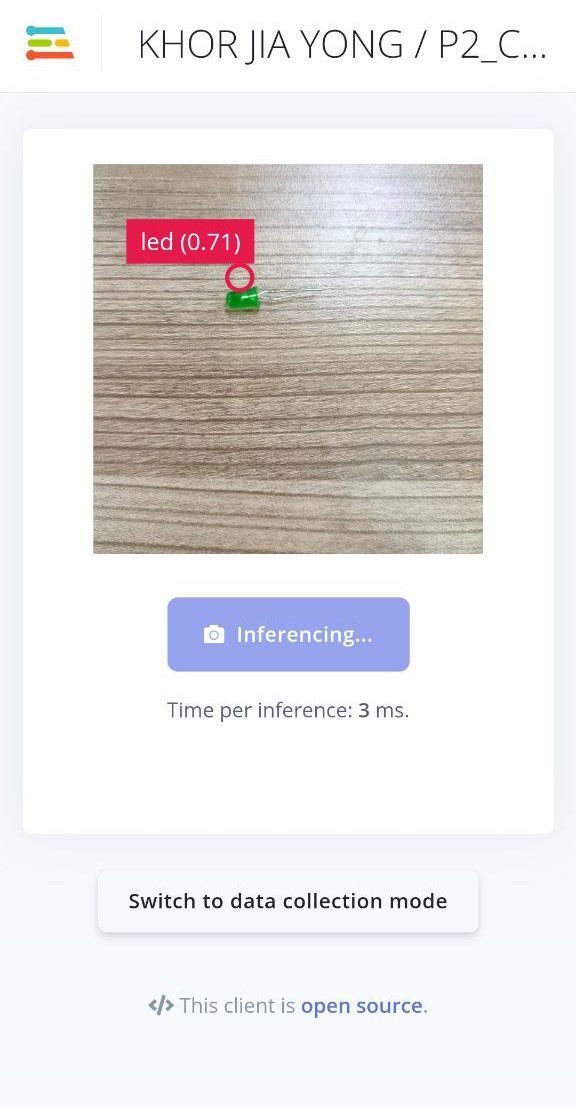
Launch your building model on the mobile phone device by scanning the QR code.
Capture various objects actively during sampling, and the results will appear on the same page.
Related Posts

TinyML on Arduino using Edge Impulse
Edge Impulse is a platform that allows us to build projects related to machine learning on microcontrollers. This tutorial will be divided into a few parts, and we will update accordingly.....
Introduction to Edge Impulse
Edge Impulse guides embedded machine learning, helping developers optimize solutions with real-world data. It speeds up deployment, benefiting various industries...
Object Classification with Edge Impulse Using Raspberry Pi 4 and Camera Module
Raspberry Pi 4 seamlessly integrates with Edge Impulse, a versatile Linux board supporting the easy addition of a microphone or camera for efficient object classification projects...
Edge Impulse with Mobile Phone Application Using Accelerometer
Edge Impulse supports mobile devices, allowing the implementation of machine learning models directly on phones. This project emphasizes using the built-in accelerometer sensor in the phone...
Edge Impulse with Raspberry Pi Pico Application Using ADC Light Sensor
Edge Impulse has the ability to interface with the Raspberry Pi Pico device, equipped with the RP2040 chip. In this project, data is gathered using the light sensor to measure light intensity...