 International
 Singapore
 Malaysia
 Thailand
 Vietnam
Your shopping cart is empty!

Voice Recognition with Edge Impulse Using Computer Application
- Khor Jia Yong
- 29 Dec 2023
- Project
- Beginner
- 275
Introduction
In this project, the computer device assumes a central role as the primary interface for communication with Edge Impulse. The project relies on the inherent capabilities of the computer's built-in microphone, designated as the key sensor type for its development. In essence, it can be referred to as a "Voice Recognition Project," showcasing its proficiency in distinguishing diverse datasets through the analysis of audio data.
Project Development
To construct the project on Edge Impulse using a computer device, it is essential to consider six required stages:
1. Device
- Set up the device by connecting the edge impulse to the computer.

- After connecting to the computer, the microphone sensor type that can be collected via the computer's built-in microphone is chosen by accepting permission to access the microphone.

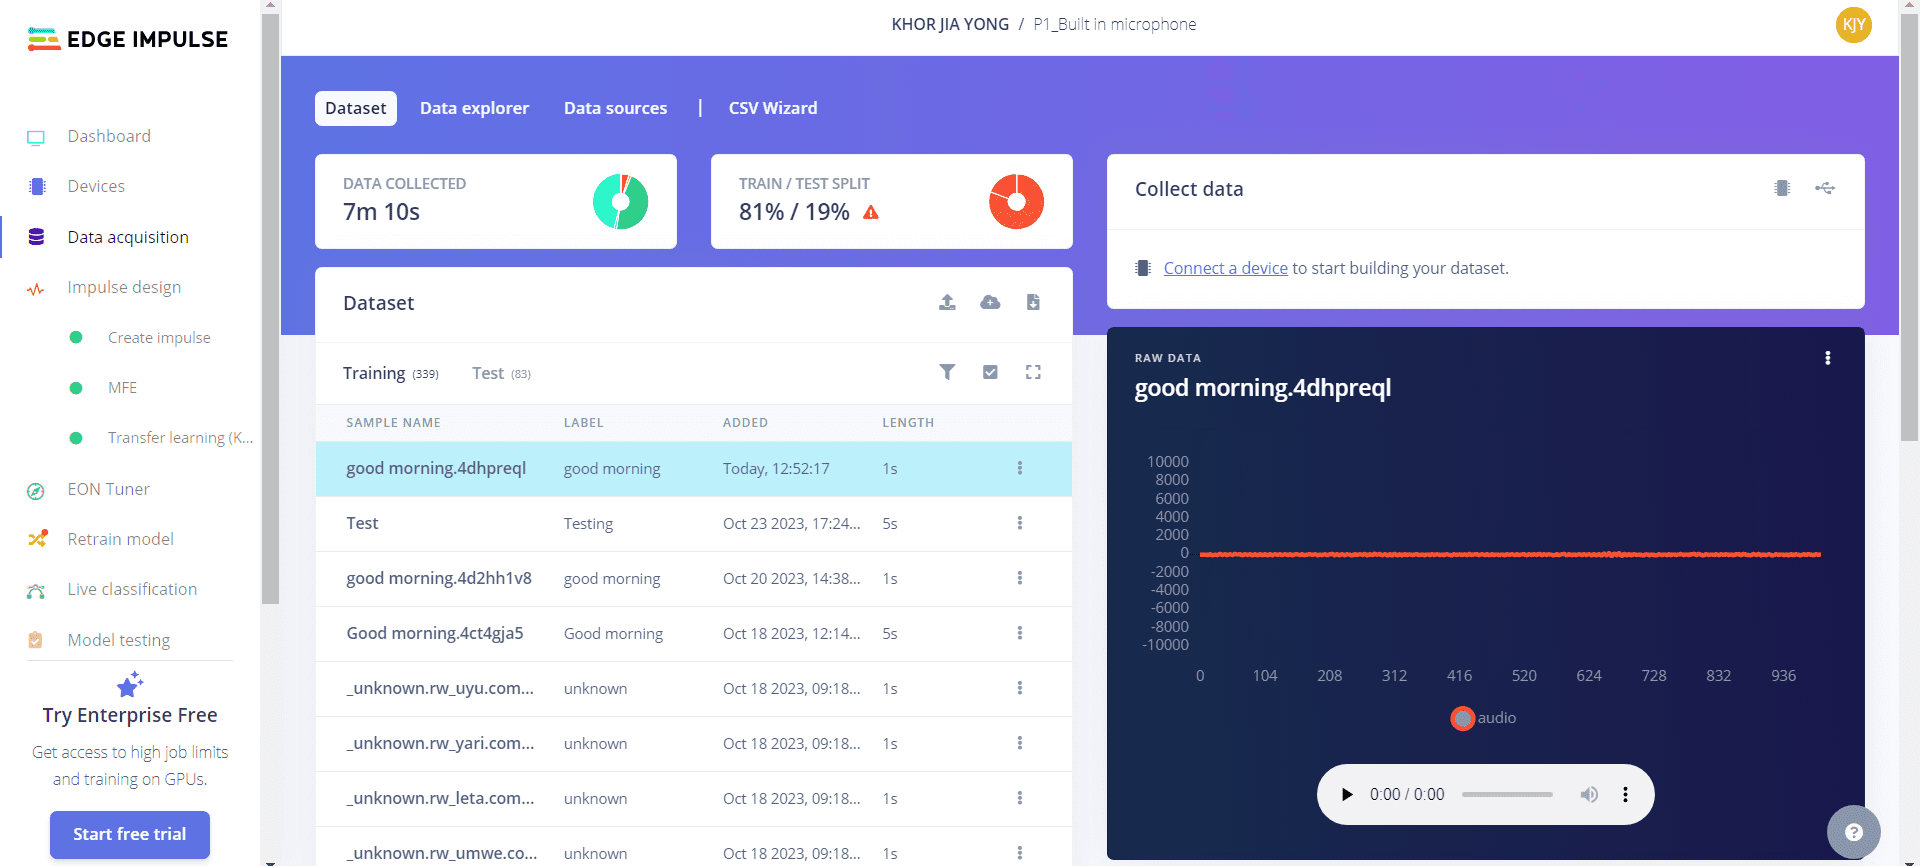
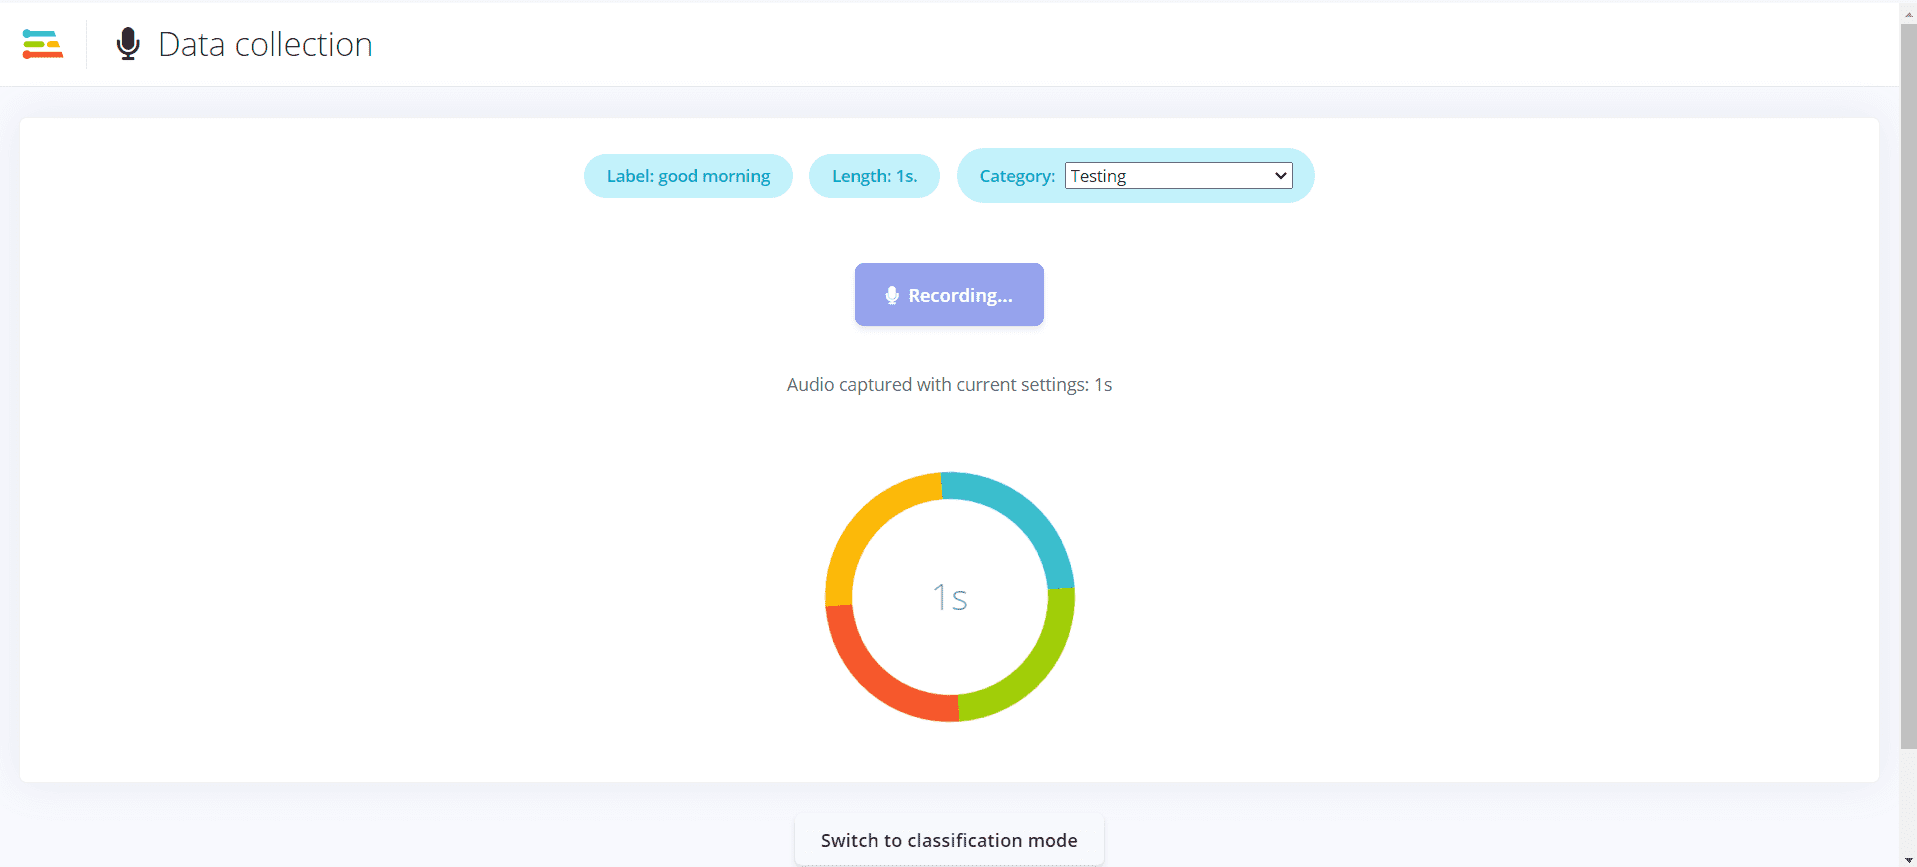
2. Data Acquisition
- To record audio data, click "Start recording" and say something like "Good morning."
a. Beforehand, initialize the initial dataset in the Label section.
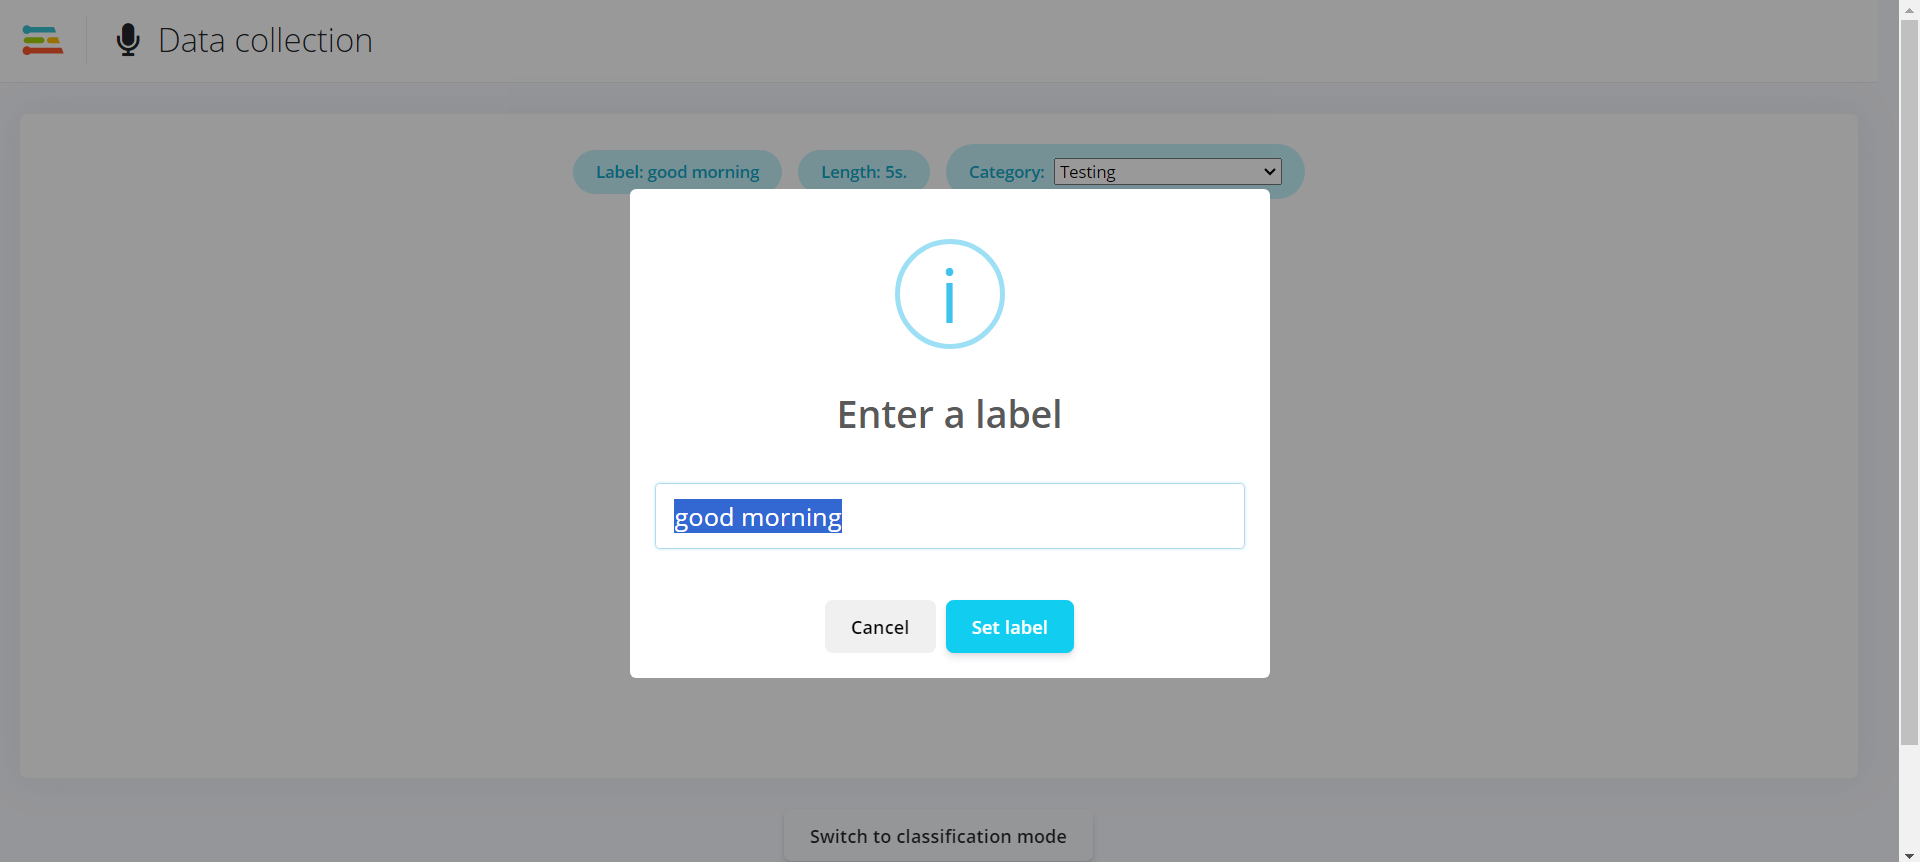
b. Customize the sample length in the Length section.

c. Don't forget to set the data category to "Training" in the Category section.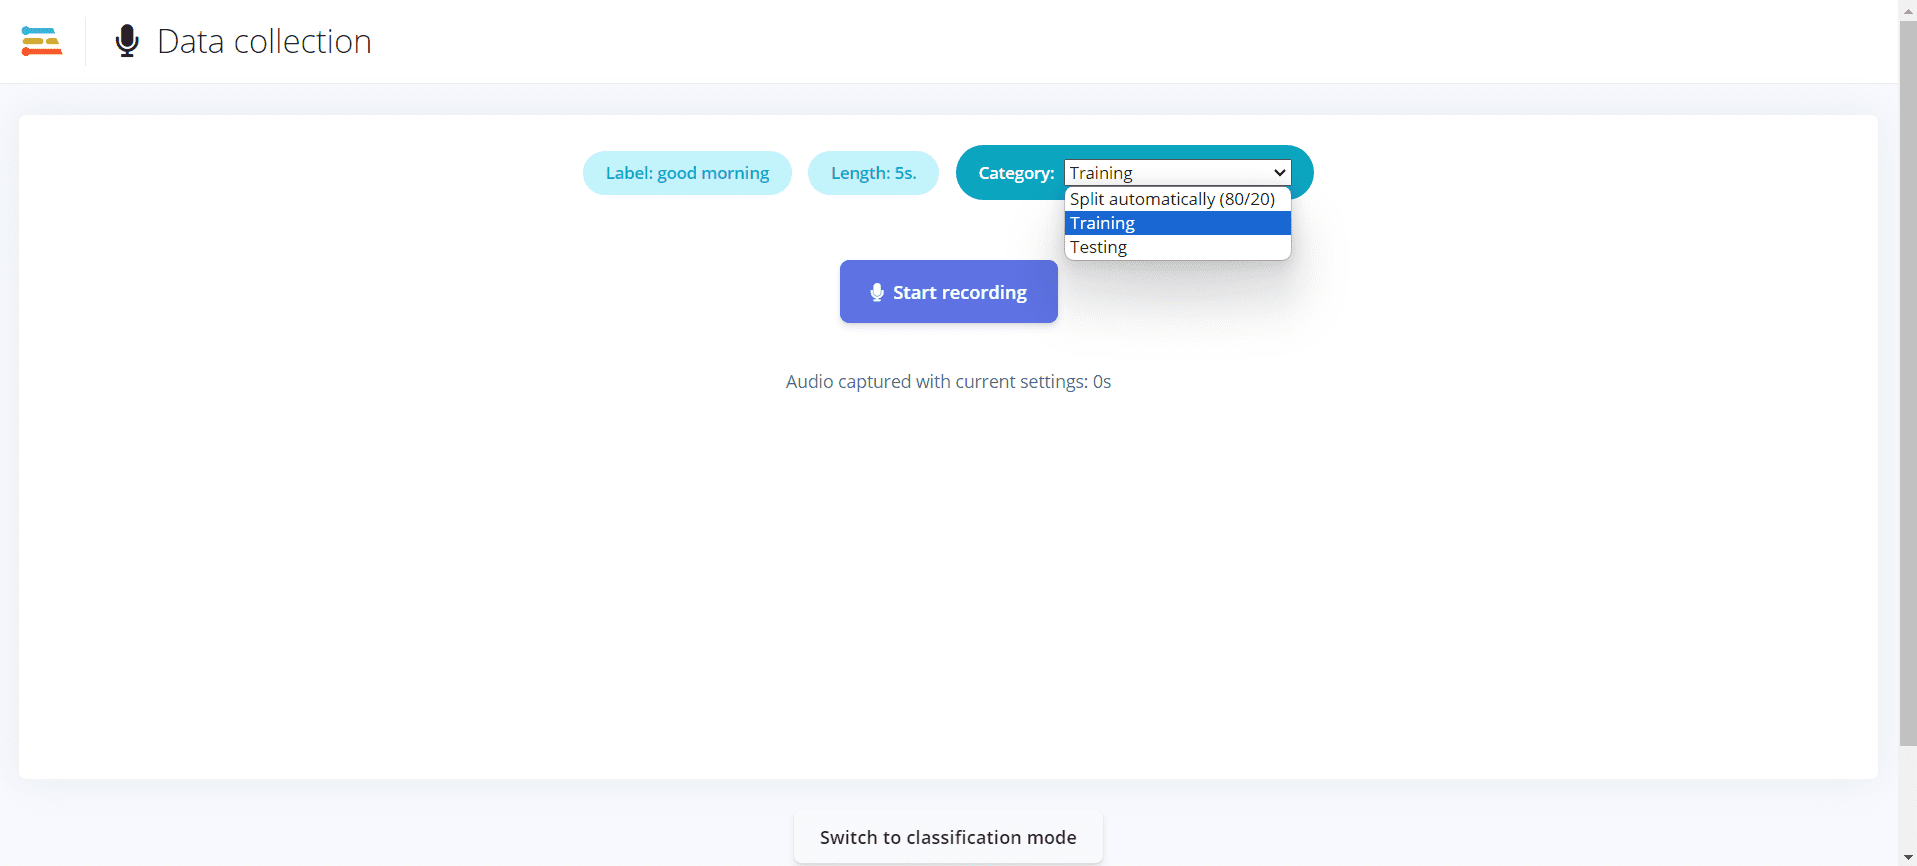
d. Press the "Start recording" button and speak, for instance, by saying "Good morning."
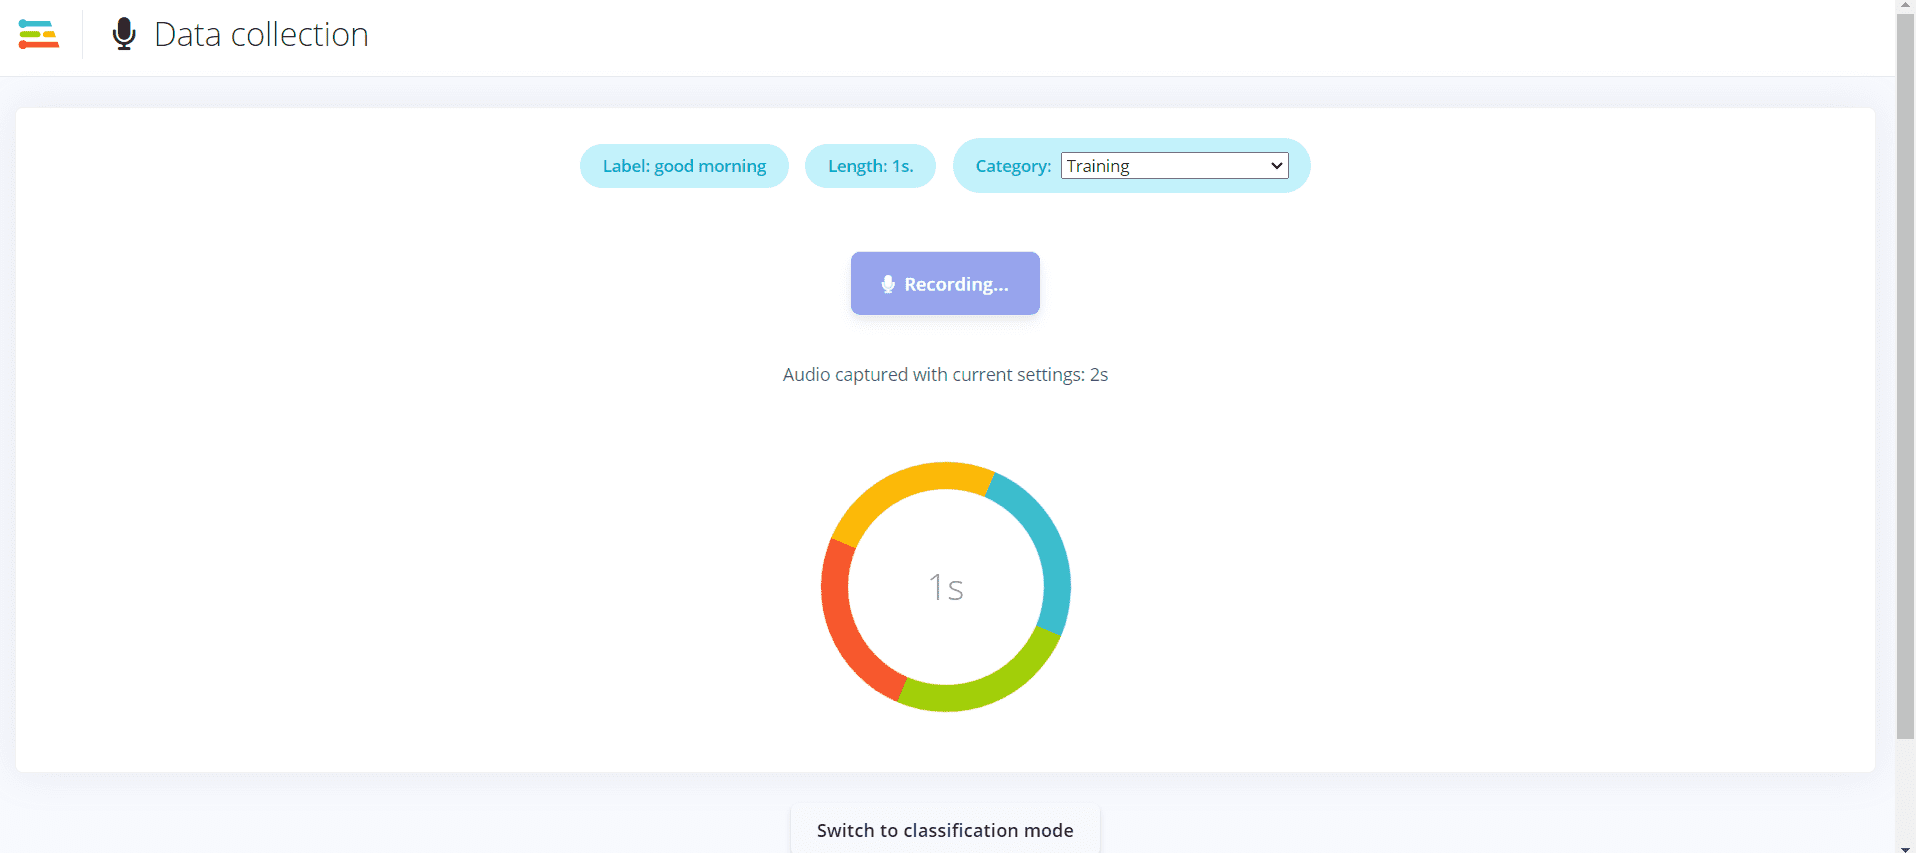
- The recorded data is saved in the data acquisition category for user monitoring. To record different data, simply change the label in the Label section.
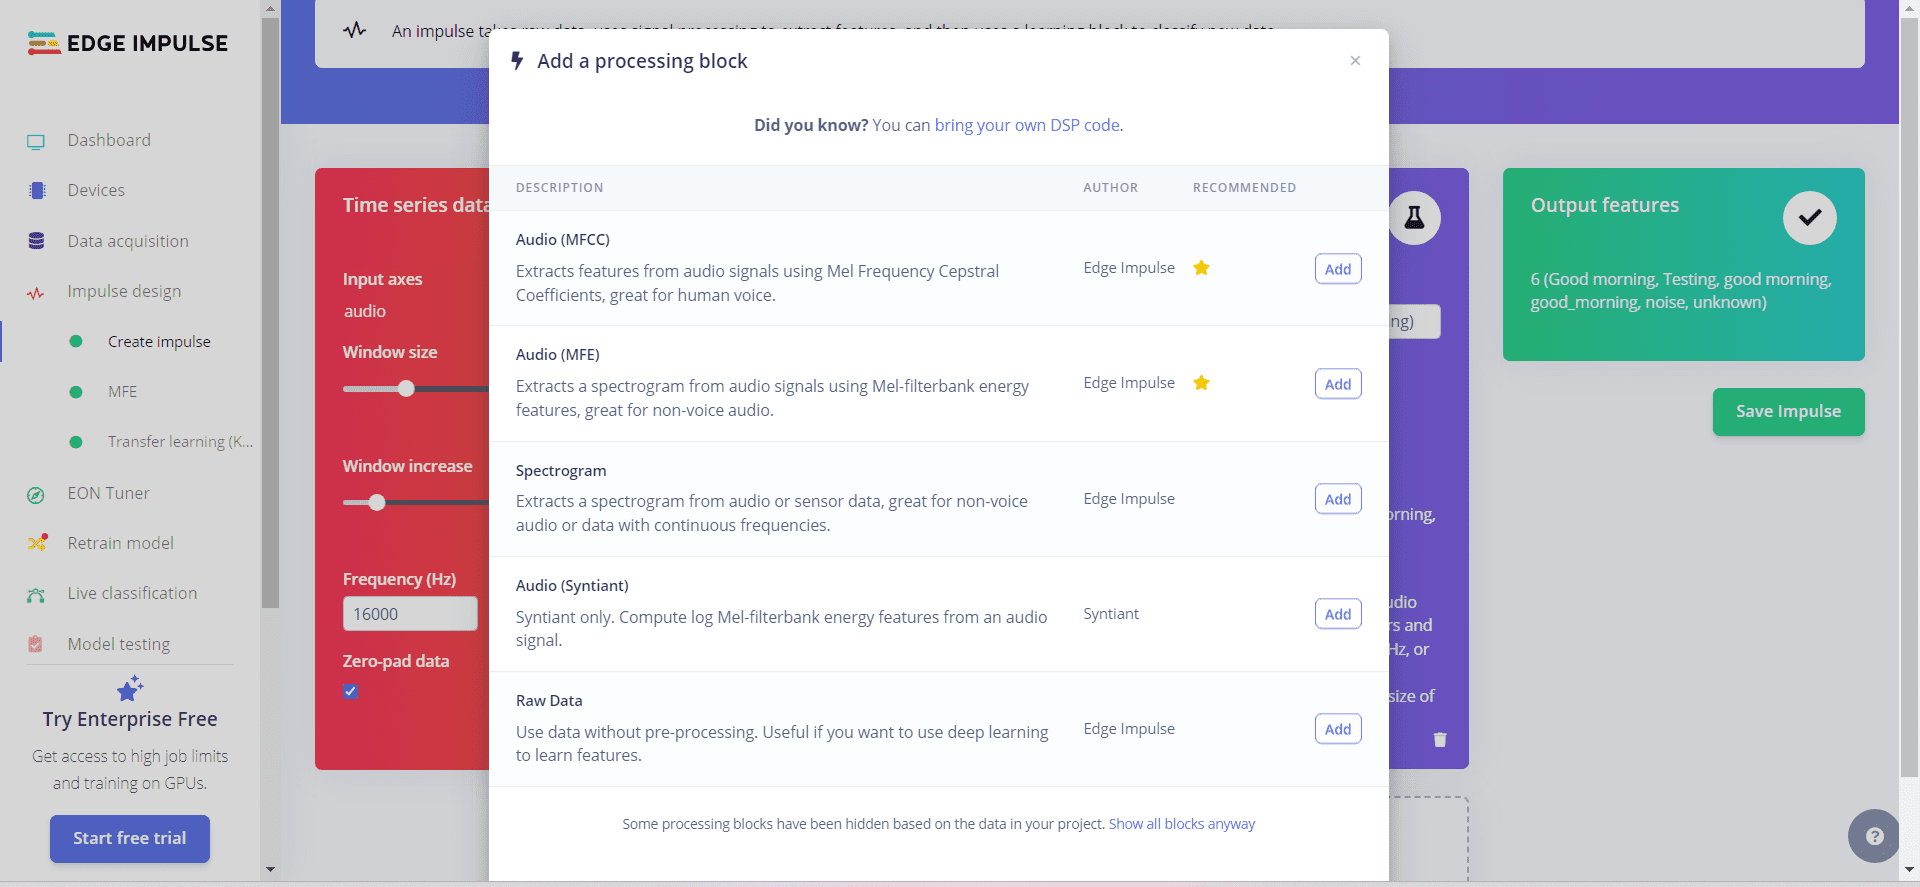
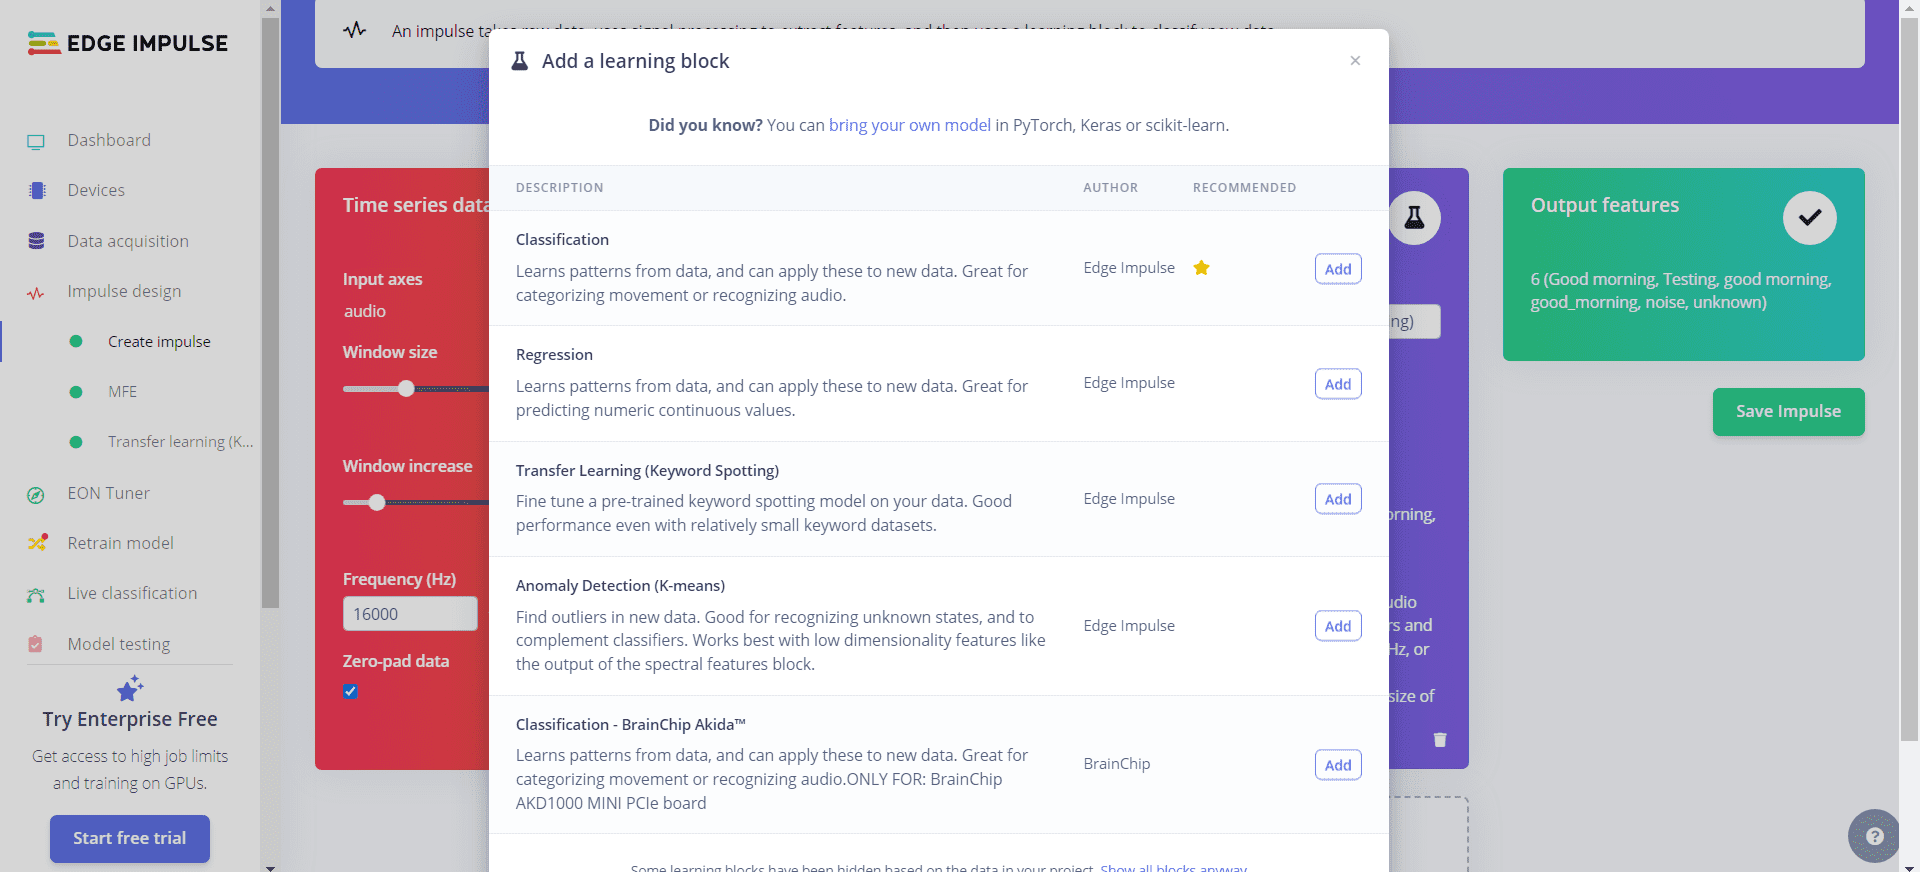
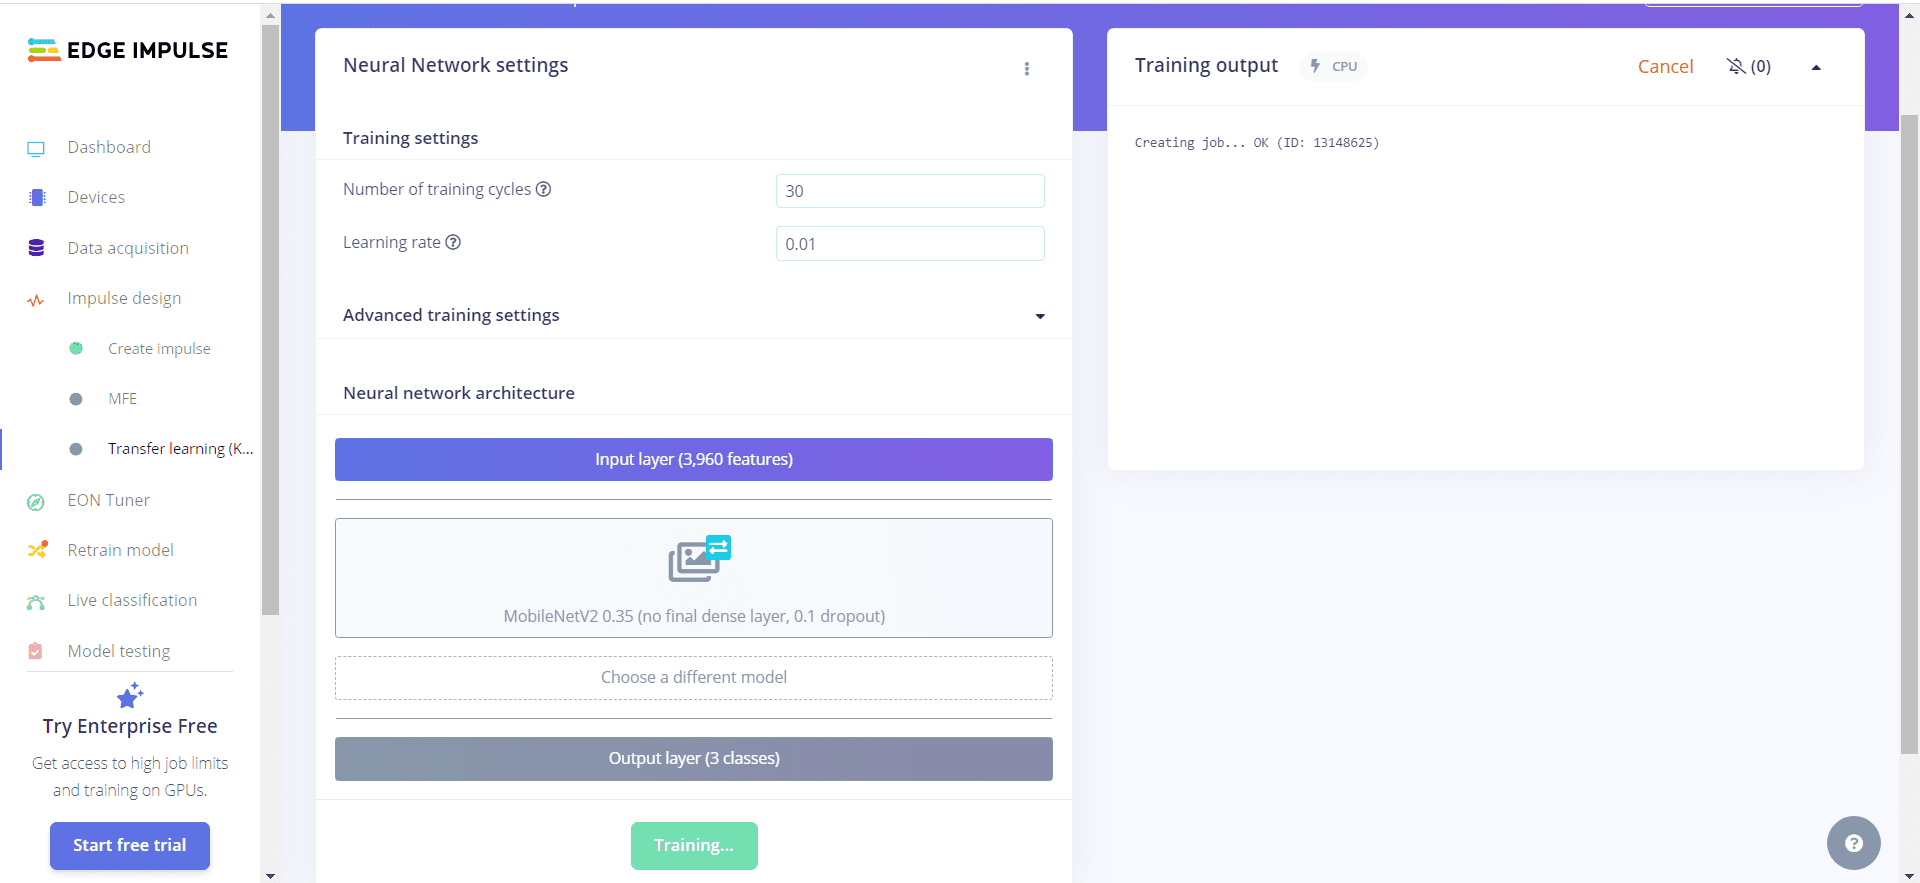
3. Impulse Design
- To display data graphically in a chart or table, you must first create and set up the impulse or feature by choosing from the recommended list. For instance, you need to set up two block models: the processing block and the learning block (the number of each block model depends on your needs).
- Remember to save created impulse
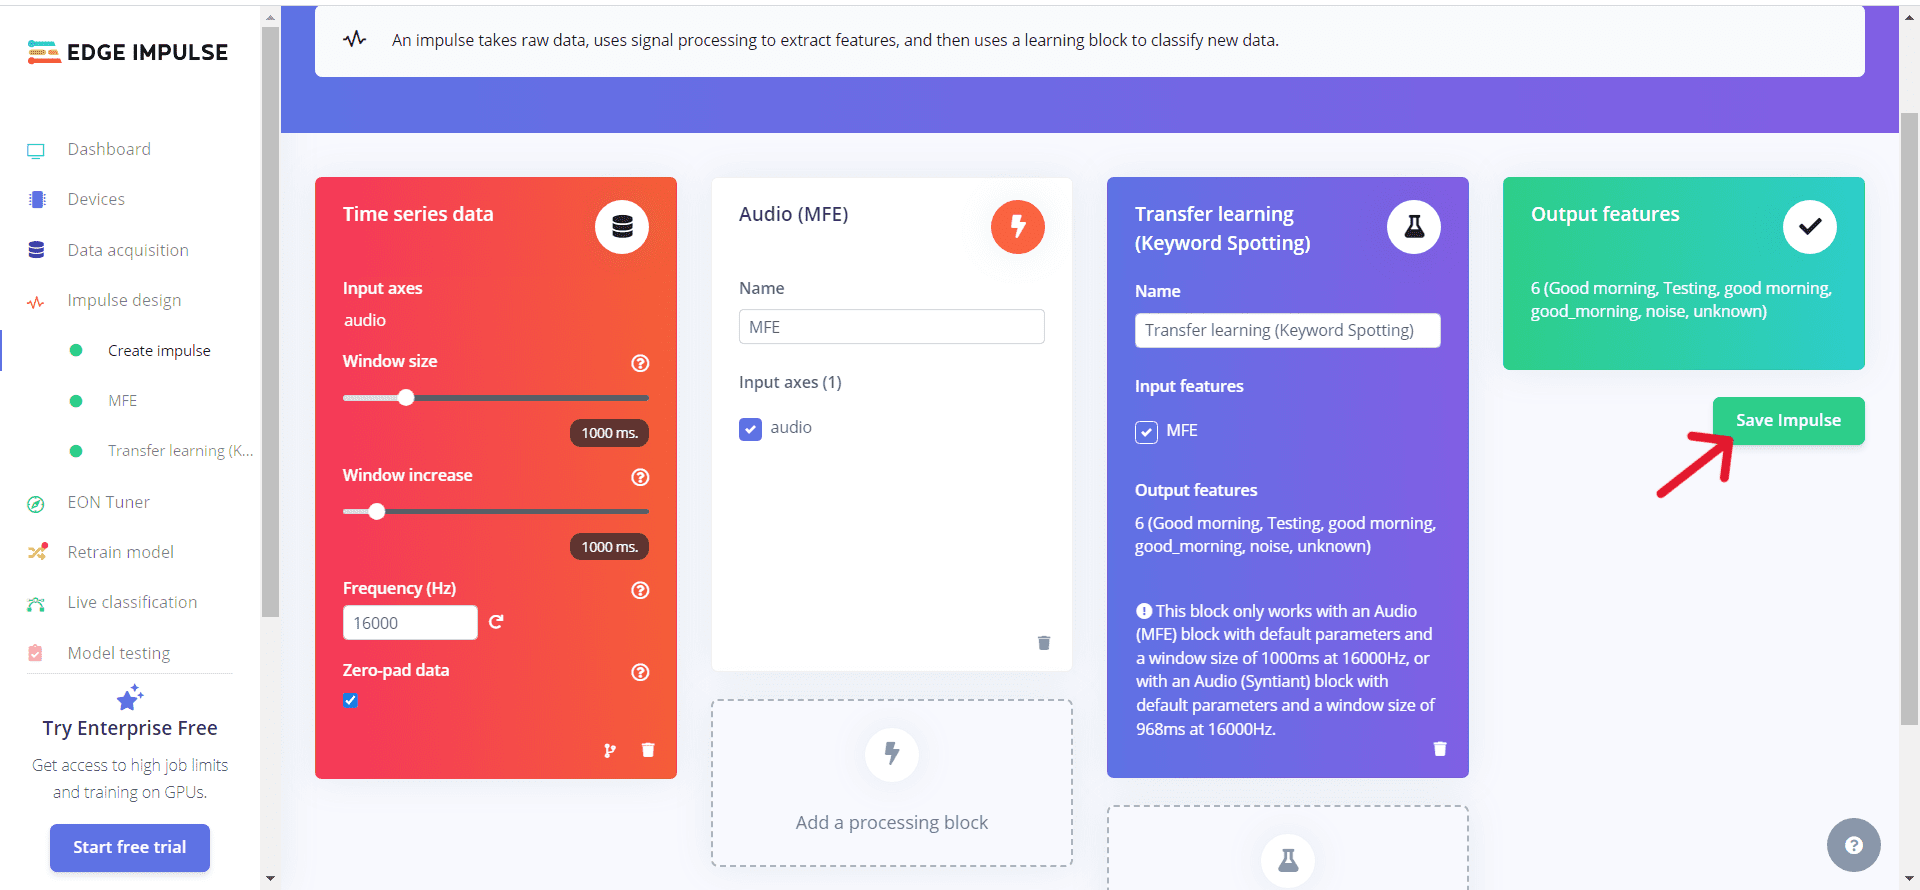
- Each created impulse must be accessed and trained independently.
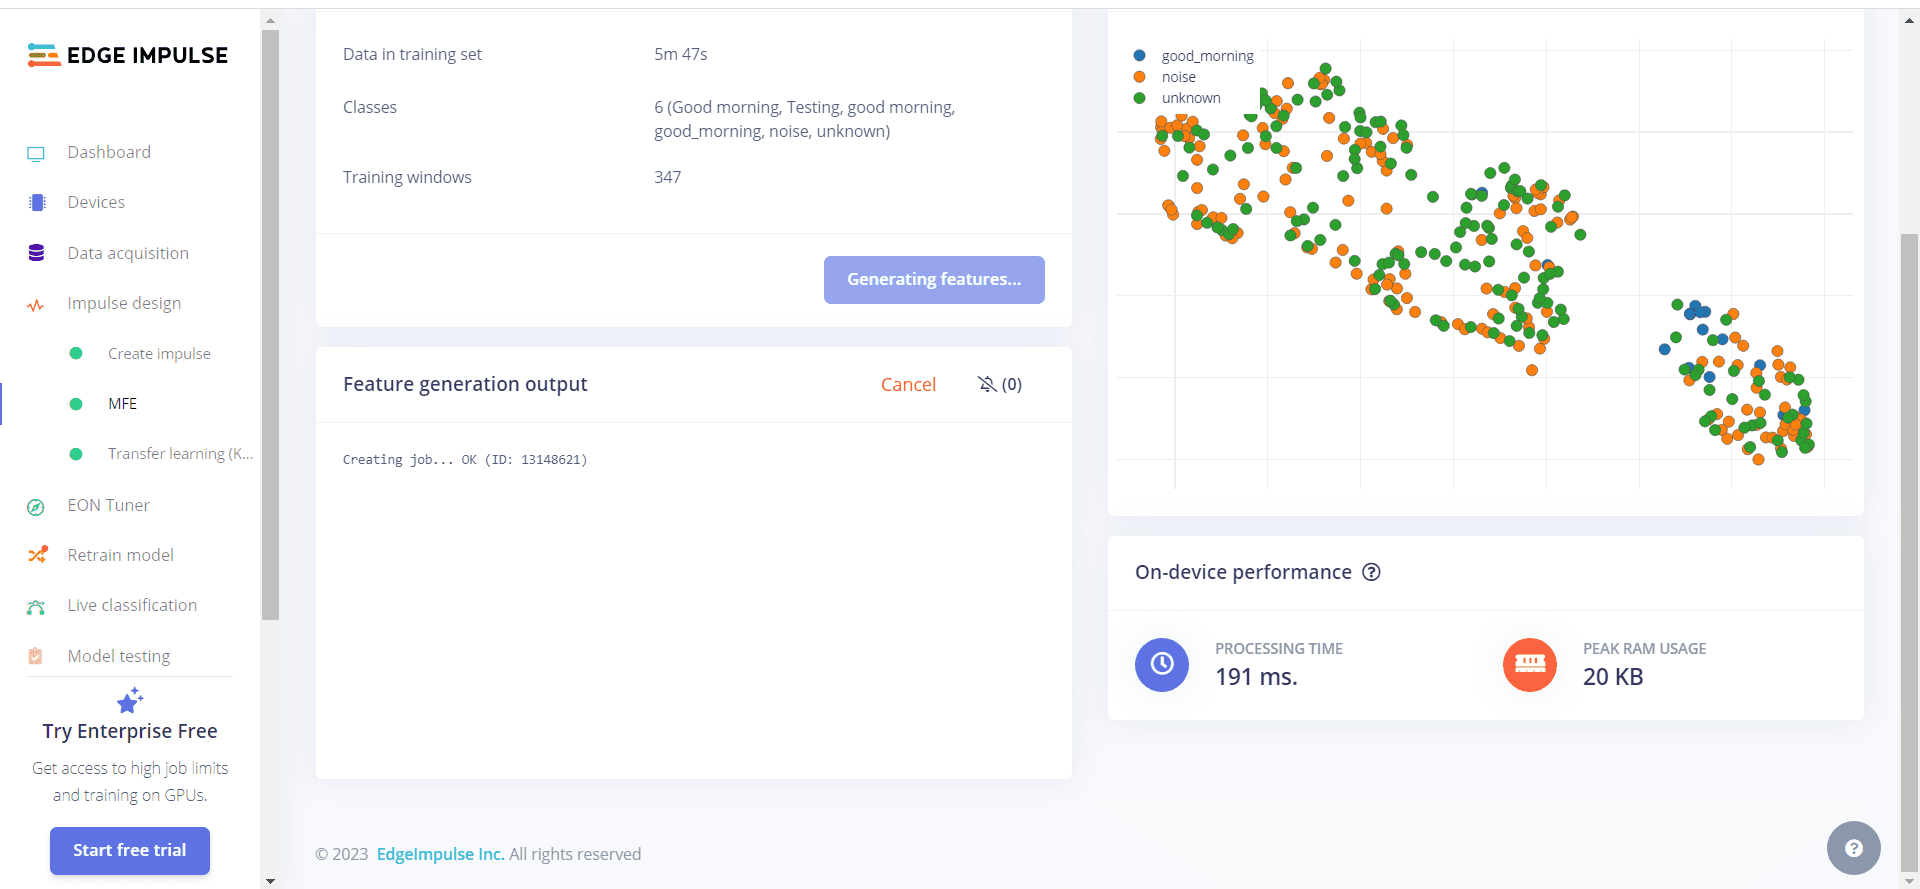
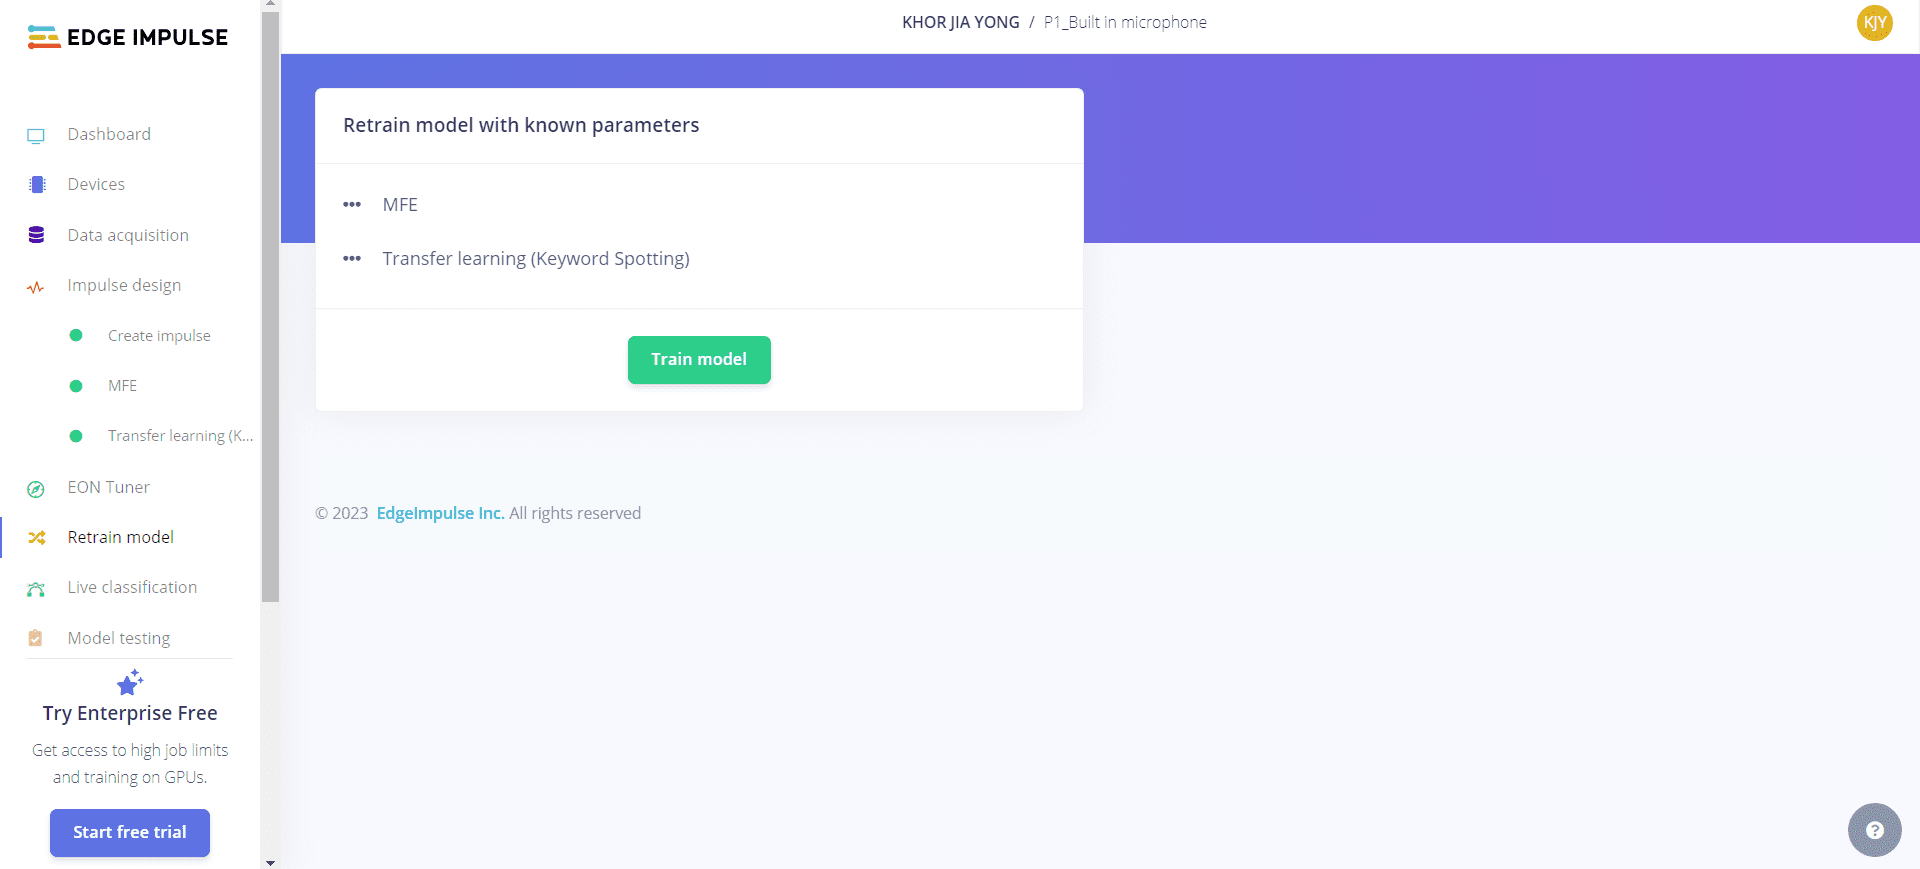
4. Retrain Model
- The impulse can be retrained again with a known parameter through the retrain model.
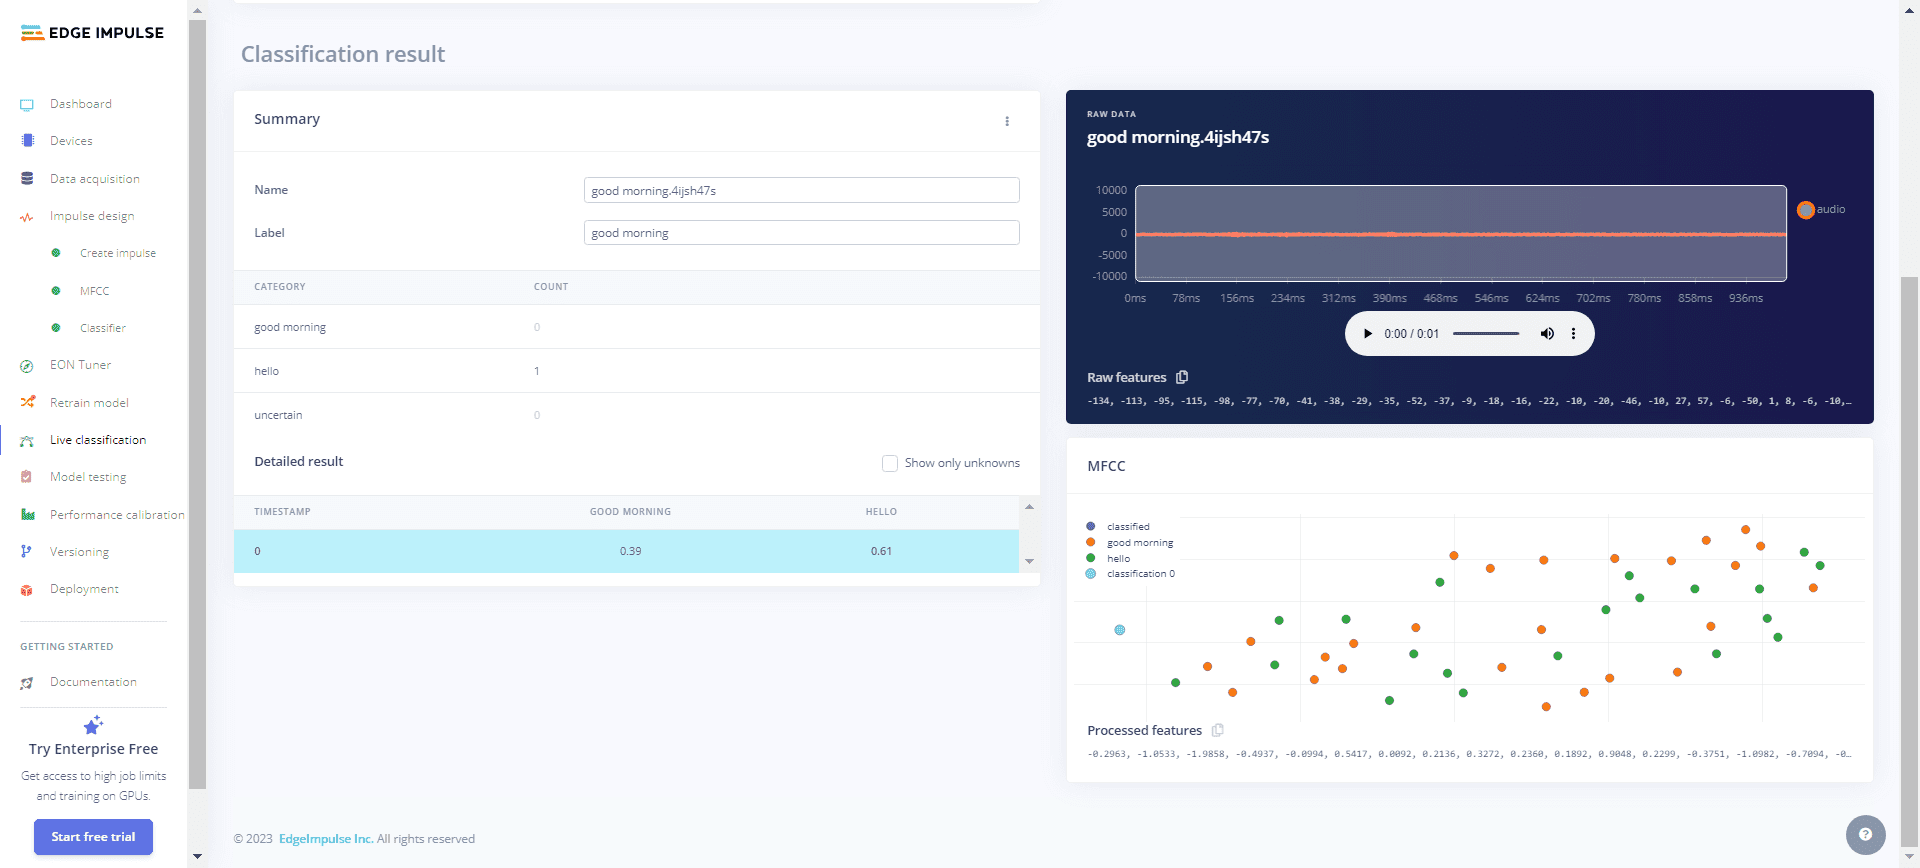
5. Live Classification
- In the live classification category, also known as the test data stage, users can speak to collect and classify test data.
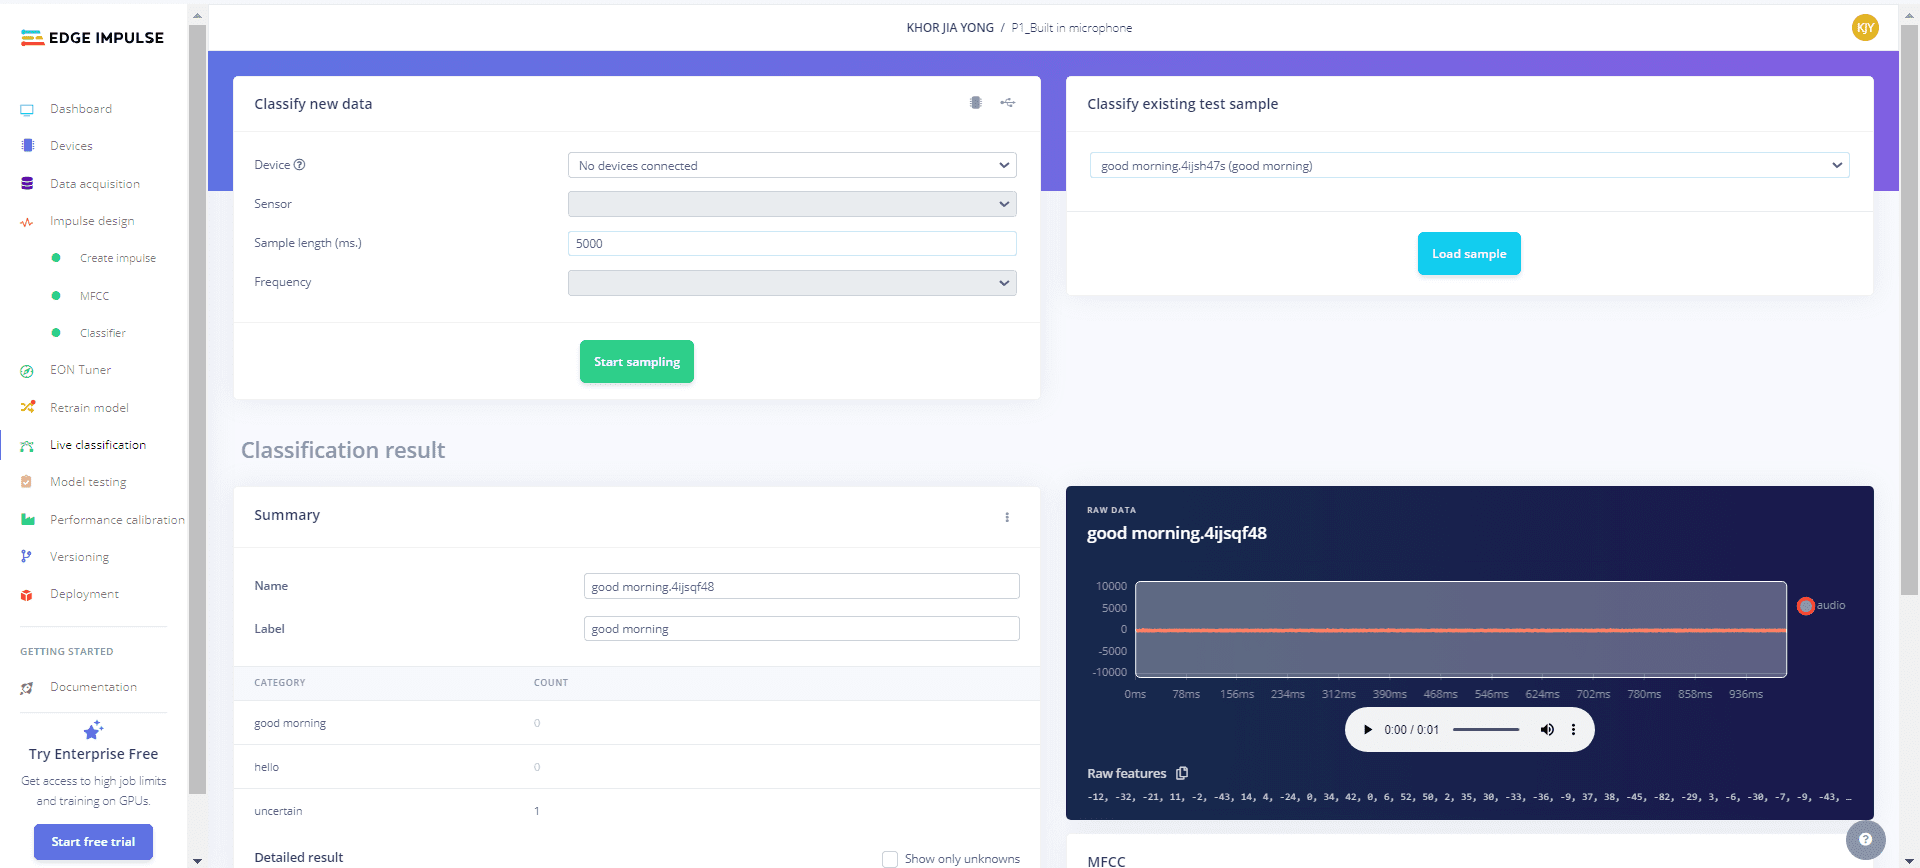
a. Return to the audio recording page, choose "Testing" instead of "Training" in the Category section.
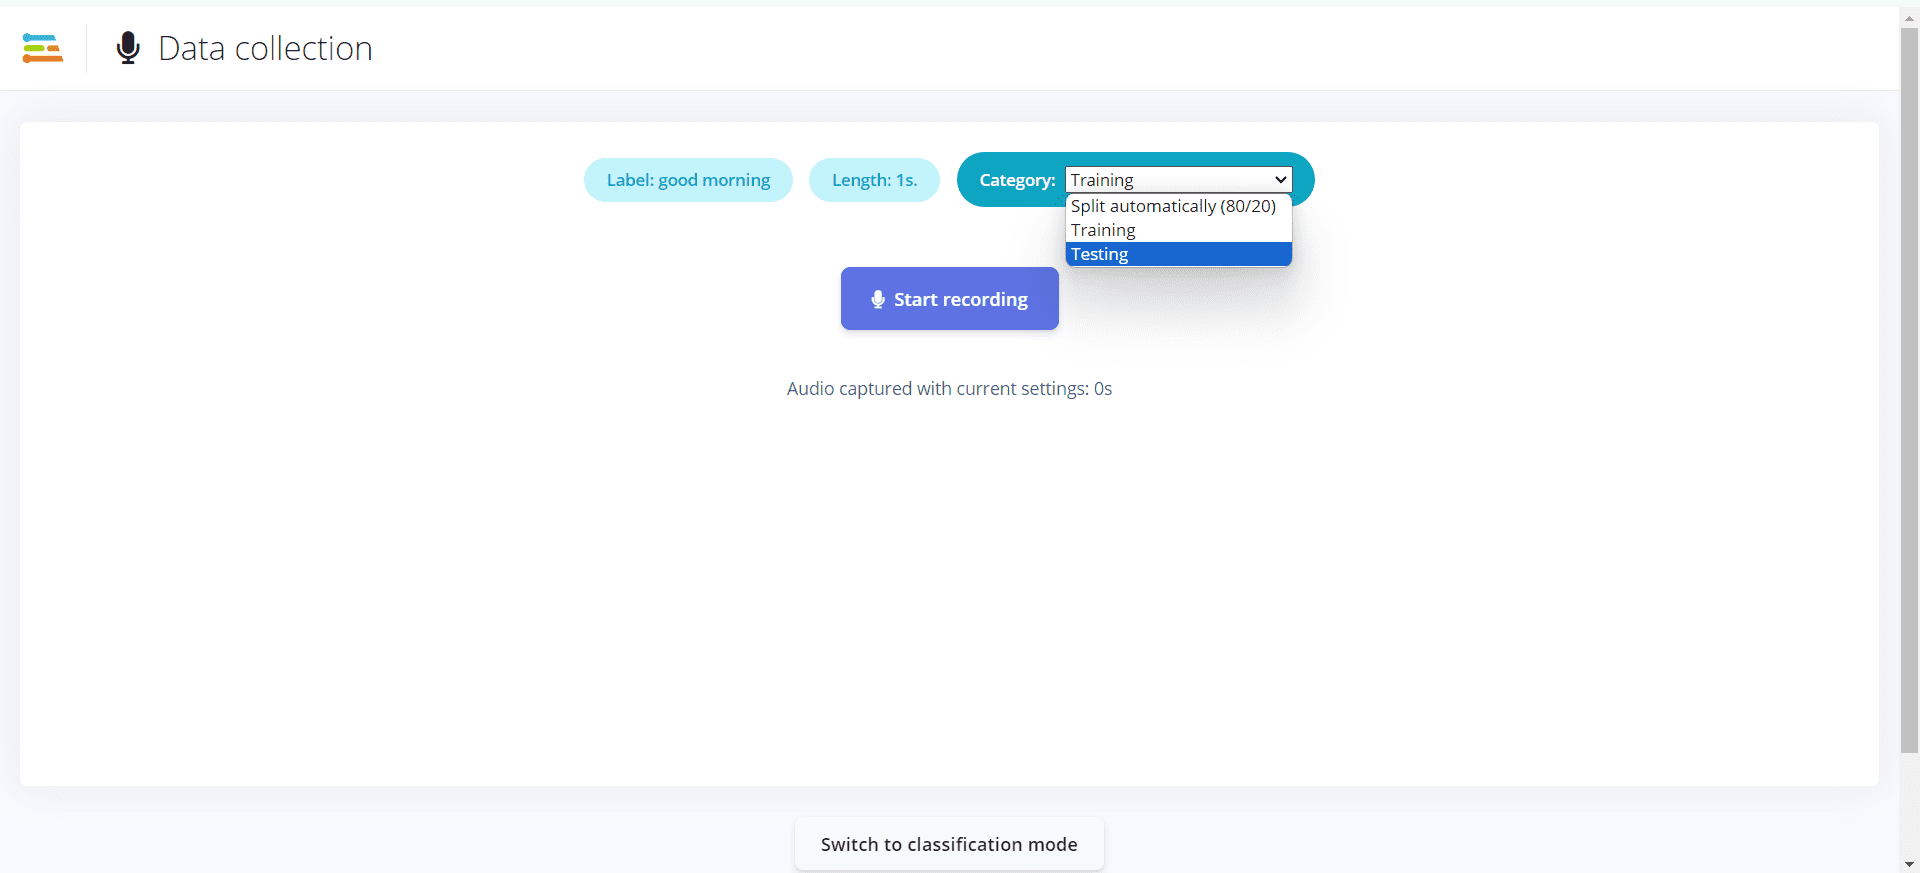
b. Click the "Start recording" button and say something, such as "Good morning."
c. The live classification result derived from the recorded test data is observable.
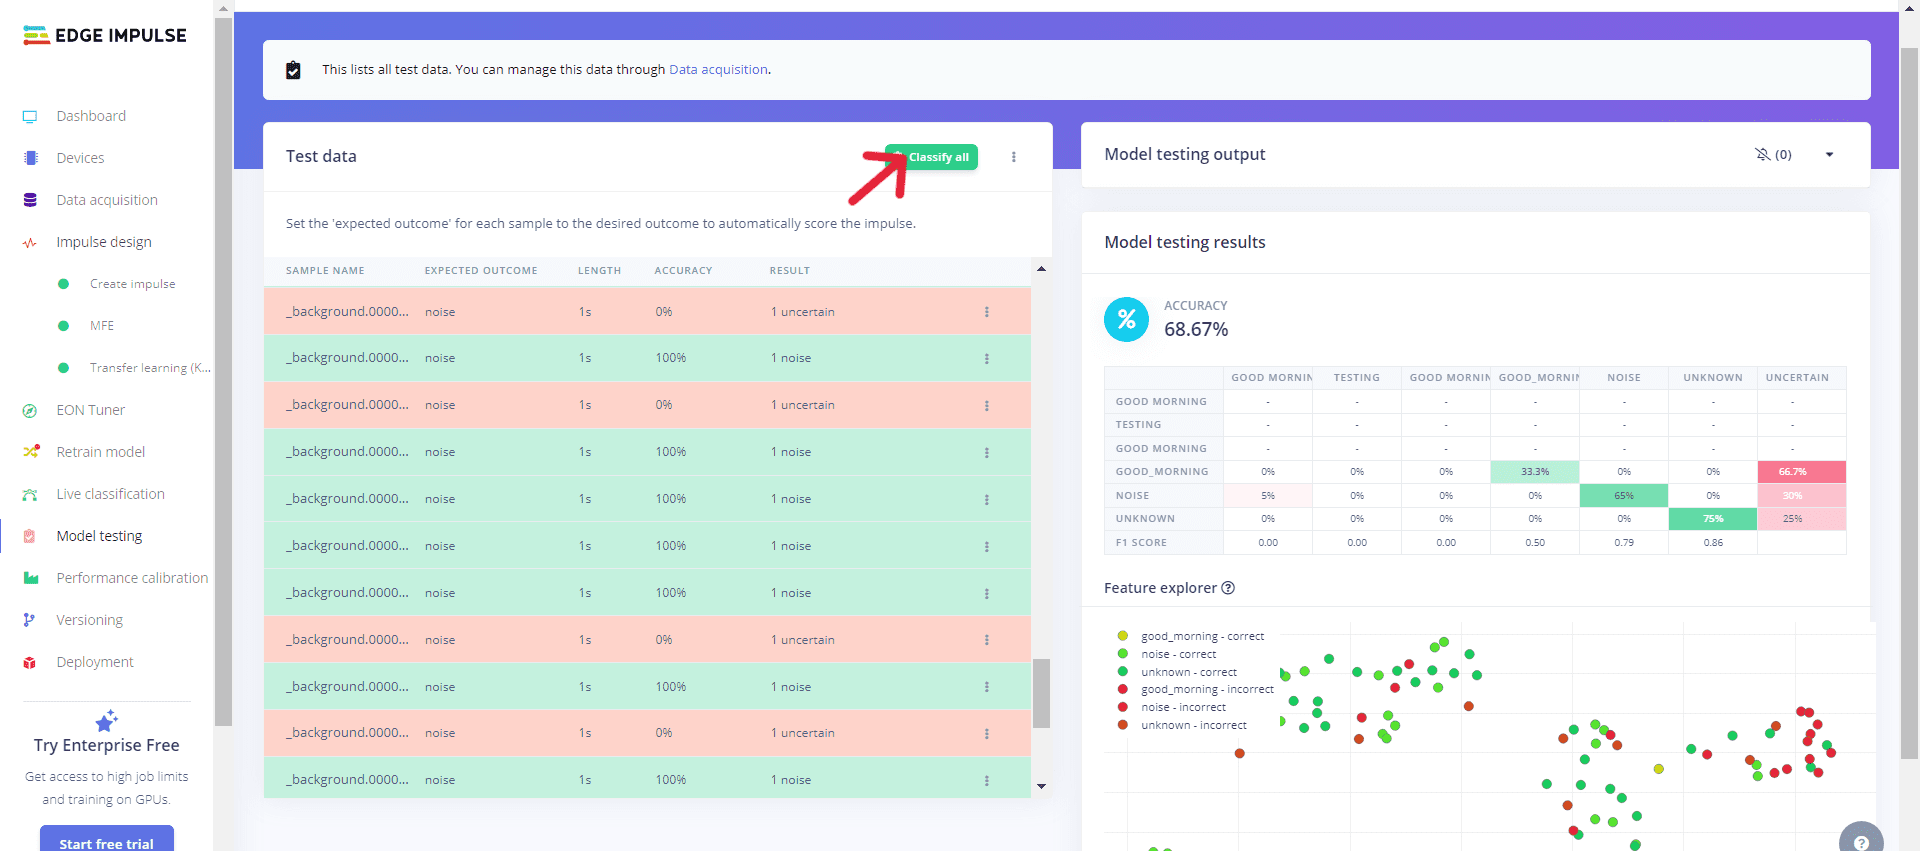
6. Model Testing
- Model testing allows the test data to be characterized in terms of graphical charts by clicking "Classify all" green icon. After testing, you can view the output on the provided chart.
Tutorial Video
The complete project development is clearly illustrated in this tutorial video.
Related Posts

TinyML on Arduino using Edge Impulse
Edge Impulse is a platform that allows us to build projects related to machine learning on microcontrollers. This tutorial will be divided into a few parts, and we will update accordingly.....
Introduction to Edge Impulse
Edge Impulse guides embedded machine learning, helping developers optimize solutions with real-world data. It speeds up deployment, benefiting various industries...
Object Classification with Edge Impulse Using Raspberry Pi 4 and Camera Module
Raspberry Pi 4 seamlessly integrates with Edge Impulse, a versatile Linux board supporting the easy addition of a microphone or camera for efficient object classification projects...
Edge Impulse with Mobile Phone Application Using Accelerometer
Edge Impulse supports mobile devices, allowing the implementation of machine learning models directly on phones. This project emphasizes using the built-in accelerometer sensor in the phone...
Edge Impulse with Raspberry Pi Pico Application Using ADC Light Sensor
Edge Impulse has the ability to interface with the Raspberry Pi Pico device, equipped with the RP2040 chip. In this project, data is gathered using the light sensor to measure light intensity...