
 International
 Singapore
 Malaysia
 Thailand
 Vietnam
Your shopping cart is empty!

RGB LED and Daisy Chained RGB LED
- Hao Zhen Goh
- 05 Jun 2024
- Tutorial
- Beginner
- 53
This guide is about controlling the 2 onboard RGB LEDs and connect external RGB LEDs to form a daisy chained RGB LEDs by using the MOTION:BIT Pro.
Programming Onboard RGB LEDs
MOTION:BIT Pro has 2 on board Neopixel RGB LEDs labeled “0” and “1” and it can be programmed by using the blocks provided in the MOTION:BIT MakeCode Extension.
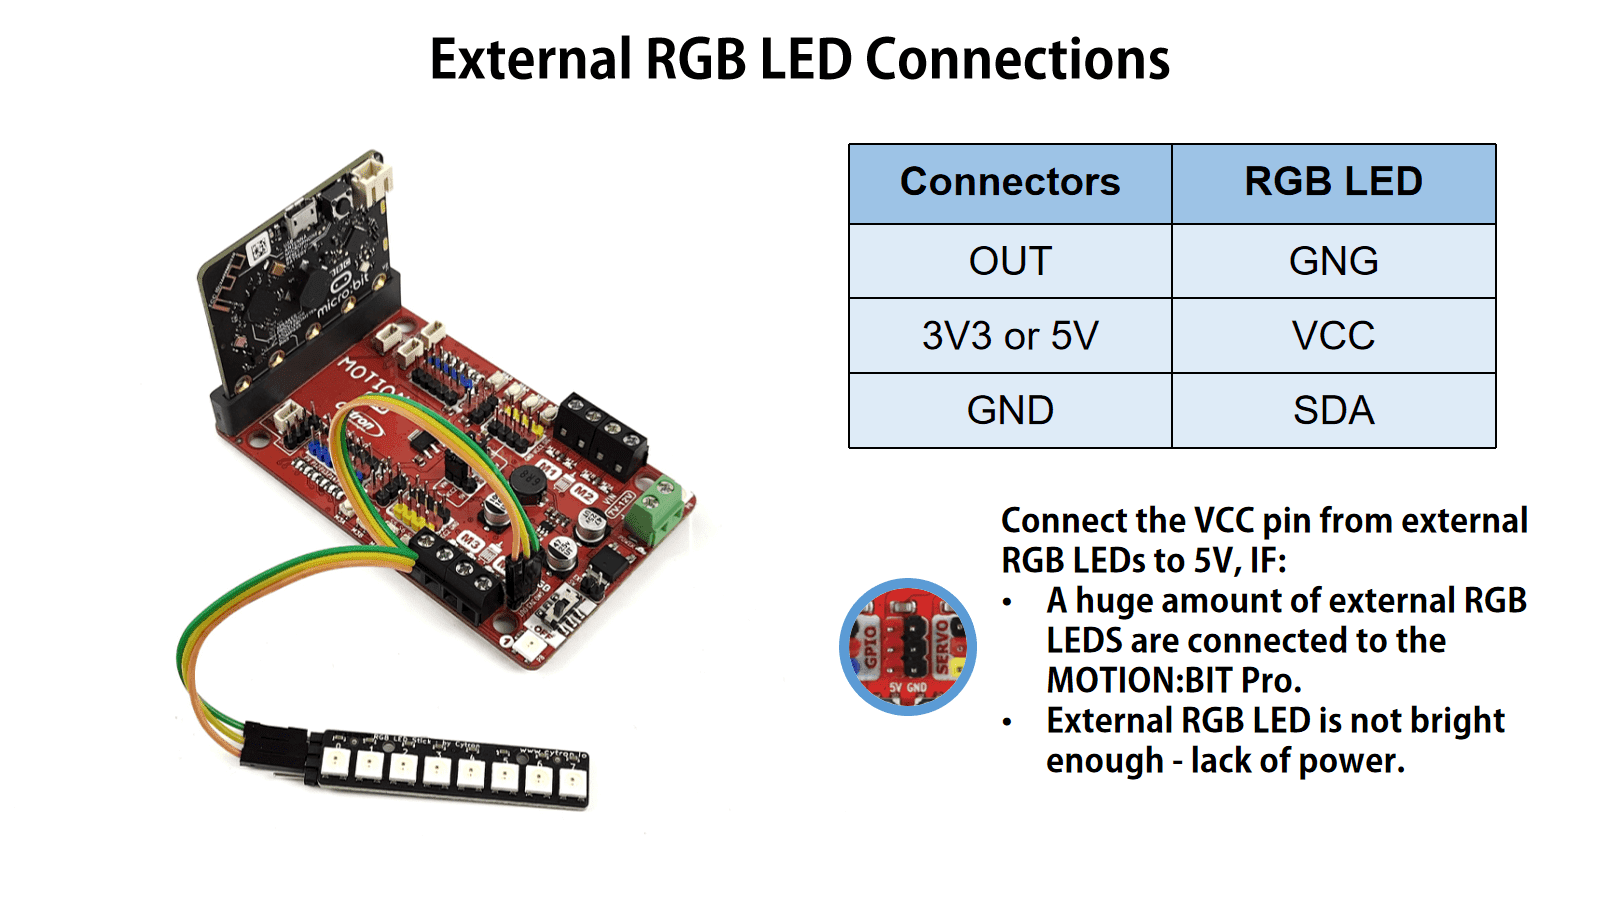
Connecting External RGB LEDs
If you wish to create a daisy chain of RGB LEDs…
Connect your external RGB LEDs to the 3-pin connectors labeled “RGB”
Example: Neopixel RGB LED Stick by Cytron with female-female jumper wires.
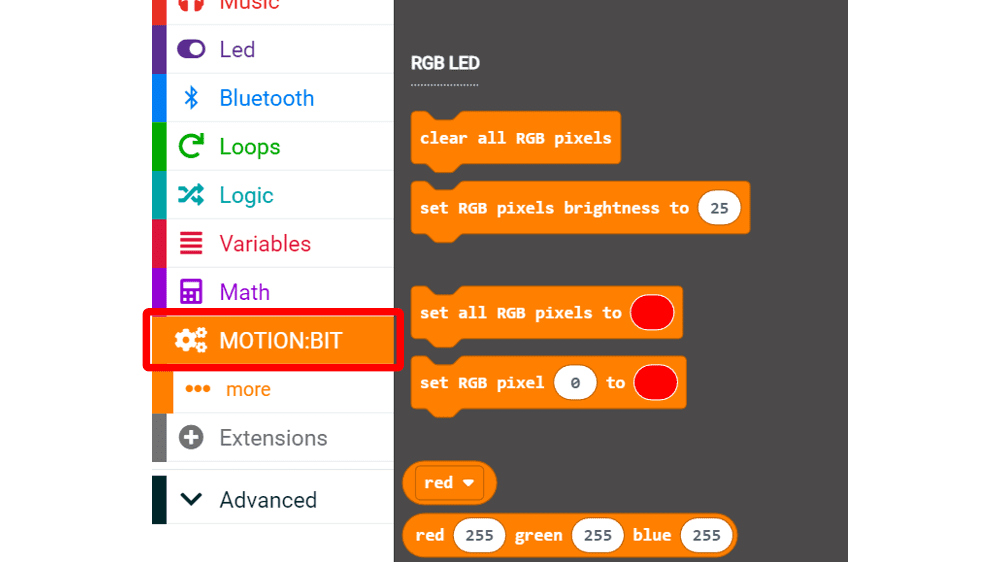
Programming the External RGB LEDs
In your MakeCode Editor, select the “… more” tab and you will see this:

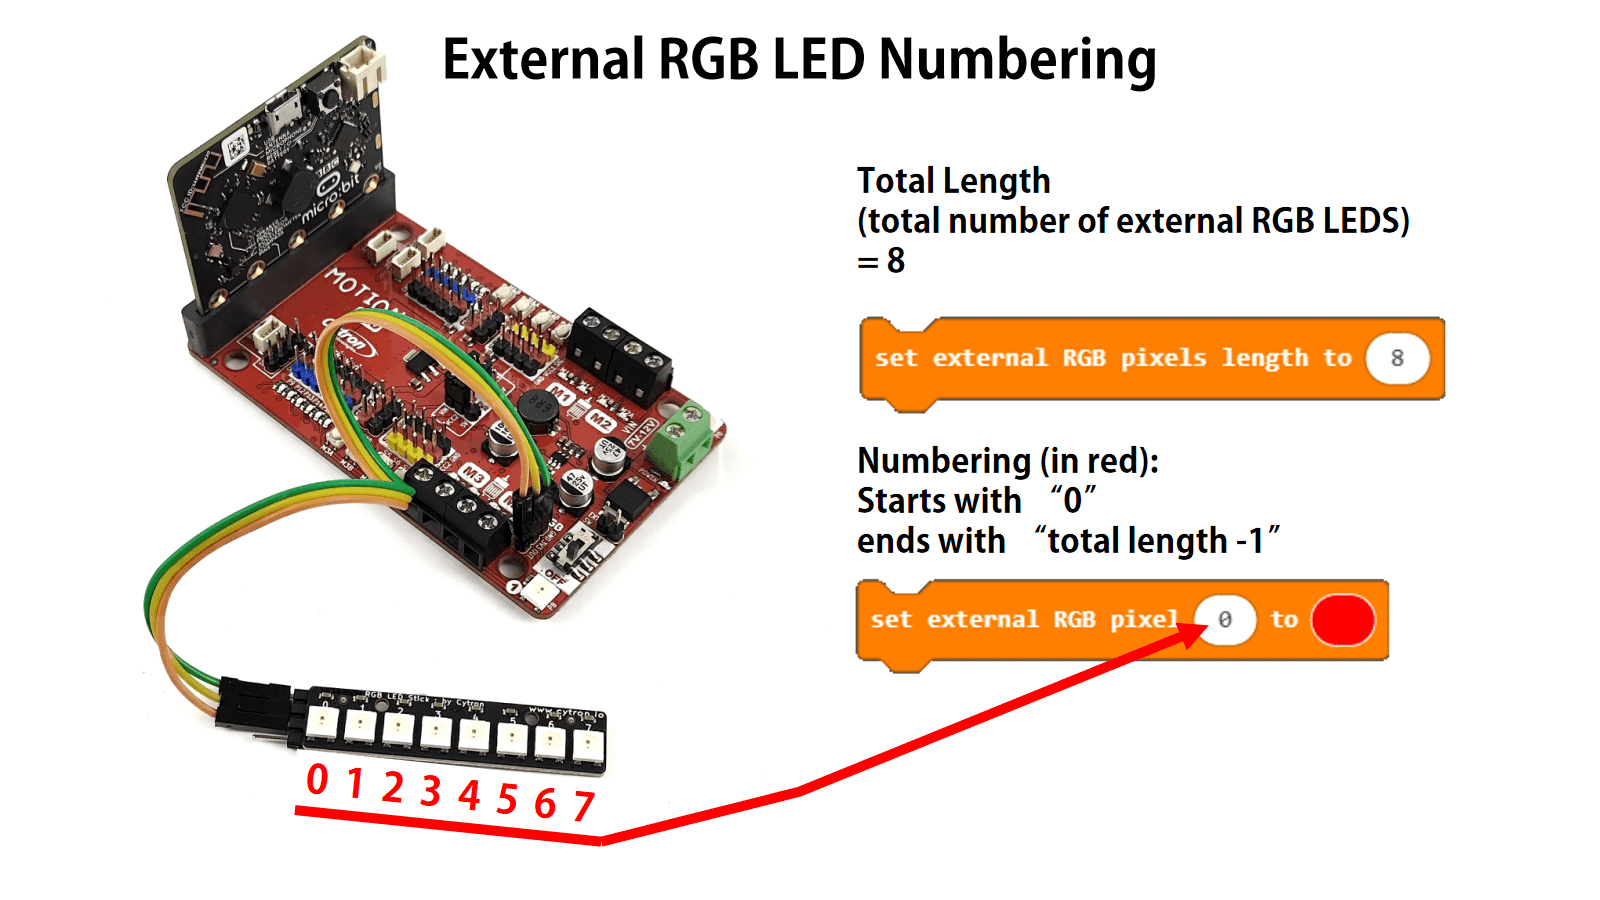
You will need to set the external RGB pixels length, for example: 8 (NOT including the number of RGB pixels is already soldered on the board)
If you wanted to “set external RGB pixel (number) to (colour)”, the numbering for external RGB pixels starts from 0 and ends with the number of external RGB pixels deducted by 1.
For example, you have connected 8 external RGB pixels to MOTION:BIT Pro.
So the numbering will be: 0, 1, 2, 3, 4, 5, 6, 7
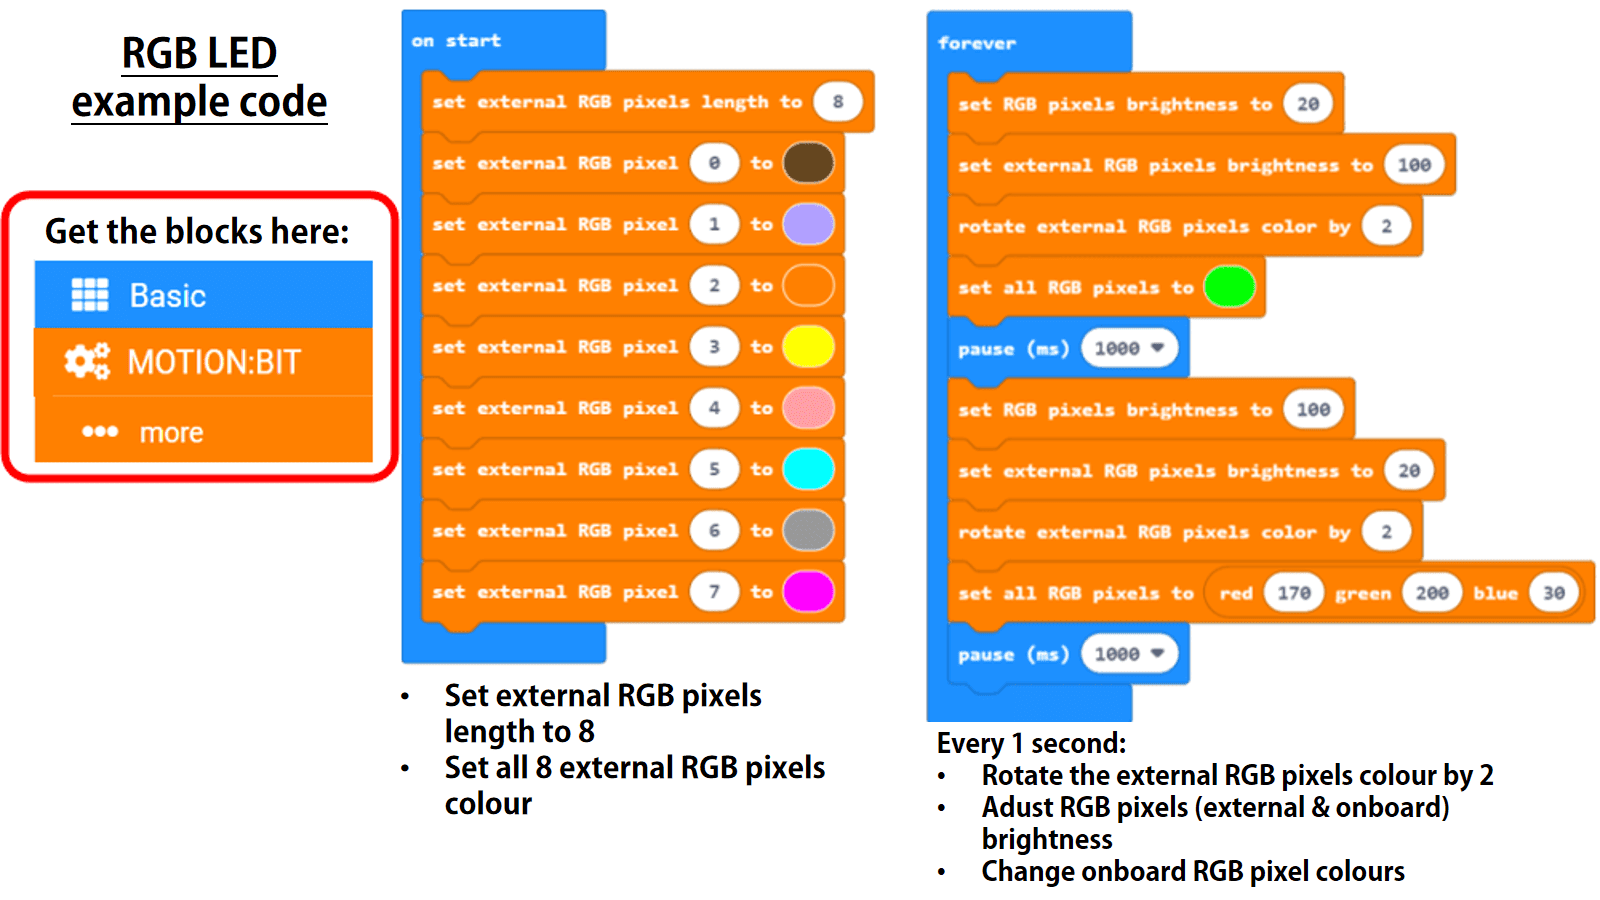
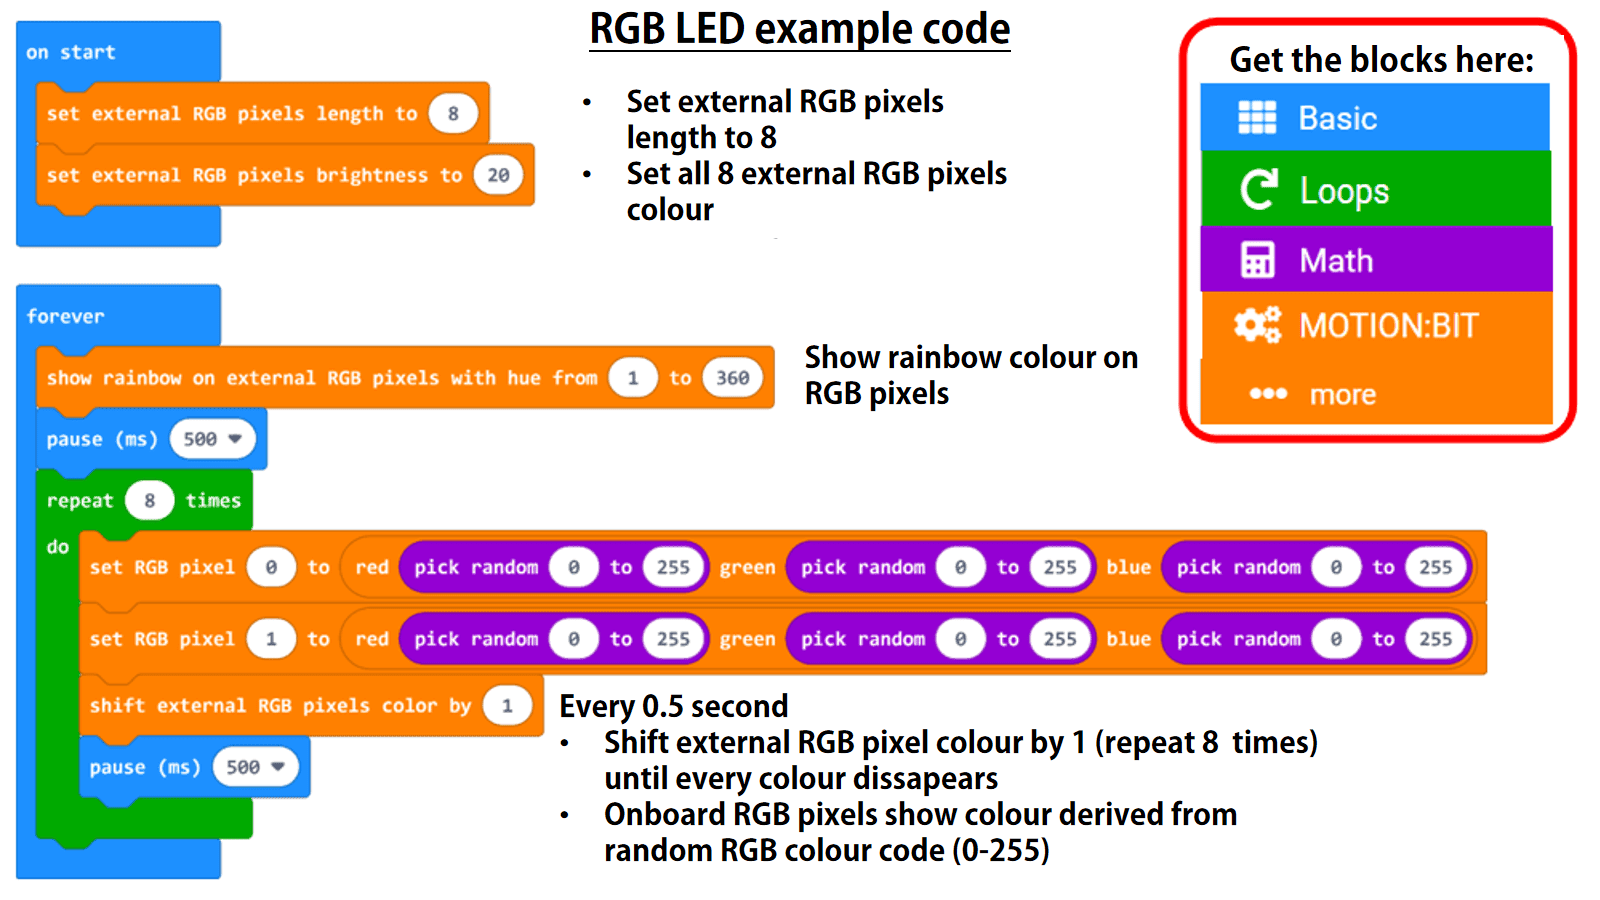
Example Code
Here are some example codes for you on using the RGB pixels on the MOTION:BIT Pro.
Note: Using Bluetooth connection and Controlling RGB pixel at the same time might interrupt and cause Bluetooth to disconnect.
Example 1:
Example 2:
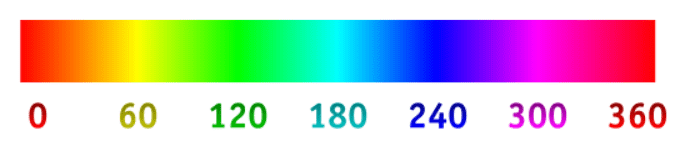
Note: hue is the one appearance parameters of a colour, ranging from 0 to 360 (Source of image : wikipedia)
Hope you are having fun building projects with MOTION:BIT Pro.
You may continue to read through the tutorials on other key features of this board or trying out some of the project guides.
Hardware Components
 by Cytron")
RGB LED Stick (Neopixel-compatible) by Cytron
S$3.18 S$3.18
x 1 unit(s)
 New
NewMOTION:BIT Pro - 12V Robotics Expansion Board f...
S$48.00 S$48.00
x 1 unit(s)