 International
 Singapore
 Malaysia
 Thailand
 Vietnam
Your shopping cart is empty!

Getting Started with ESP32-CAM
- Nabila Nadzelan
- 03 Apr 2023
- Tutorial
- Beginner
- 6202
This tutorial will guide you through the process of setting up your ESP32-CAM board, connecting it to your computer, installing drivers, and uploading sample code. By following the steps in this tutorial, you'll be ready to start experimenting with your ESP32-CAM board and exploring its many capabilities.
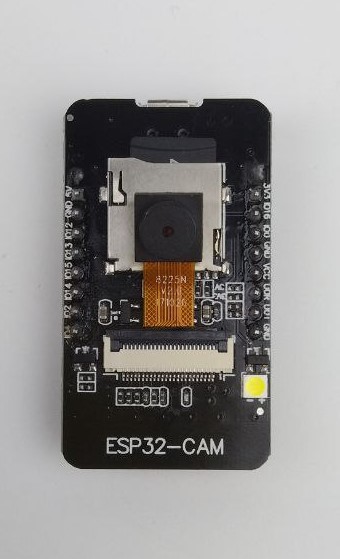
Hardware required
Setting up the ESP32-CAM board
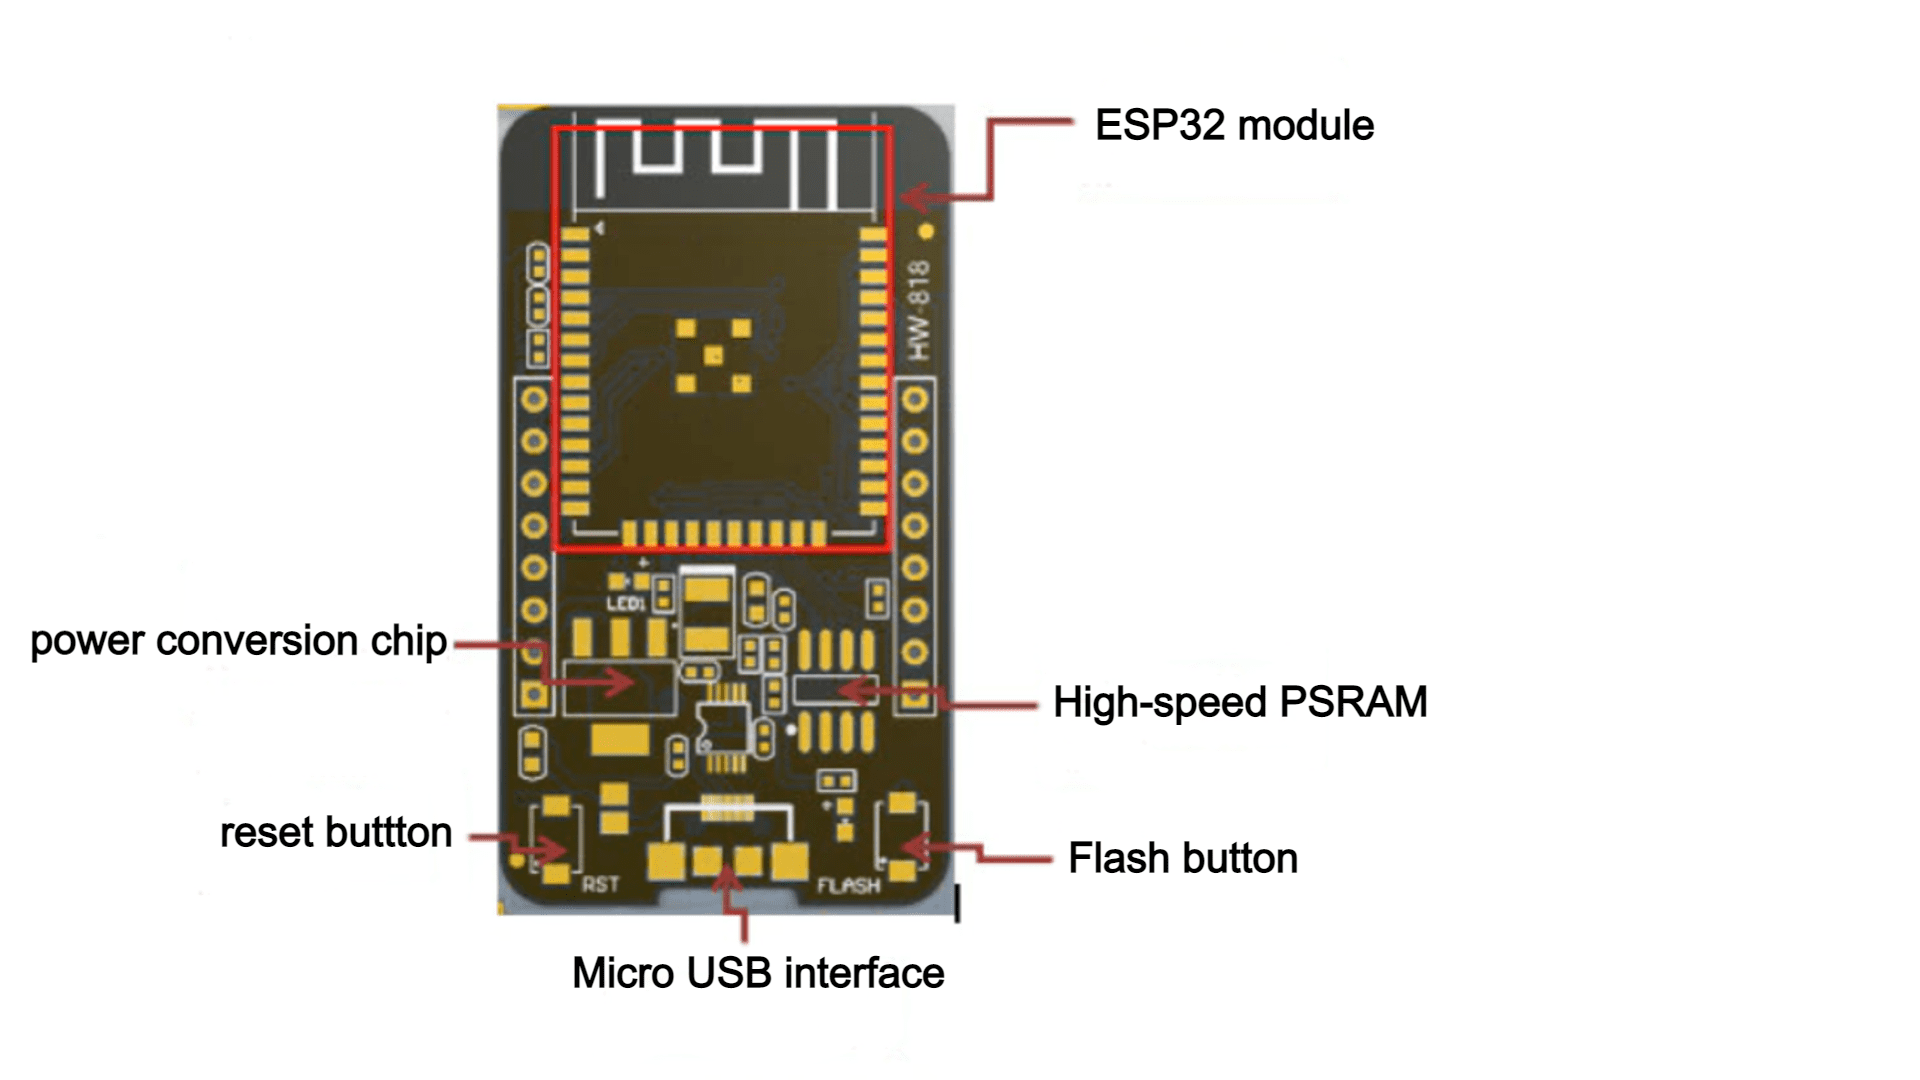


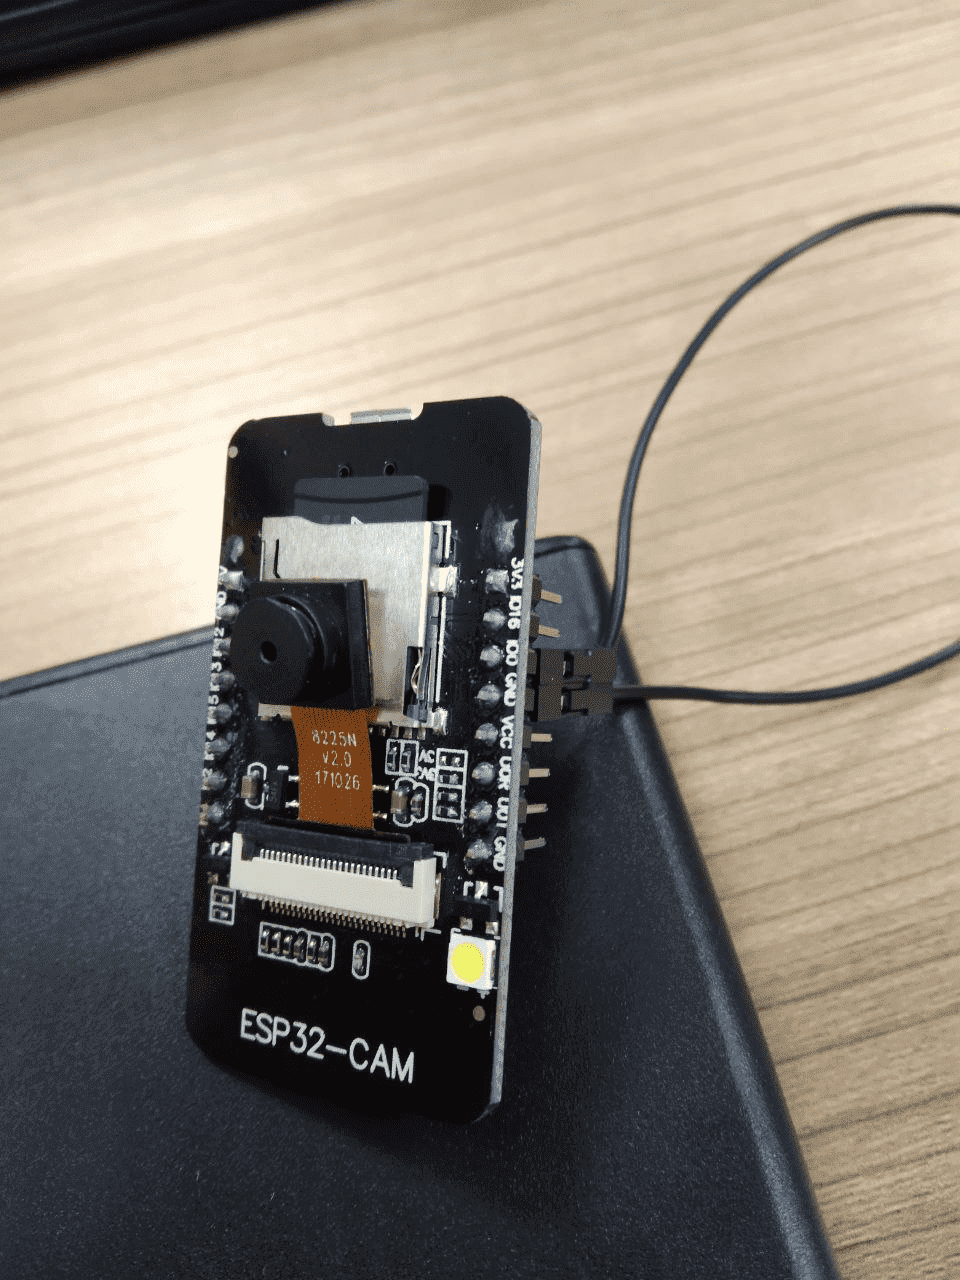
1. To enter the download mode and upload the code, connect the IO0 pin and GND of the ESP32-CAM board.
2. Install Arduino IDE software.
Setting up ESP32-CAM board on Arduino IDE
1. After installing the Arduino IDE, go to the File menu, then select Preferences. Add the new preference to the additional board manager URLs.
https://raw.githubusercontent.com/espressif/arduino-esp32/gh-pages/package_esp32_index.json
.png )
2. Next, go to the Tools menu and click on the Board Manager, search for ESP32, and install it.
.png )
3. Go to the File menu, then select Examples. From the examples menu, select the ESP32 and then open CameraWebServer sketch.
.png )
4. Go to Tools, choose Board then choose ESP32 and select ESP32 Wrover Module. Then, change the Partition Scheme to "Huge APP (3MB No OTA/1MB SPIFFS)".
.png )
5. Edit the board, comment on other camera models, and uncomment the Camera Model Ai Thinker.
.png )
6. You also need to change your Wifi SSID and Password.
Note: This ESP32 Camera board only supports 2.4GHz WiFi.
.png )
7. Connect the Micro USB cable to the computer.
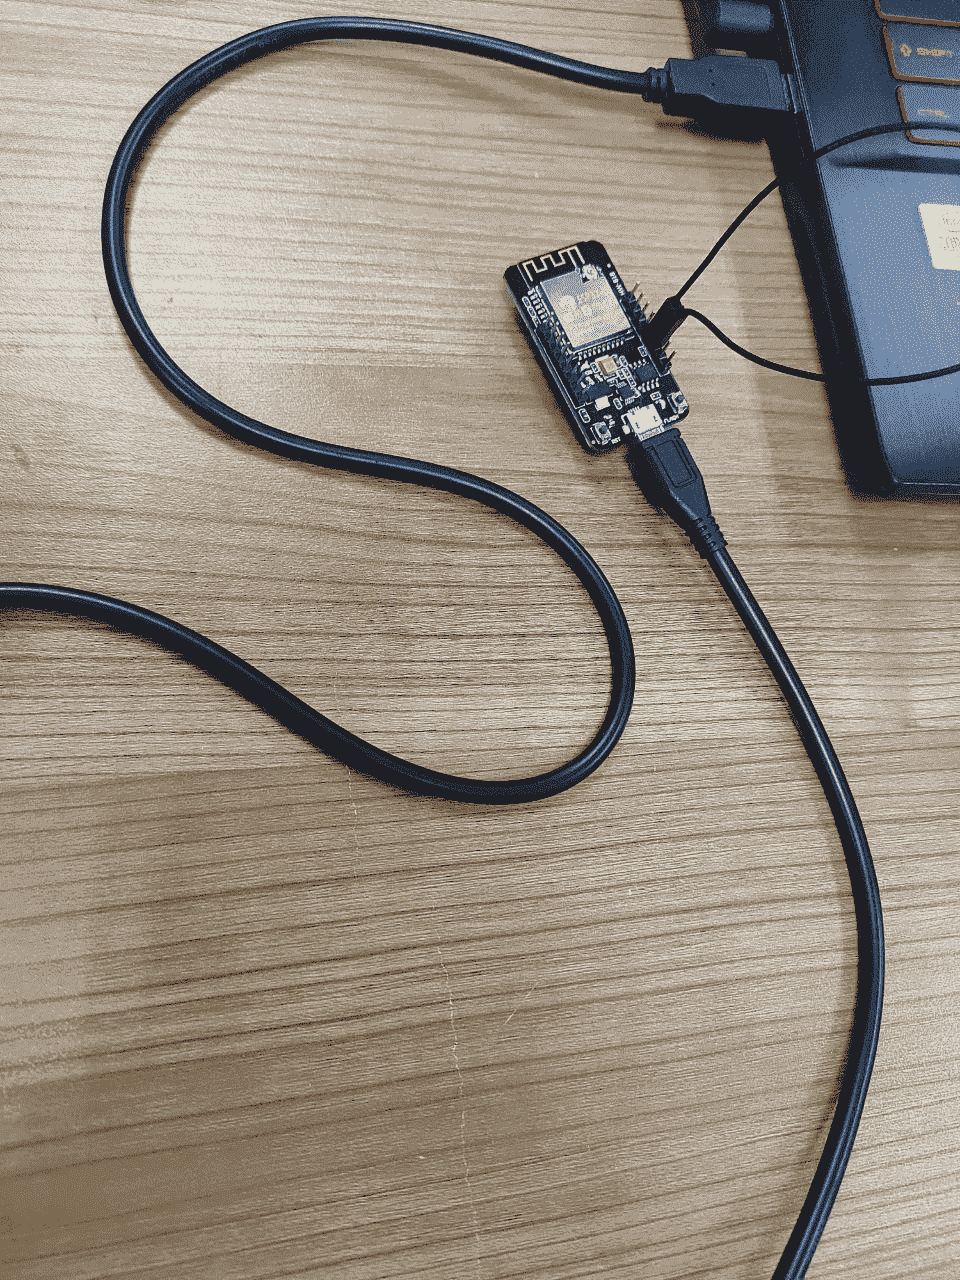
8. After you make the changes, now you upload the code. This code will take time to compile and upload.
.png )
9. Open the Serial Monitor by clicking on the button located at the top right corner. Next, remove the IO0 or GND jumper wire to disable the downloading mode.
.png )
Push the RESET button and the device will try to connect to the Wi-Fi network. It will display the local IP Address after connecting to the Wifi.
10. Copy and enter the camera's IP Address into your web browser to access and edit the camera settings.
.png )
11. Click the 'Start Stream' button at the bottom, and move the camera to see yourself in the video.
.png )
References
- https://www.youtube.com/watch?v=VCZXSh6f5sE&ab_channel=EasyOne
- https://www.youtube.com/watch?v=MW090751sV4&ab_channel=TheTinkerFoundry
Save picture into SD Card
Formatting Micro SD Card
1. To format the Micro SD card, insert it into your computer using SD card reader and open 'My Computer' or 'This PC'. Then, right-click on the drive corresponding to the SD card and select the 'Format' option.
.png )
2. A window will appear, choose 'FAT32' and click 'Start' to format. Name the drive or SD card under the 'Volume label'.
.png )
Setting up the ESP32-CAM board
1. Insert the SD Card into the ESP32-CAM.
2. Repeat steps 1 to 2 from the first tutorial.
Setting up the ESP32-CAM in Arduino IDE
1. Repeat steps 1 to 4 from the first tutorial.
5. Replace the coding with the link below.
6. Connect the Micro USB cable to the ESP32-CAM board, then compile and upload the coding.
7. Compile and upload the code to the board, then remove the IO0 or GND jumper wire once it shows 'Hard resetting via RST pin' to stop the download process.
8. Open the Serial Monitor and press the RESET button to start the camera. The picture will be saved on the SD card.
.png )
9. Remove the SD card from the board and insert it into your computer. Open the SD Card file to view the pictures you've taken.
.png )
References
Hardware Components
-268x268.jpg "ESP32 Camera with USB Connectivity") Backorder Only
Backorder OnlyESP32 Camera with USB Connectivity
S$20.71 S$20.71
x 1 unit(s)