 International
 Singapore
 Malaysia
 Thailand
 Vietnam
Your shopping cart is empty!

Getting Started with Maker pHAT
- Idris Zainal Abidin
- 18 Oct 2018
- 894
VIDEO
This video will show you how to get started with Maker pHAT.
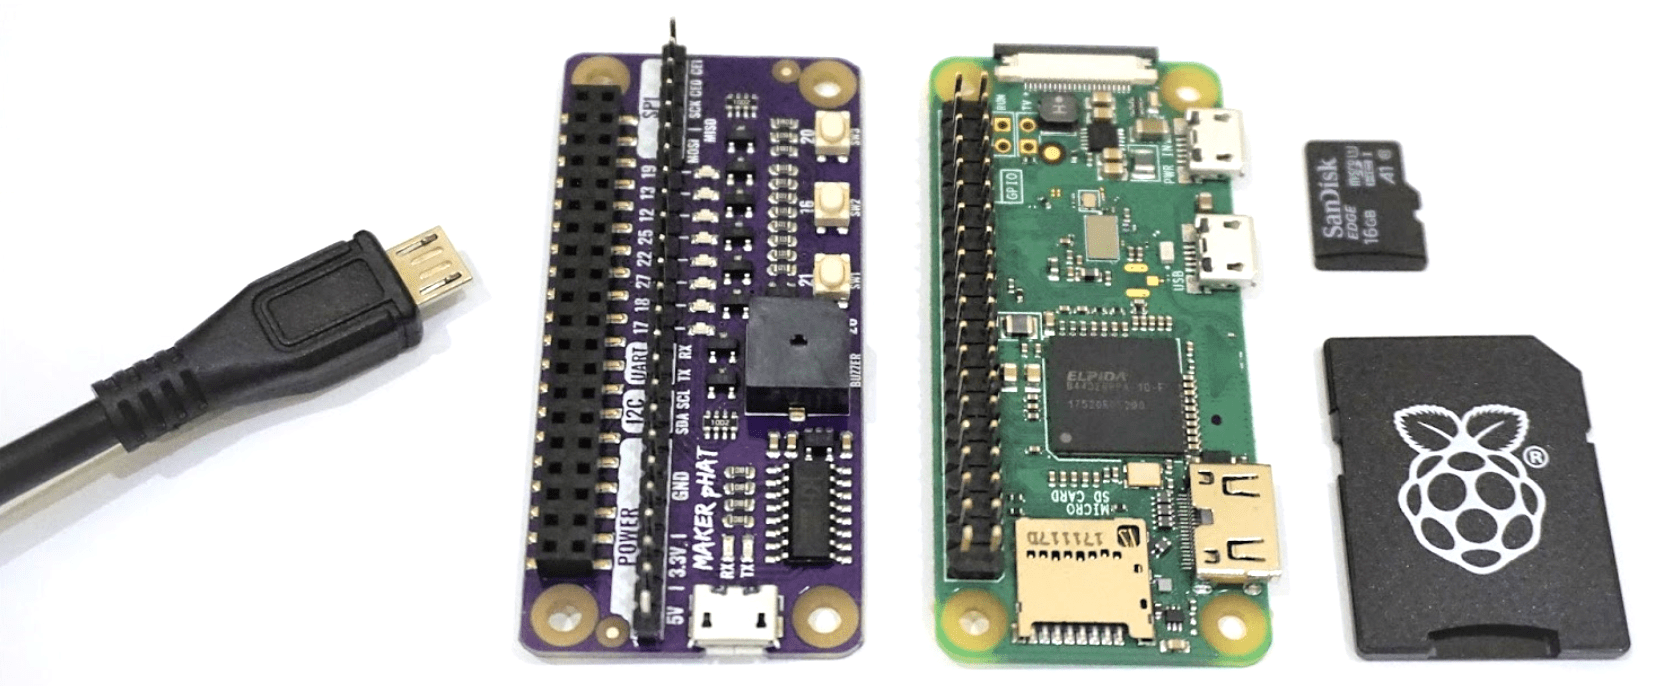
1 – PREPARING HARDWARE
To get started, we recommend you to have:
2 – INSTALL THE LATEST RASPBIAN OS
Note: The latest NOOBS (V2.9.0) already comes with Raspbian pre-installed. If you buy 16GB Micro SD Card with NOOBS for RPI, you don’t need to write Raspbian image.
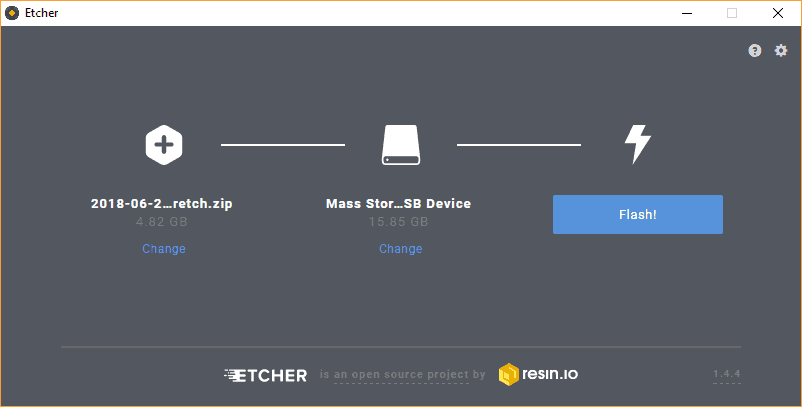
Download the latest Raspbian OS (Raspbian Stretch with Desktop) and write the image on the SD card using Etcher.
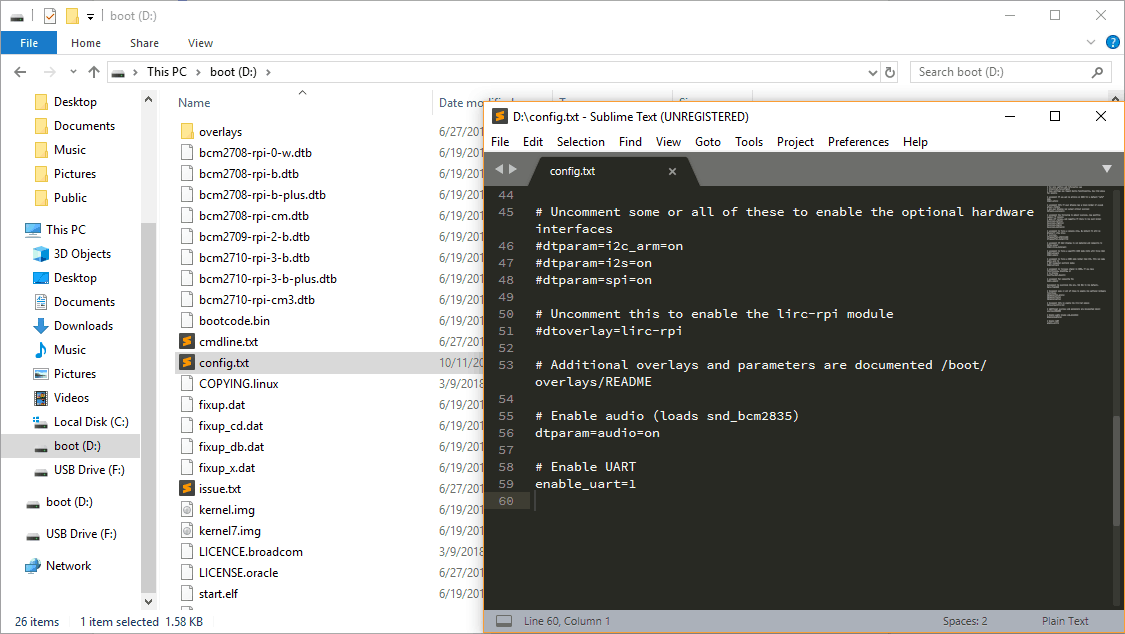
After done flashing, take the SD card out and insert back to your laptop. Open SD card directory (e.g. D:/boot) and open config.txt file. Put enable_uart=1 at the bottom of the line. Save and eject the SD card. Then insert the SD card into Raspberry Pi Zero WH.
3 – INSTALL MAKER PHAT DRIVER
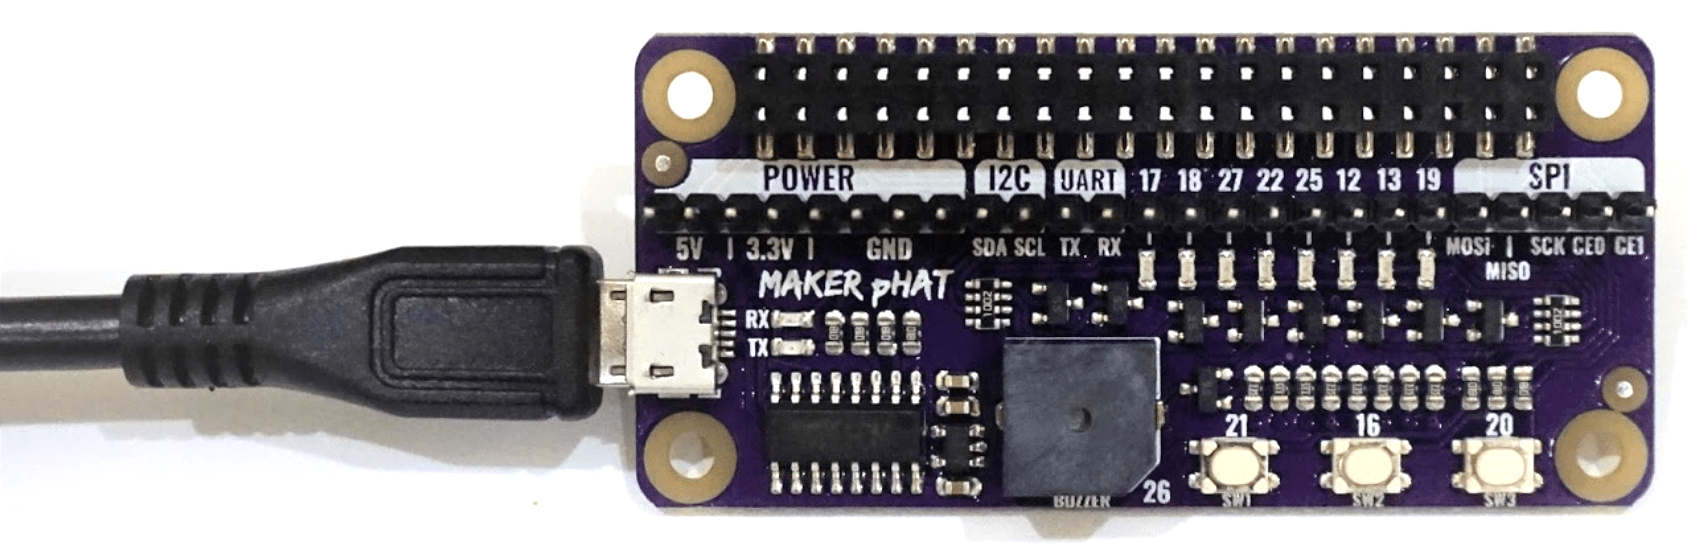
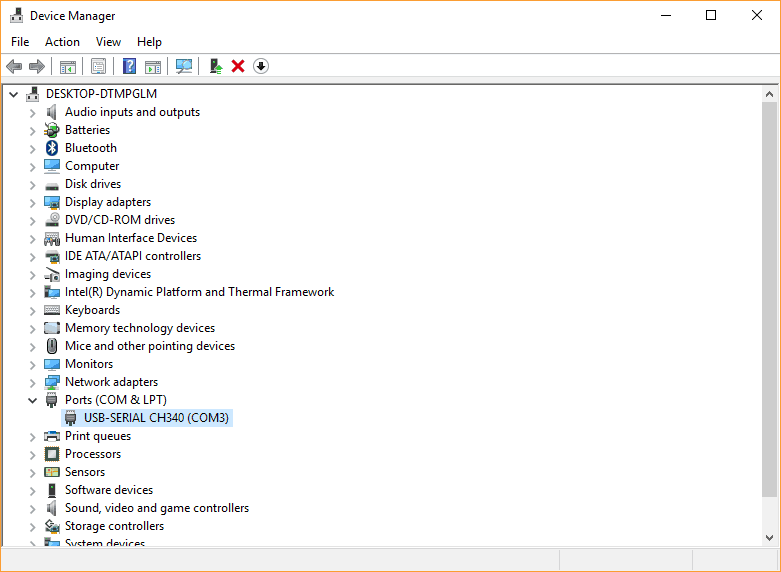
Don’t stack the Maker pHAT to Raspberry Pi Zero WH yet. Connect Maker pHAT to your laptop using USB Micro B Cable. Check either your laptop is able to detect the Maker pHAT. Open Device Manager, and check under Ports (COM & LPT) category. It should be detected as USB-SERIAL CH340 (COM number). If yes, you can proceed to the next step. If not, download and install Maker pHAT driver.
Download and install Maker pHAT driver. Please choose appropriate driver depends on your laptop/PC operating system:
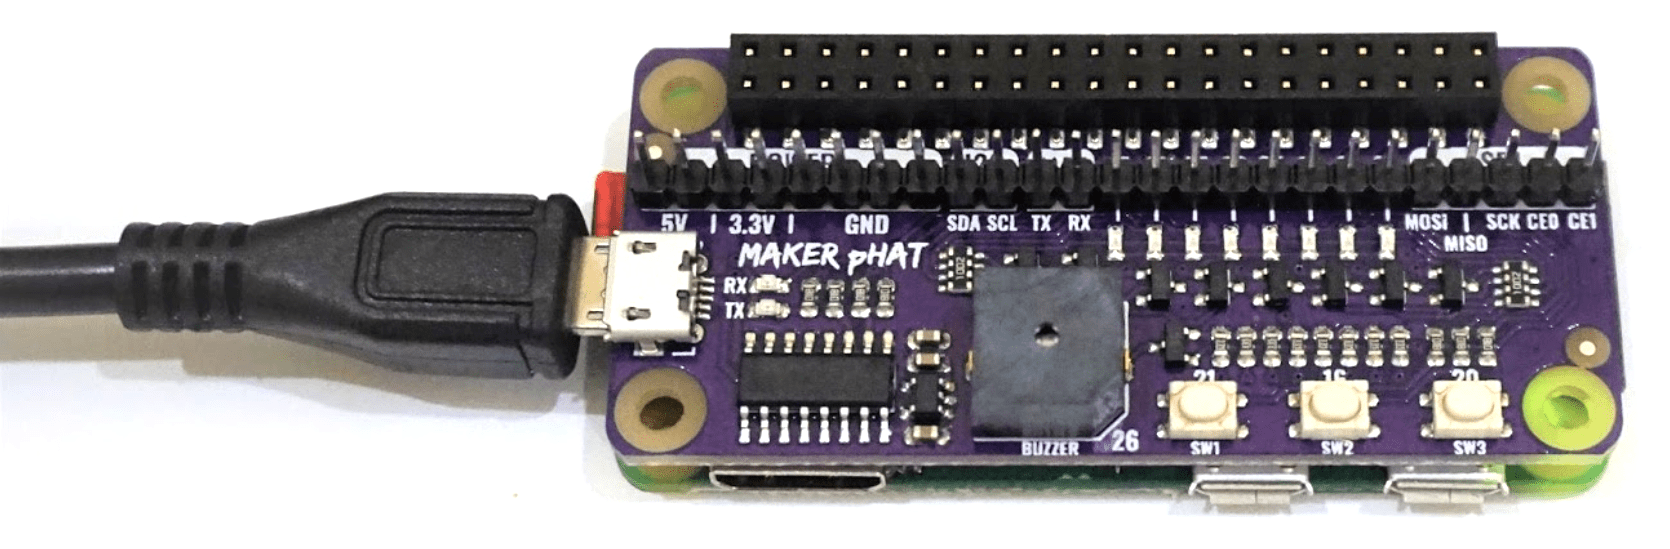
Once detected, disconnect the USB cable. Stack Maker pHAT on the top of Raspberry Pi Zero WH.

4- INSTALL PUTTY (WINDOWS)
For Windows user, download and install PuTTY. Connect your Maker pHAT to your laptop using USB Micro B Cable. Since Maker pHAT is already stacked on the Raspberry Pi, this connection will power up Raspberry Pi through Maker pHAT. Please be reminded to do not easily disconnect the cable without proper shutdown.
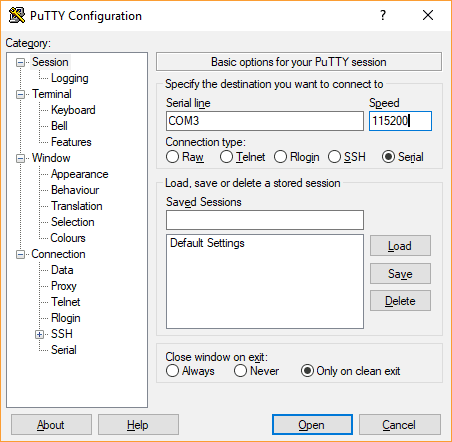
Open PuTTY software. Tick on the Serial, then write your COM number (e.g. COM3). Please refer to your Device Manager. Set Speed to 115200. Then click Open.
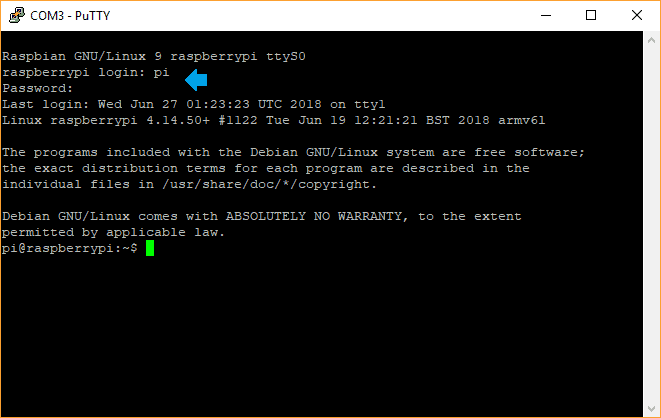
Press Enter, then insert Raspberry Pi default login information as follow.
- raspberrypi login: pi
- password: raspberry
So far, you’re able to access Raspberry Pi through serial remote (Maker pHAT). We will further guide you until we can remote using VNC Viewer (Virtual Network Computing).
5 – CONNECT TO WIFI
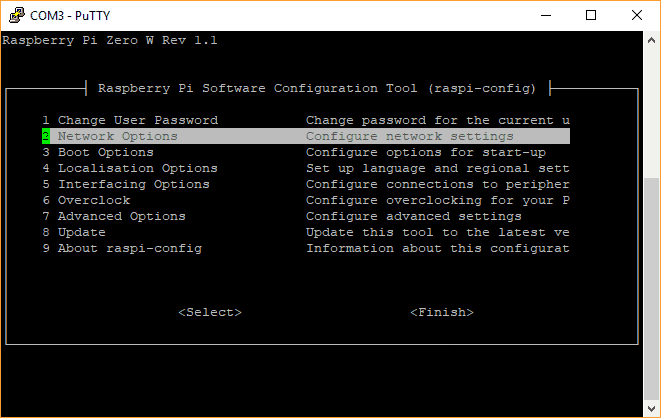
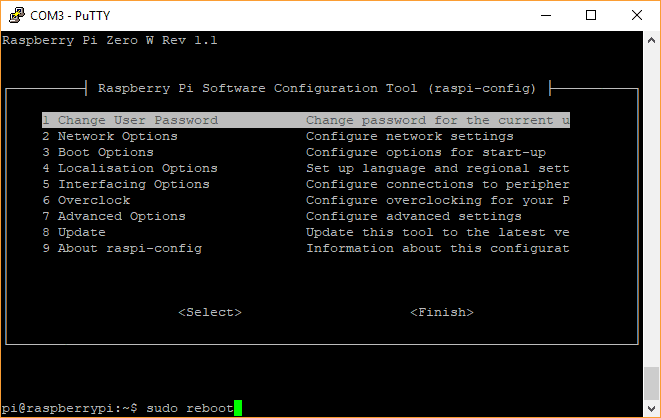
To remote using VNC Viewer, we need a WiFi connection. We can set the WiFi connection in Raspberry Pi Software Configuration Tool. Write the following command and Enter.
sudo raspi-config

Go to number 2 Network Options. Then Enter.
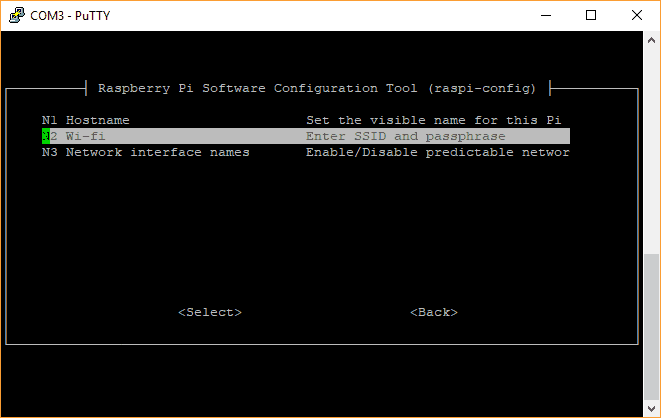
Choose N2 Wi-fi and Enter.
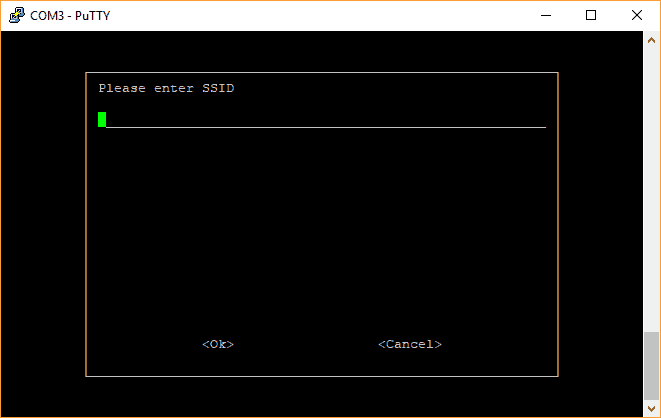
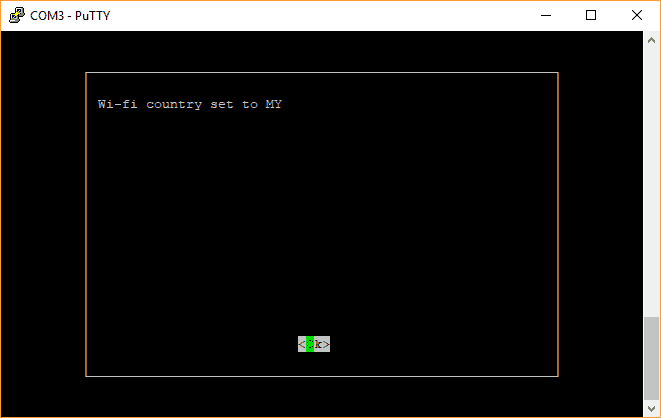
Choose your country and press Enter.

Write your WiFi SSID (Enter), followed by WiFi passphrase (Enter).
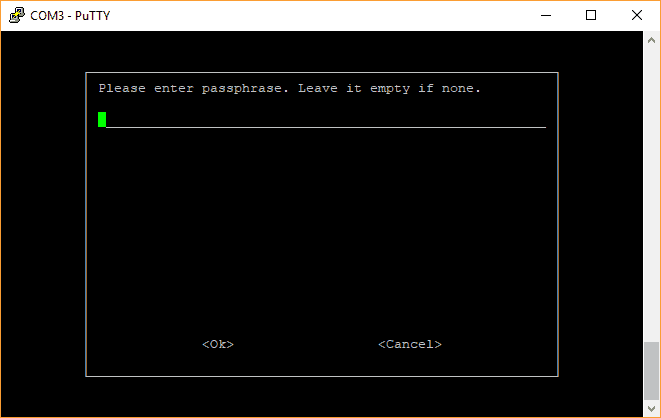
Done setting for WiFi connection. Press Enter to
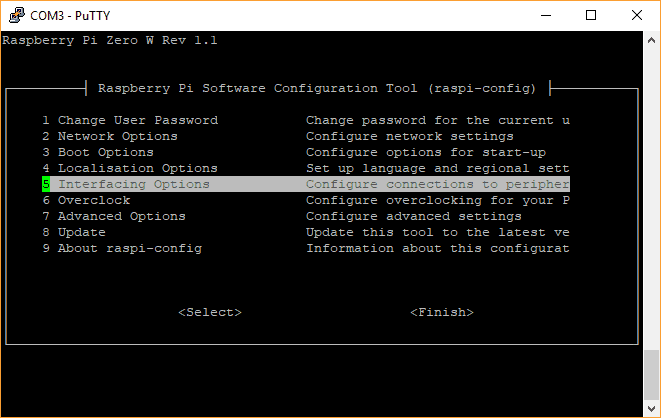
Next, we need to enable VNC server in Raspberry Pi. Go back to the top menu, and select to the number 5 Interfacing Options.
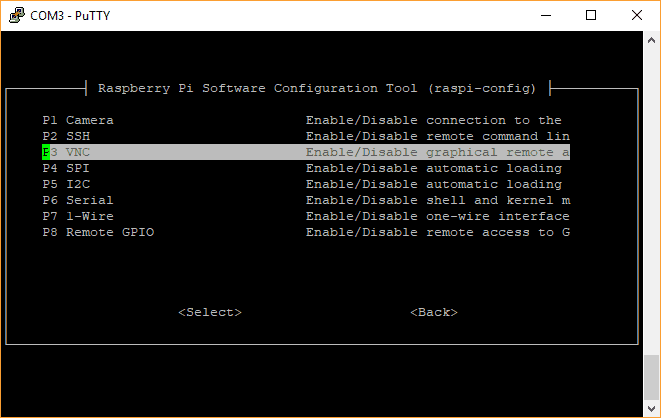
Select P3 VNC.
Choose
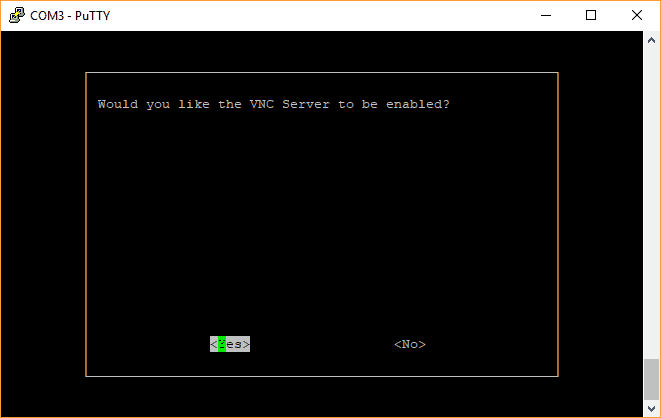
VNC server is enabled. Press Enter to
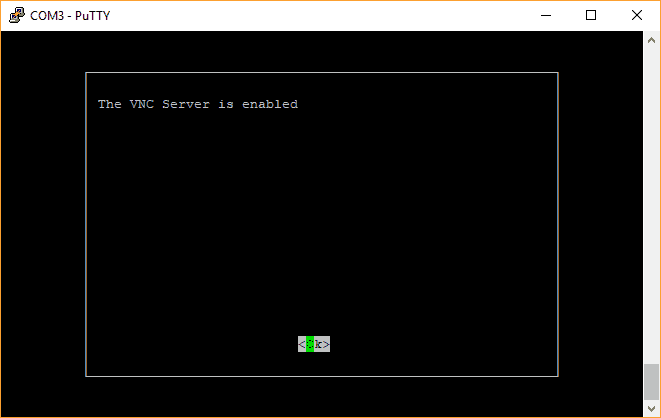
Press Esc to exit Raspberry Pi Configuration Tool. Now, reboot Raspberry Pi to enable WiFi connection and VNC server. Write following command followed by Enter.
sudo reboot
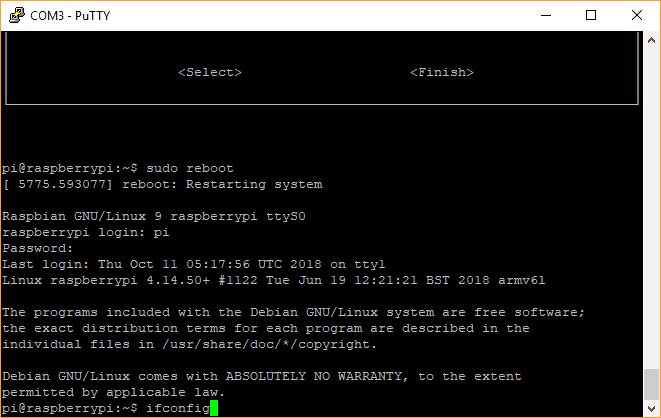
Login to Raspberry Pi like previous. If all your setting is correct, your Pi will connect to WiFi. Next we need to trace the IP address. Write following command and Enter.
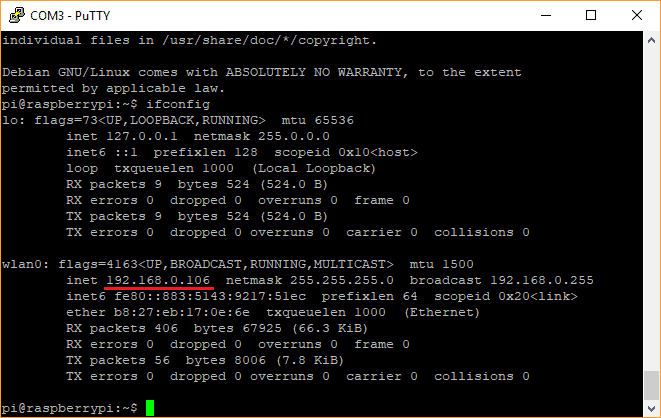
ifconfig
Your Raspberry Pi will display IP address (e.g. 192.168.0.106).
We recommend you to update your Raspbian with following command.
sudo apt-get update
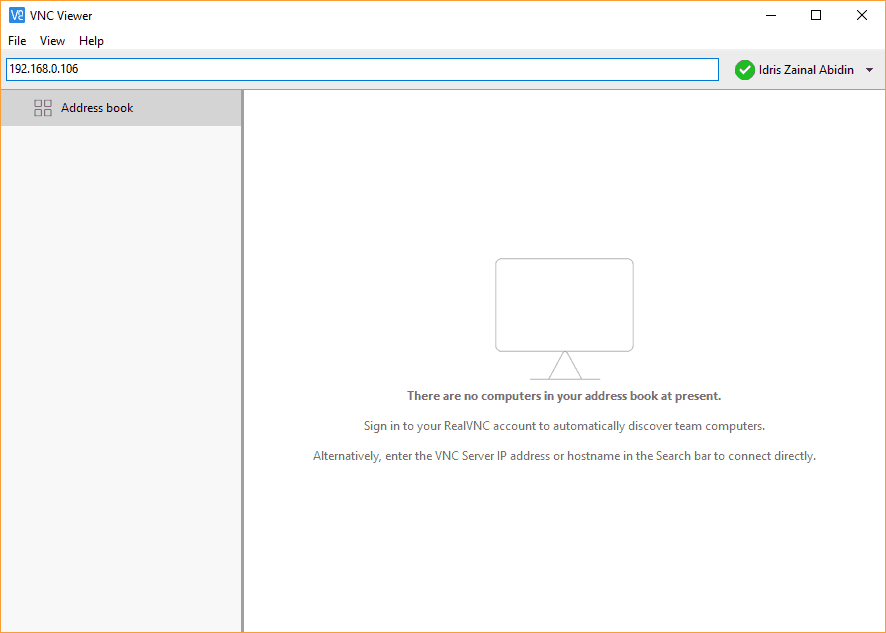
Done update, open VNC Viewer and insert Raspberry Pi’s IP address on the text bar. Then press Enter.
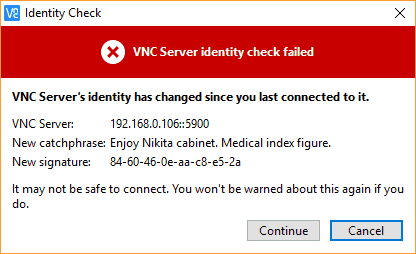
A warning window will popup. Sometimes the warning is in yellow and sometimes in red. Proceed with Continue button.
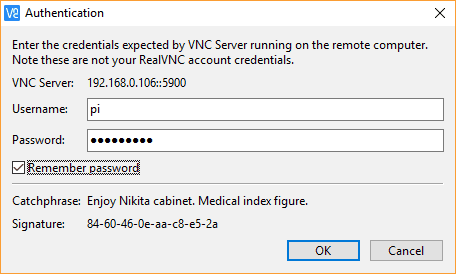
Fill up Raspberry Pi default login information.
- Username: pi
- Password: raspberry
Press OK.
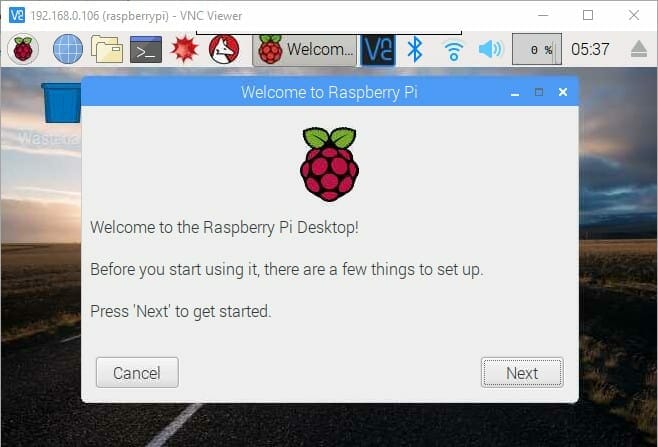
Tadaa. Your VNC remote is successful. Now you can access Raspberry Pi Desktop through VNC Viewer and WiFi connection.
MAKER PHAT DEMO CODE (PYTHON)
You can try the demo code below using Python 3 (IDLE).
MAKER PHAT DEMO CODE VIDEO
This video will show you how the demo code works on Maker pHAT.
THANK YOU
Thanks for reading this tutorial. For more details, you can refer to Maker pHAT User’s Manual. If you have any technical inquiry, please post at Cytron Technical Forum.
Related Products

Maker pHAT: Simplifying Raspberry Pi for {Educa...
S$15.57 S$15.57
x 1 unit(s)