 International
 Singapore
 Malaysia
 Thailand
 Vietnam
Your shopping cart is empty!

Node-RED on CM4 Maker Board: Displaying Thermocouple Sensor Data
- Abdul Salam A Haris
- 07 Sep 2023
- Tutorial
- 843
In this tutorial will guide you on how to display temperature data from a thermocouple on the Node-RED dashboard using the CM4 Maker Board.
Hardware Components

MAX6675 K-Thermocouple to Digital Converter Module
S$8.93 S$8.93
x 1 unit(s)
CM4 Maker Board
S$80.00 S$80.00
x 1 unit(s)

MAX6675 K-Thermocouple to Digital Converter Module
S$8.93 S$8.93
x 1 unit(s)

CM4 Maker Board
S$80.00 S$80.00
x 1 unit(s)
Software Requirements:
1. Node-RED
2. Python 3.x
Hardware Configuration:
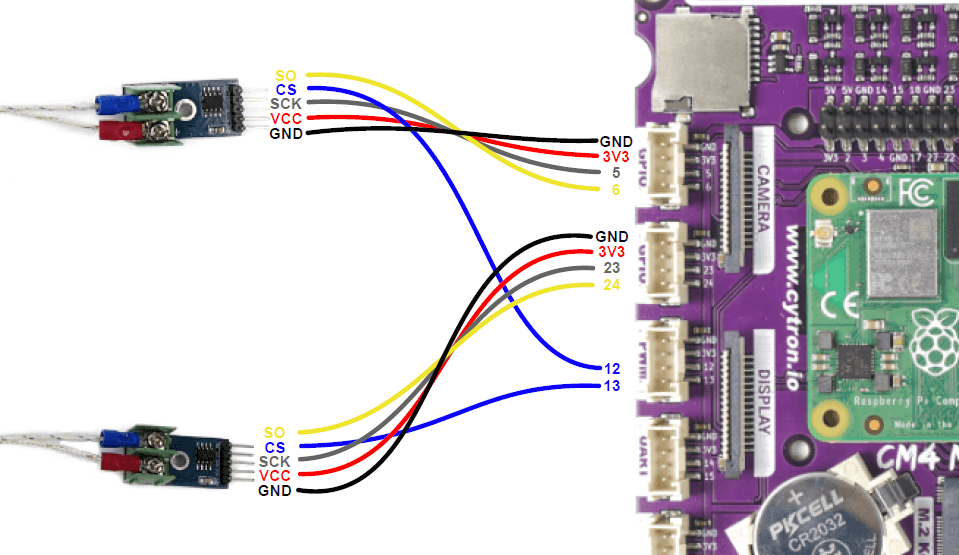
Connect your MAX6675 thermocouple module to the Grove ports on the CM4 Maker Board.
Setting Up Your Software Environment:
Download or clone the GitHub repository on your CM4 Maker Board: GitHub Repository.
Installing Node-RED on CM4:
1. Update the Raspberry Pi OS:
sudo apt-get update && sudo apt-get upgrade
2. Install Node-RED by running the following commands in your terminal:
bash <(curl -sL https://raw.githubusercontent.com/node-red/linux-installers/master/deb/update-nodejs-and-nodered)
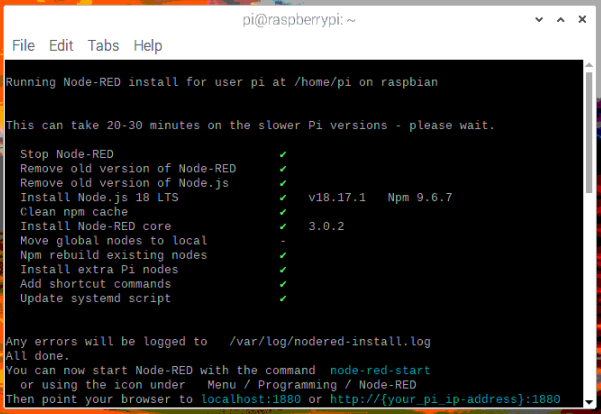
3. For customizing the settings, you can leave them as default by typing 'N.' If you want more security, type 'y' to enable user login.
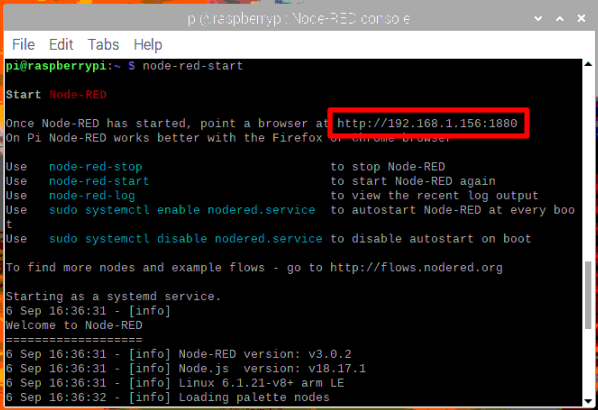
4. Once installed, start Node-RED using the command:
node-red-start
Setting Up Node-RED:
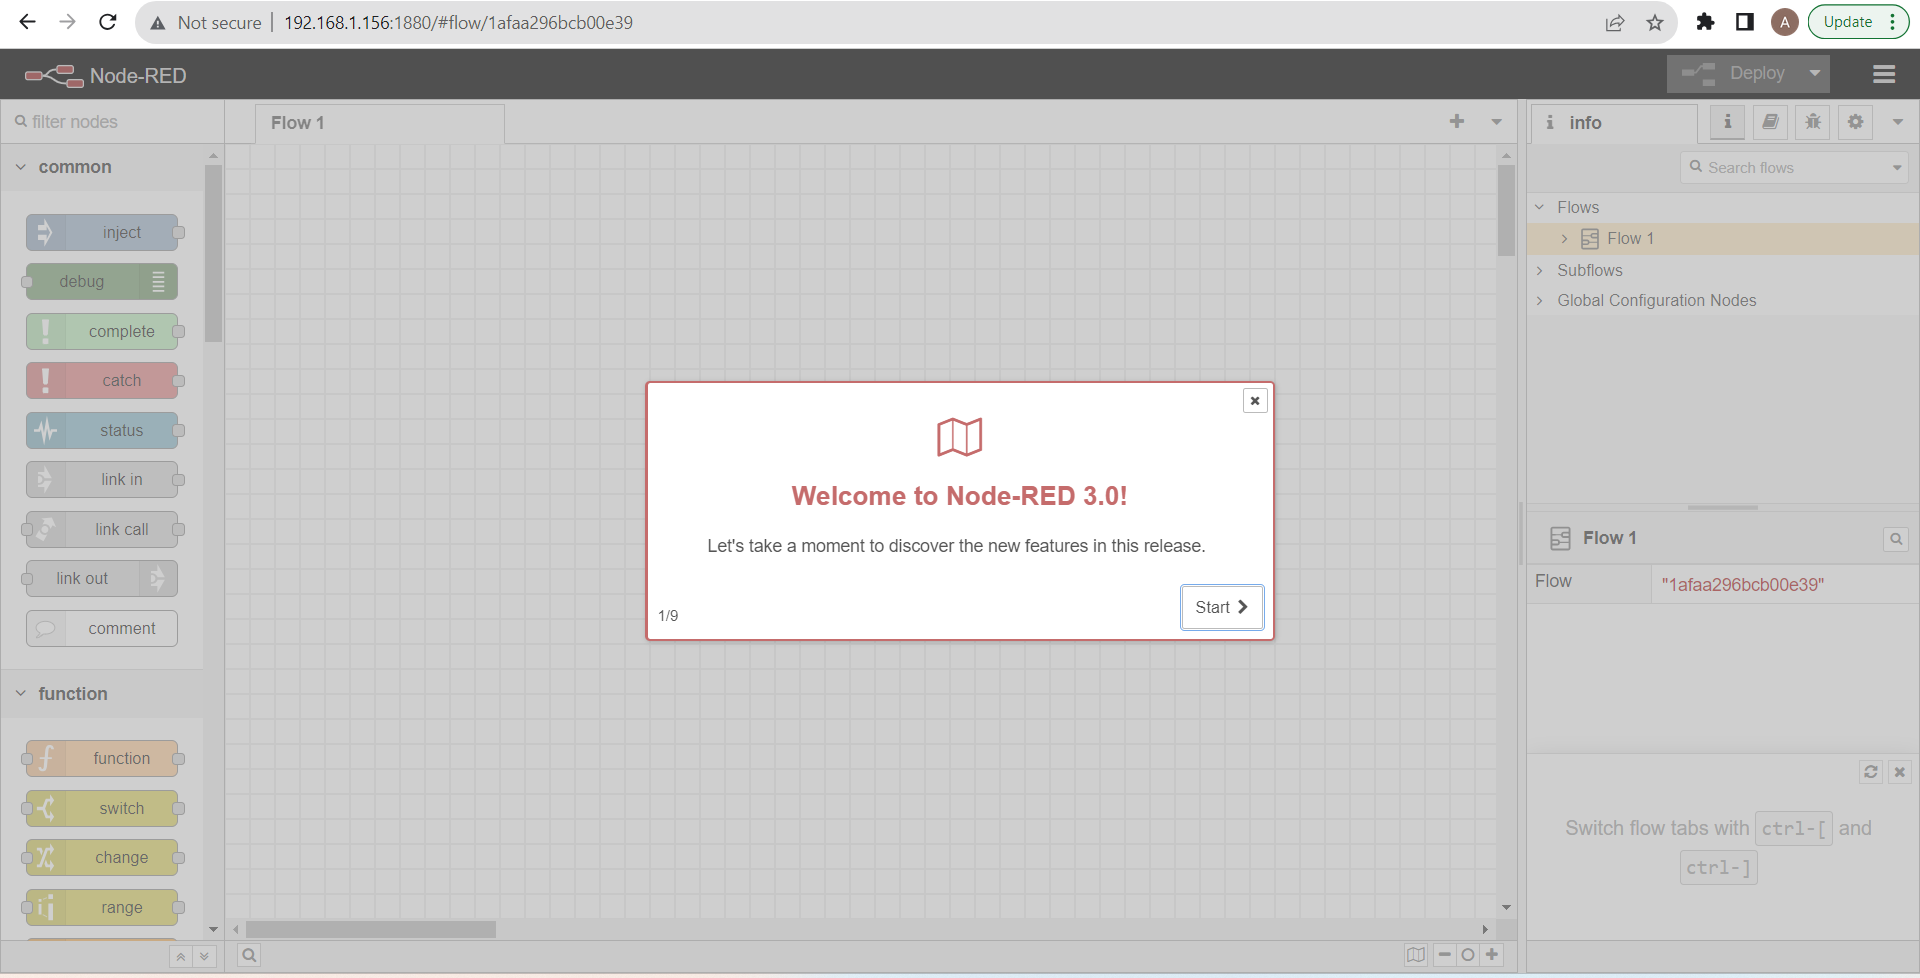
1. Access the Node-RED interface by opening a web browser and navigating to `http://localhost:1880` or the IP address `http://192.168.1.156:1880`. Alternatively, open the Node-RED interface through another browser connected to the same network.
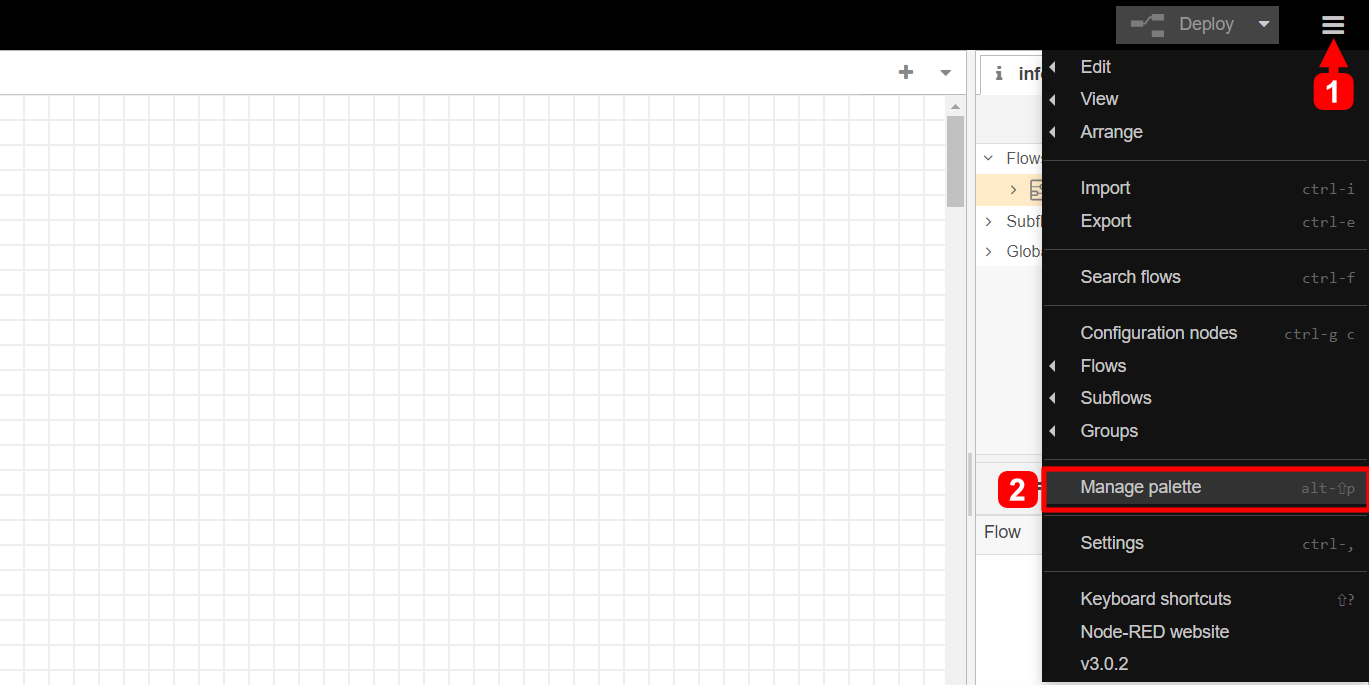
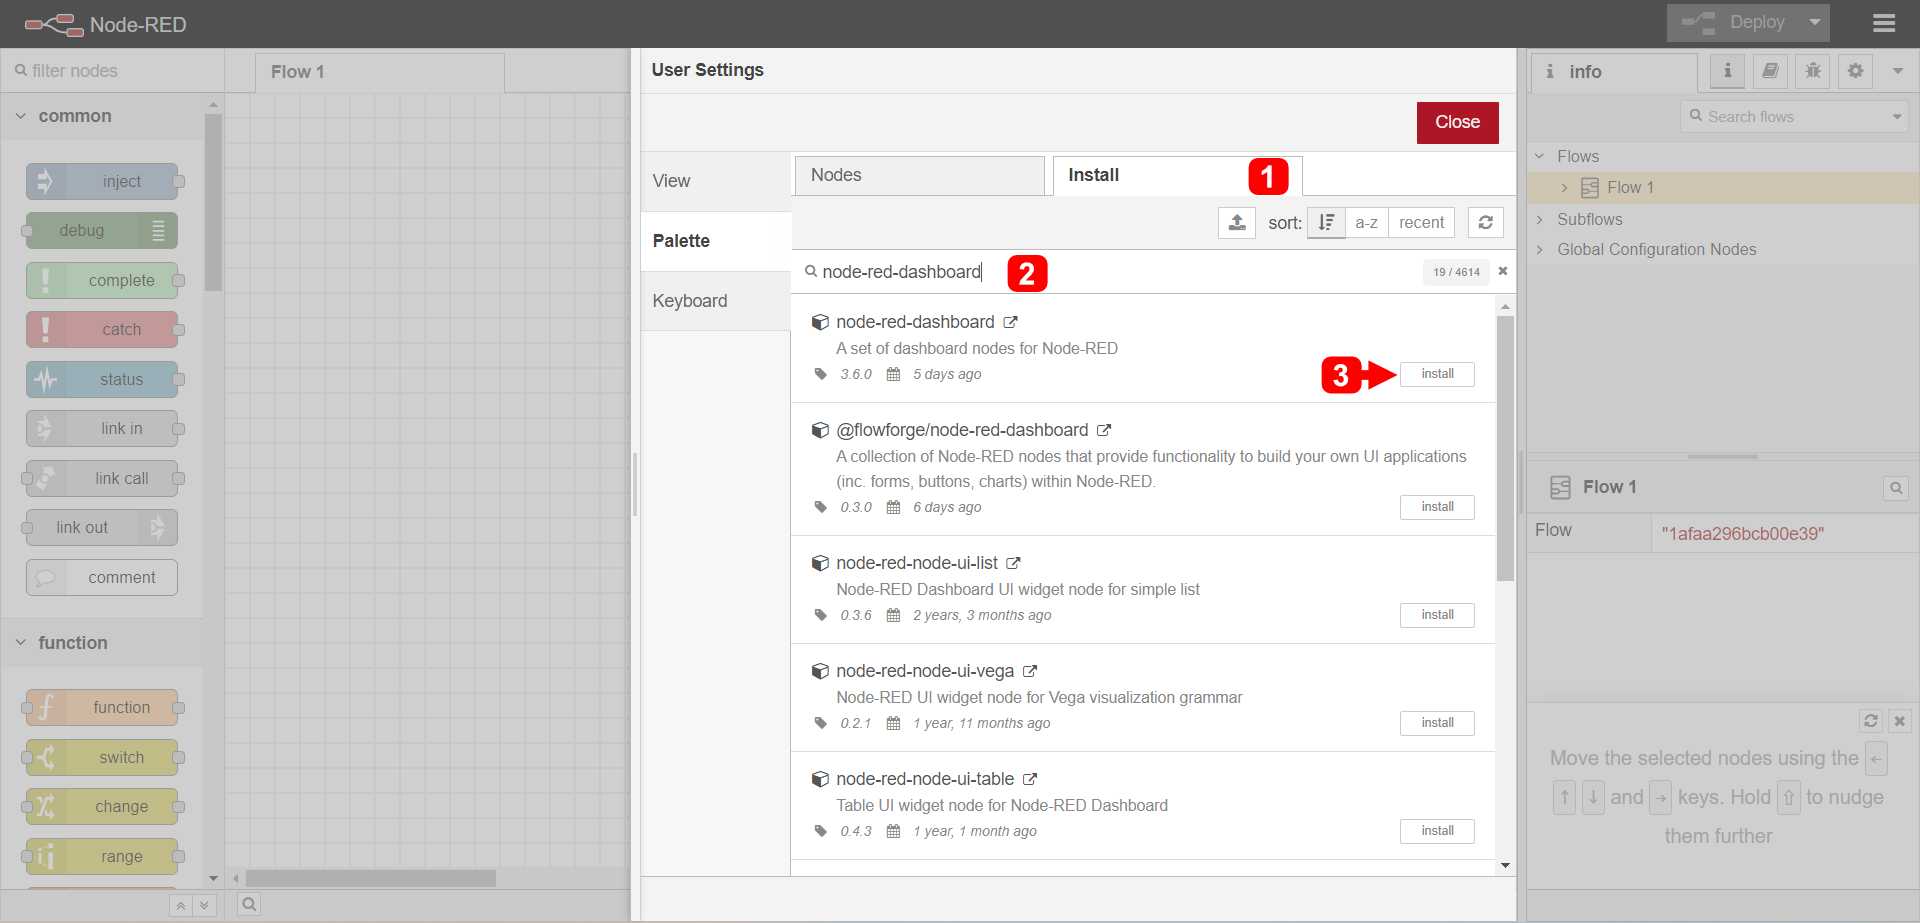
2. Install the `node-red-dashboard` extension.
Sending Sensor Data to Node-RED:
This tutorial will show you two ways to send sensor data to Node-RED: through TCP/IP and MQTT connections.
Local TCP/IP Connection to Node-RED:
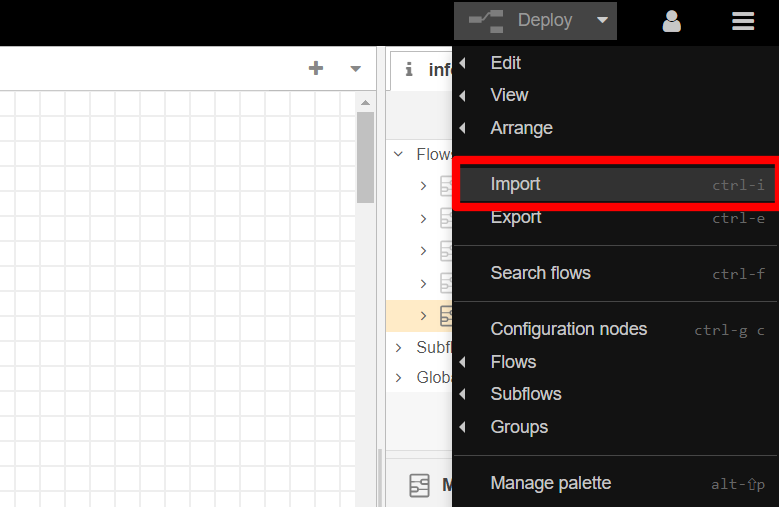
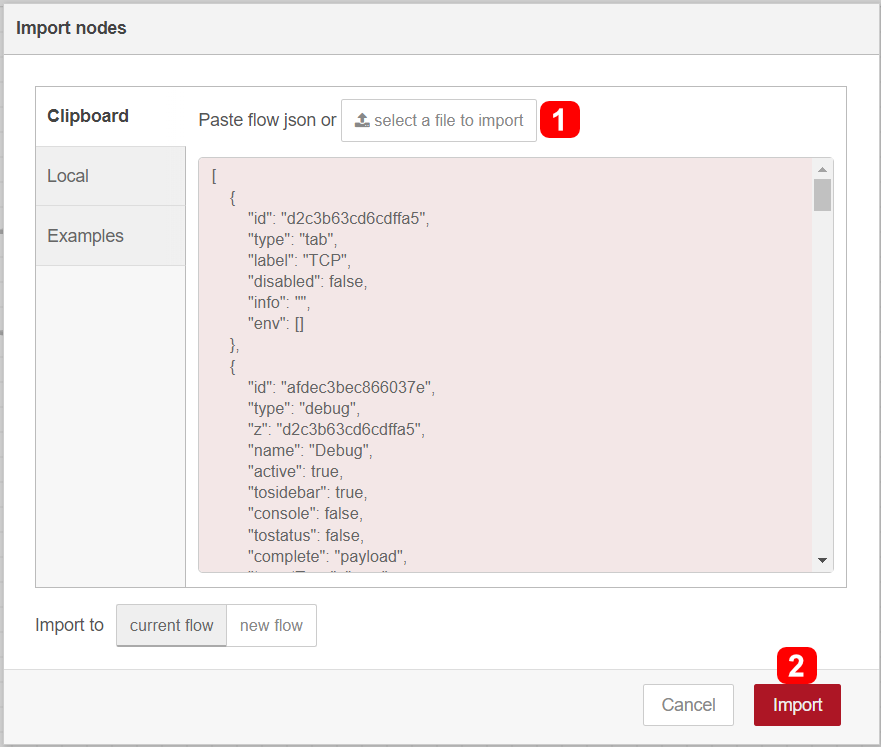
1. Import the JSON file 'node_red_max6675_TCP.json' from the previously downloaded GitHub repository into your Node-RED.
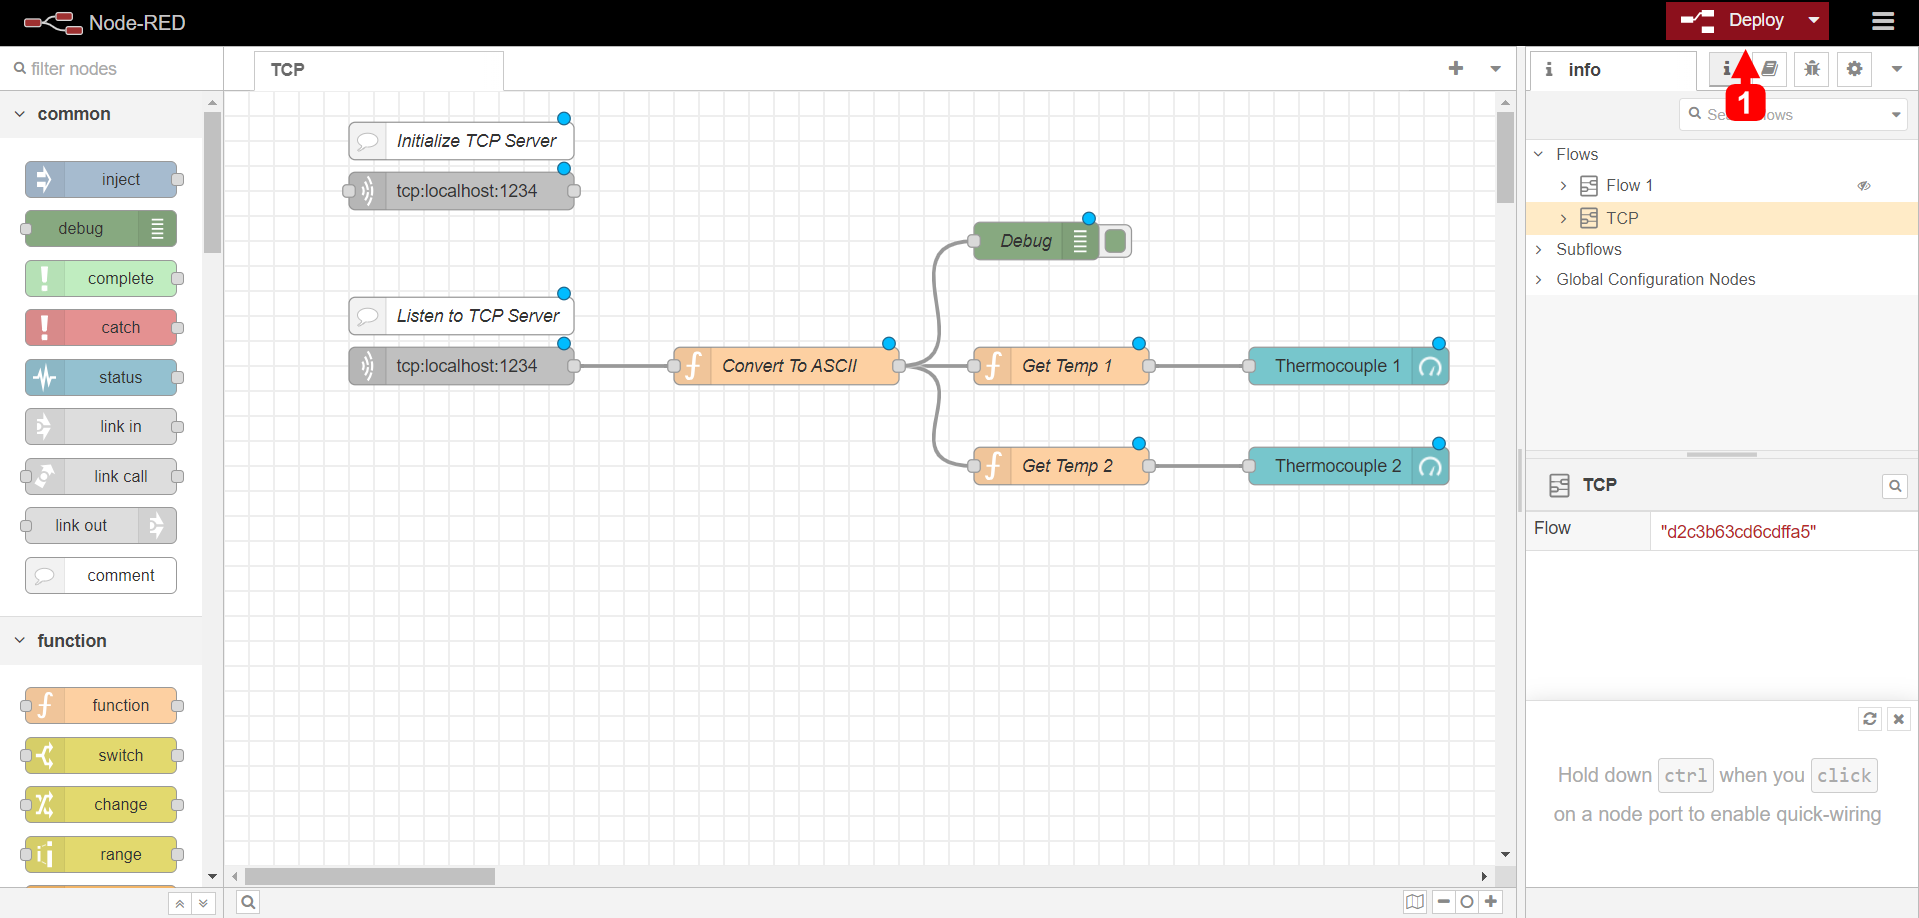
2. Click the "Deploy" button on the top right of the interface.
3. Open the Python code 'node_red_max6675_TCP.py' and run it.
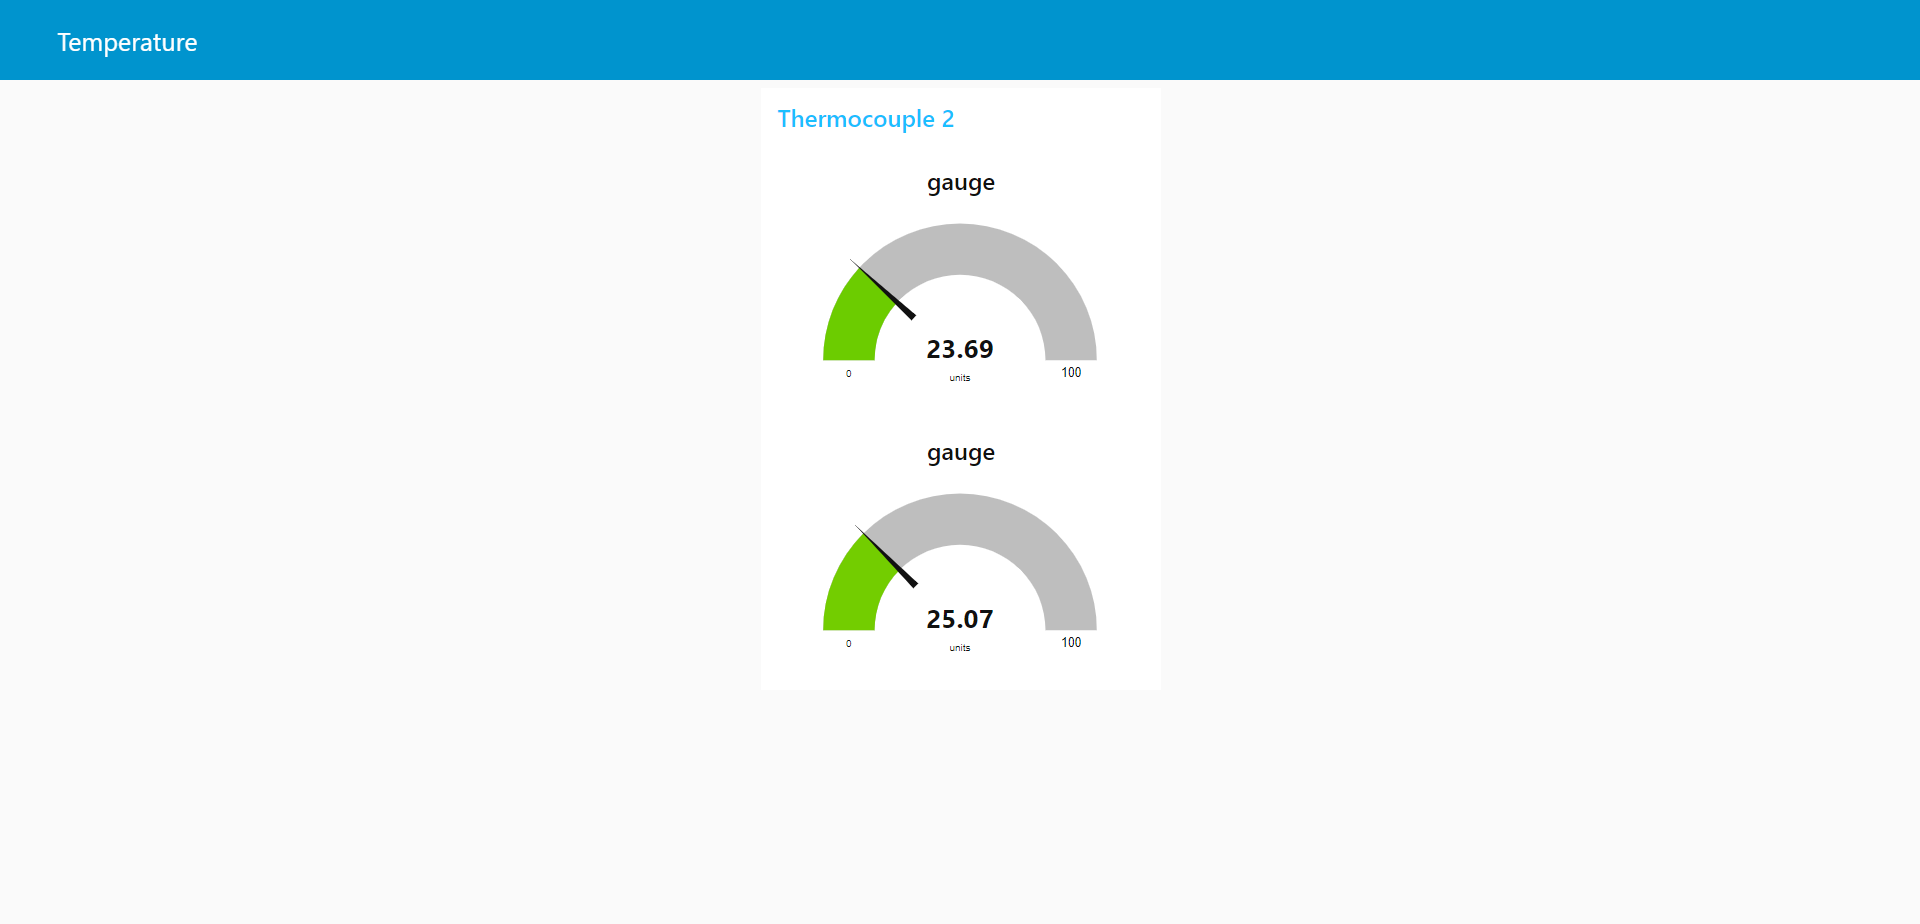
4. Open a new tab in your browser and add 'ui' after the current Node-RED URL to access the dashboard.

Making Your Node-Red Dashboard Online with MQTT:
In this tutorial, we'll use HiveMQ as the MQTT broker. If you prefer another broker, you can skip this step.
1. Install the Paho-MQTT library using the following command:
sudo pip3 install paho-mqtt
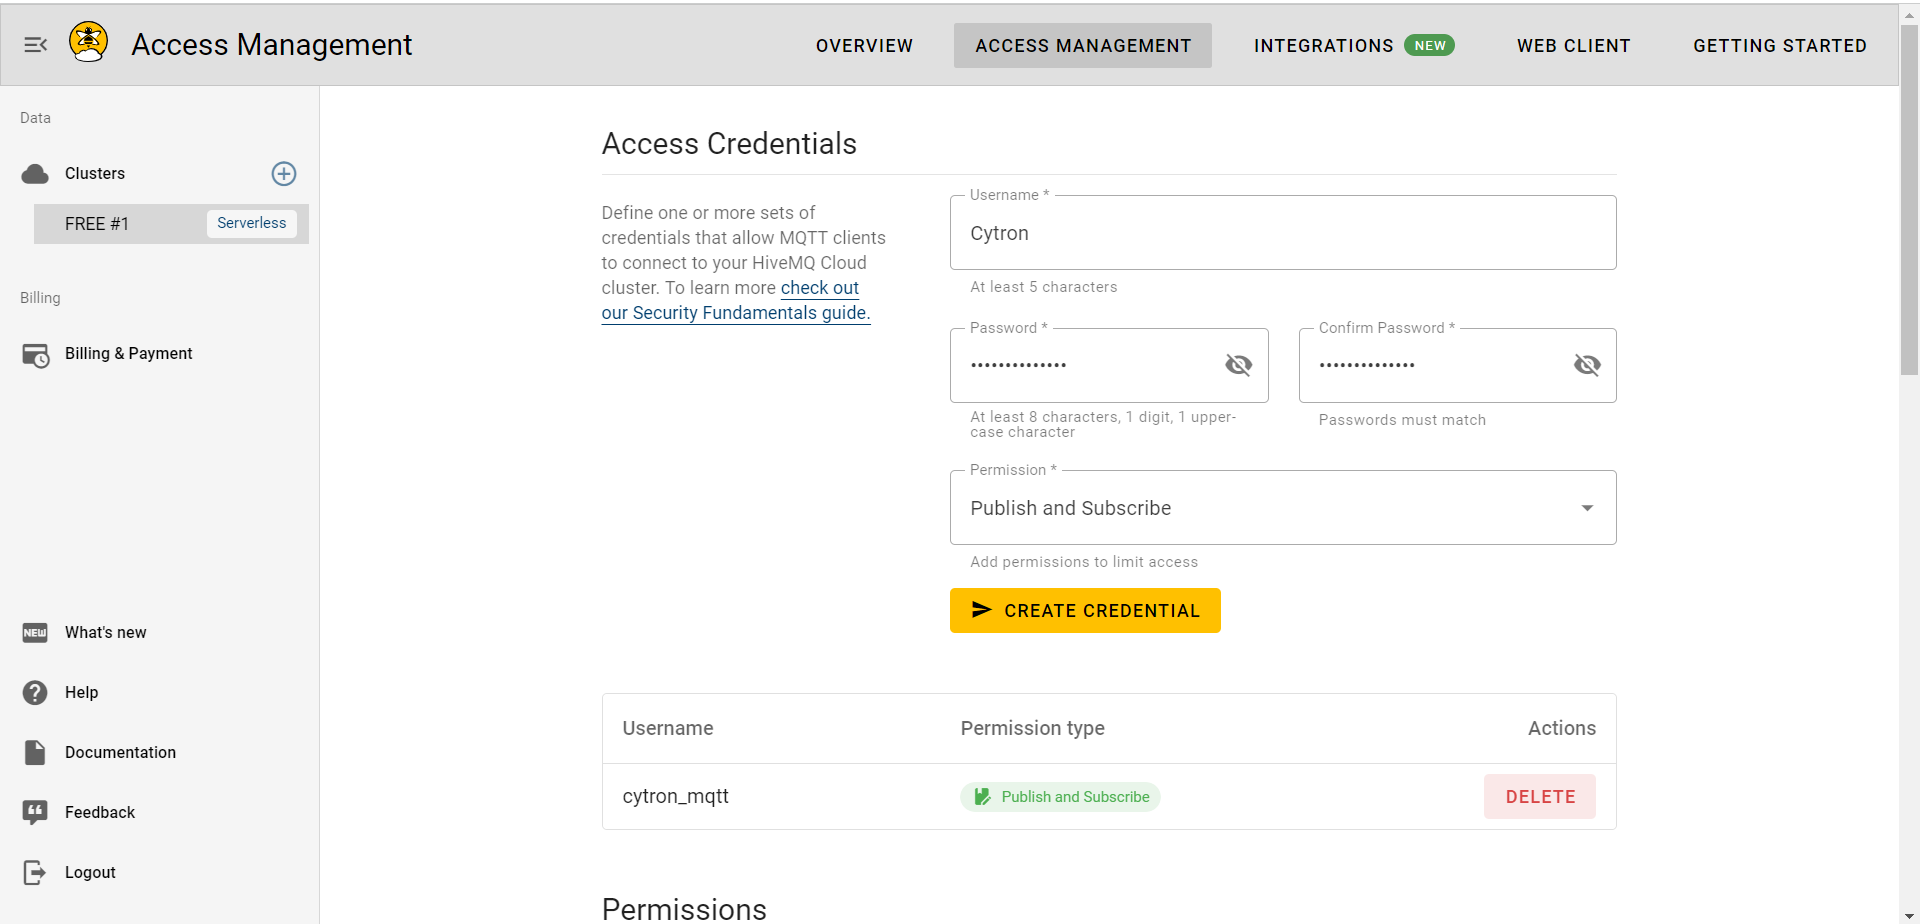
2. Register for a HiveMQ Broker account here. For this tutorial, the free version will suffice.
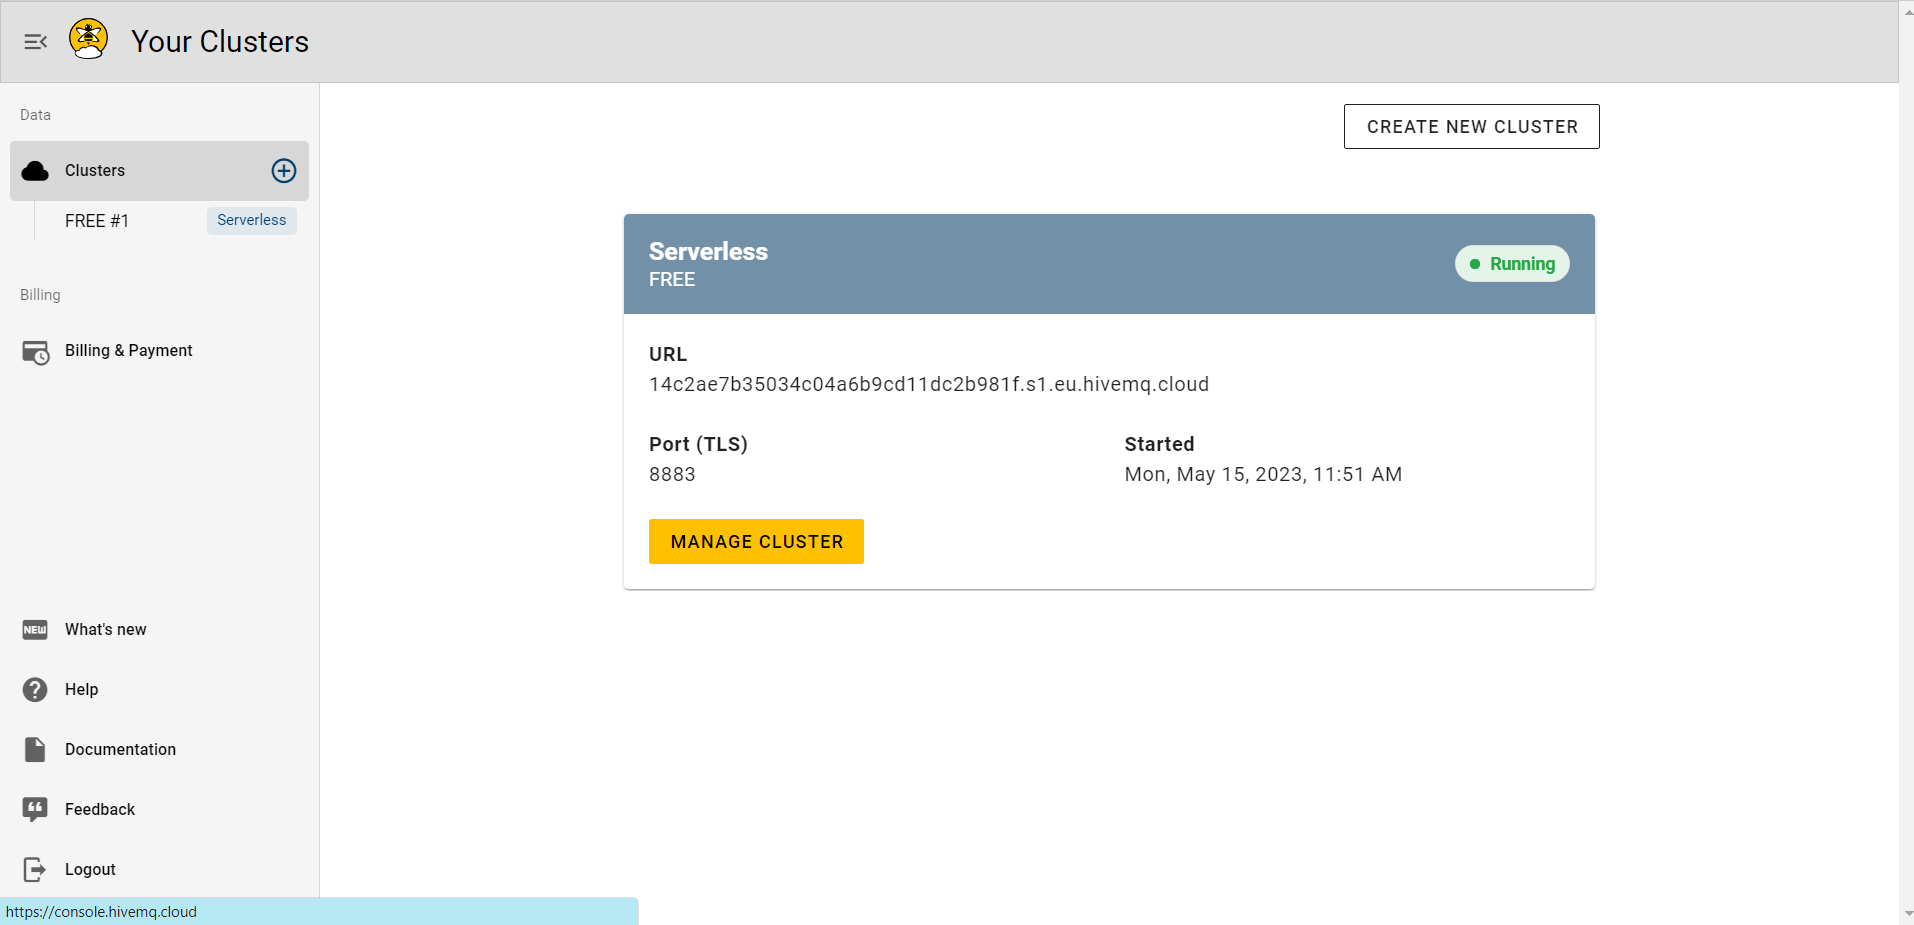
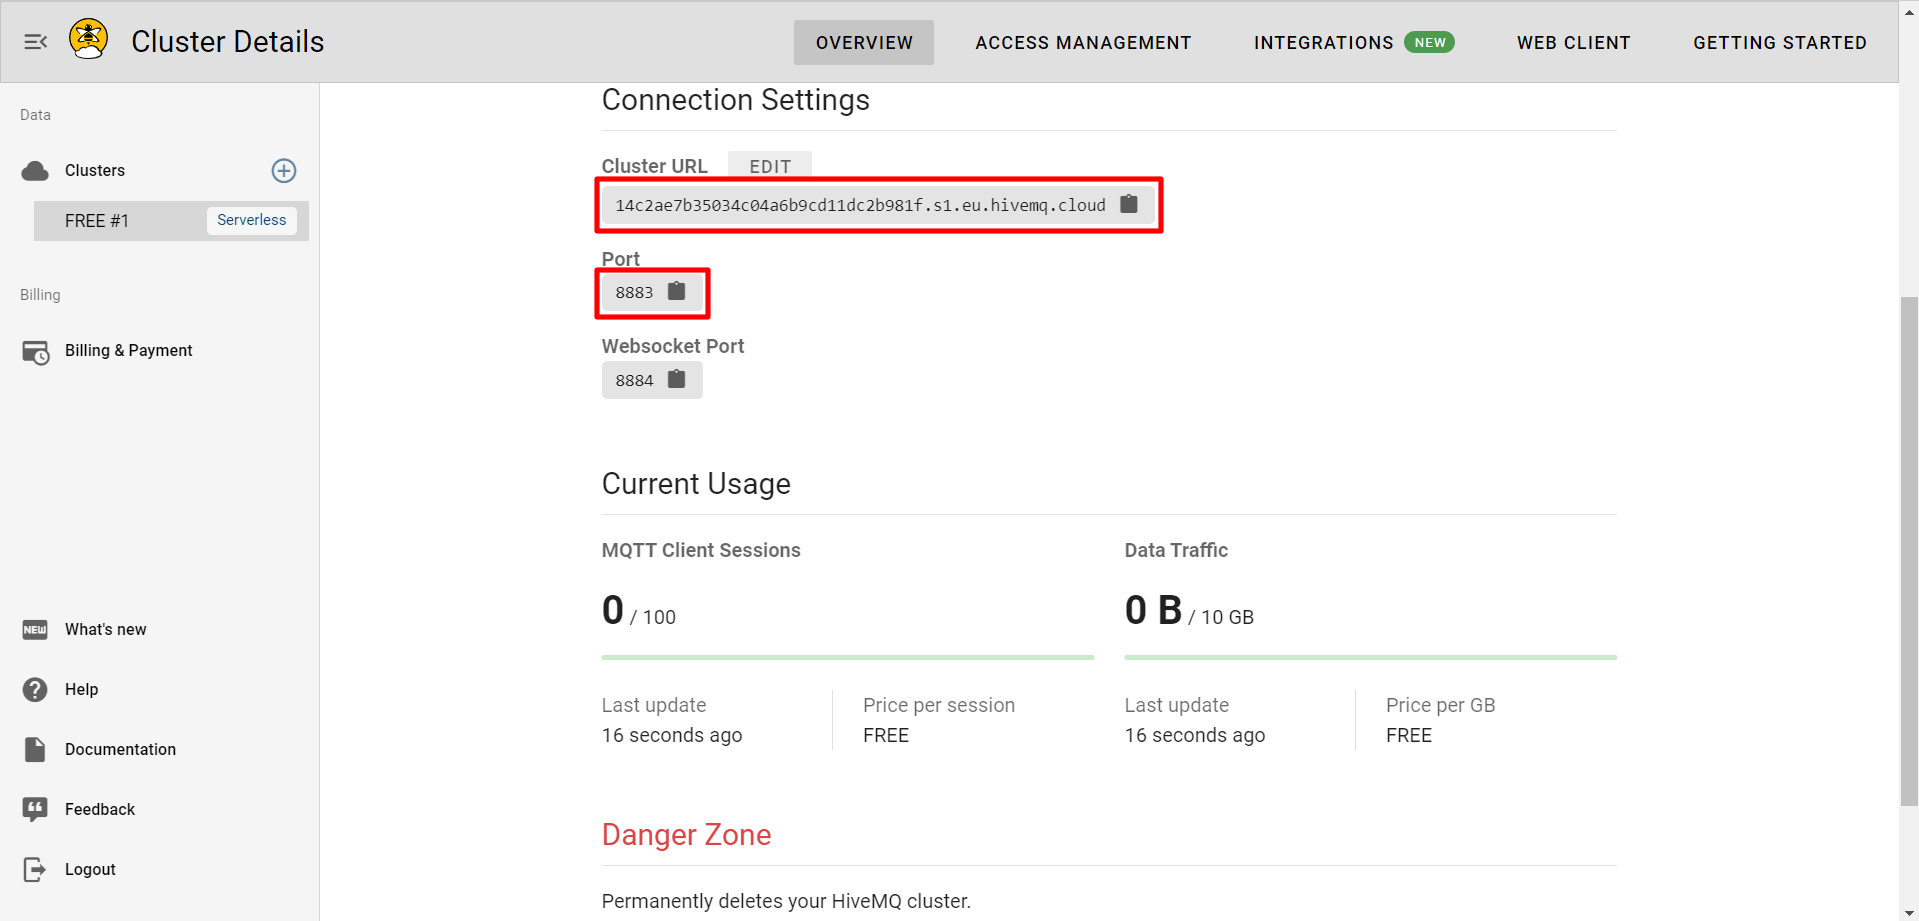
3. Obtain the Cluster URL and Port (you'll need them for the Python code and Node-RED MQTT setup).
4. Create your Access Credentials (Username and Password) and remember your password for later use in both the Python code and Node-RED MQTT setup.
5. Import the JSON file 'node_red_max6675_MQTT.json' from the GitHub repository into your Node-RED.
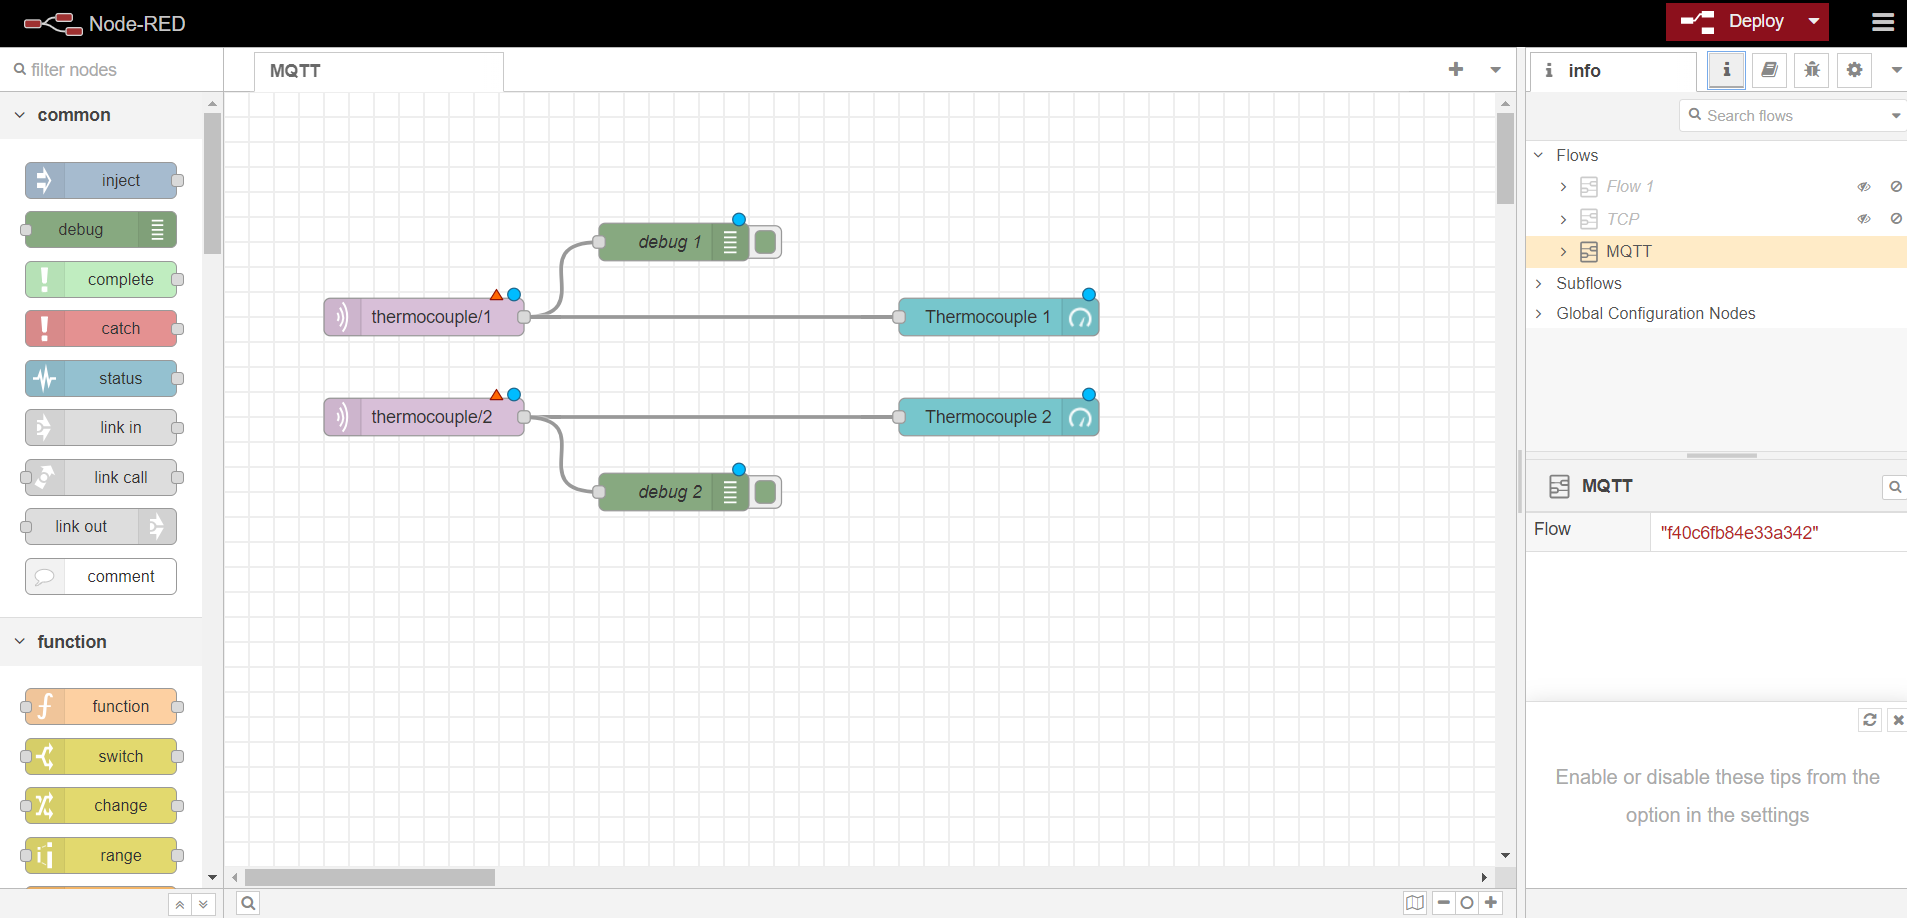
6. Double-click on the thermocouple/1 (purple block) and, in the right menu, click on the edit icon.
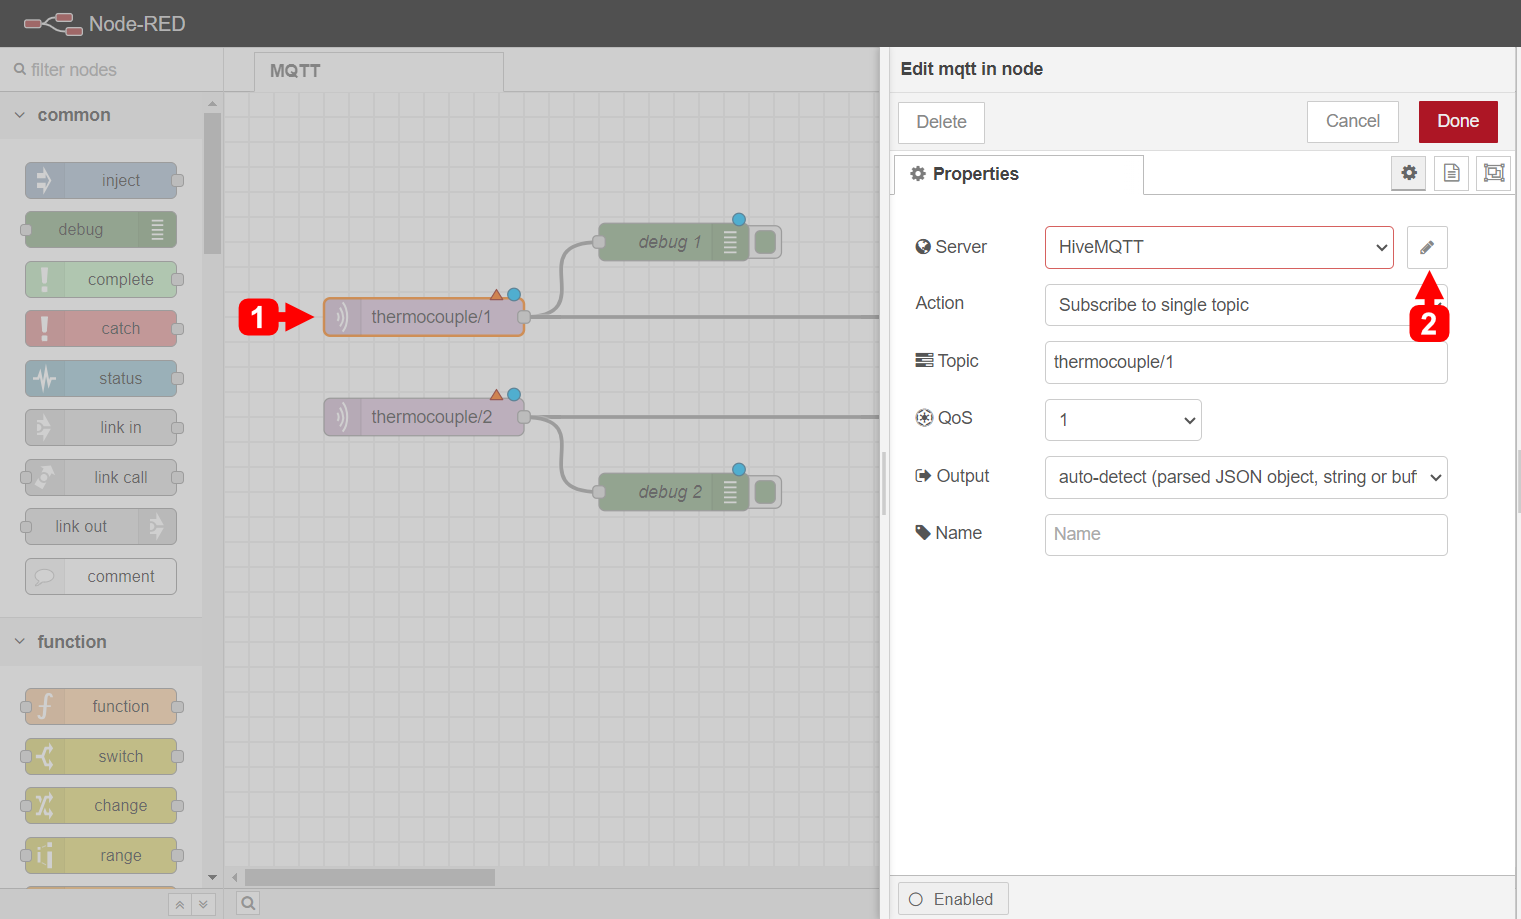
7. Insert the Cluster URL and Port number obtained from HiveMQ.
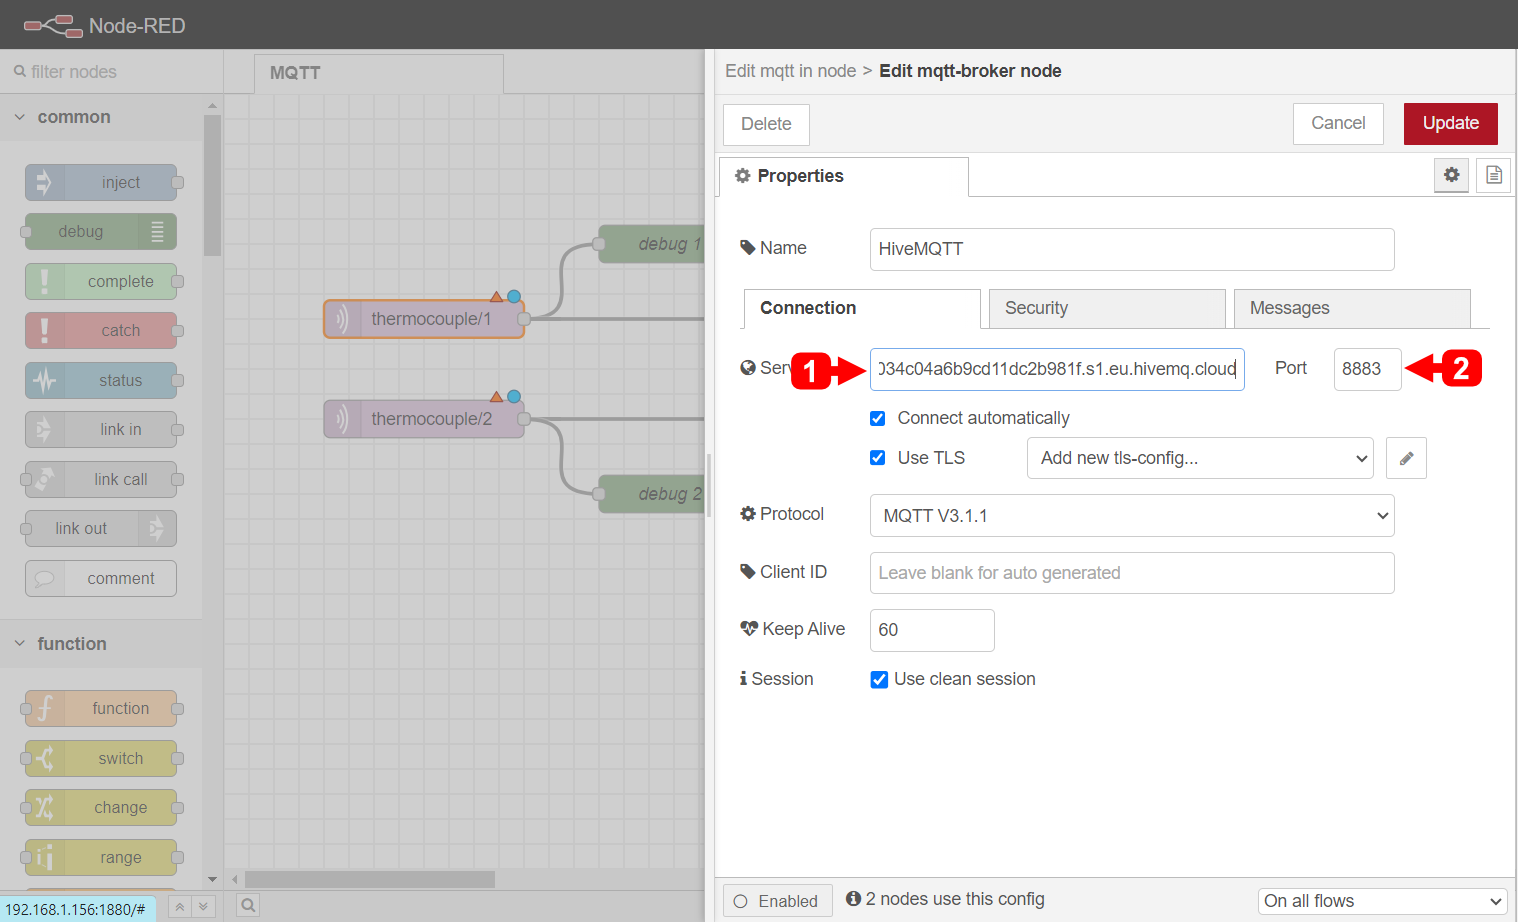
8. In the Security section, input your access credentials (Username and Password) from HiveMQ. Click "Update" to save the settings.
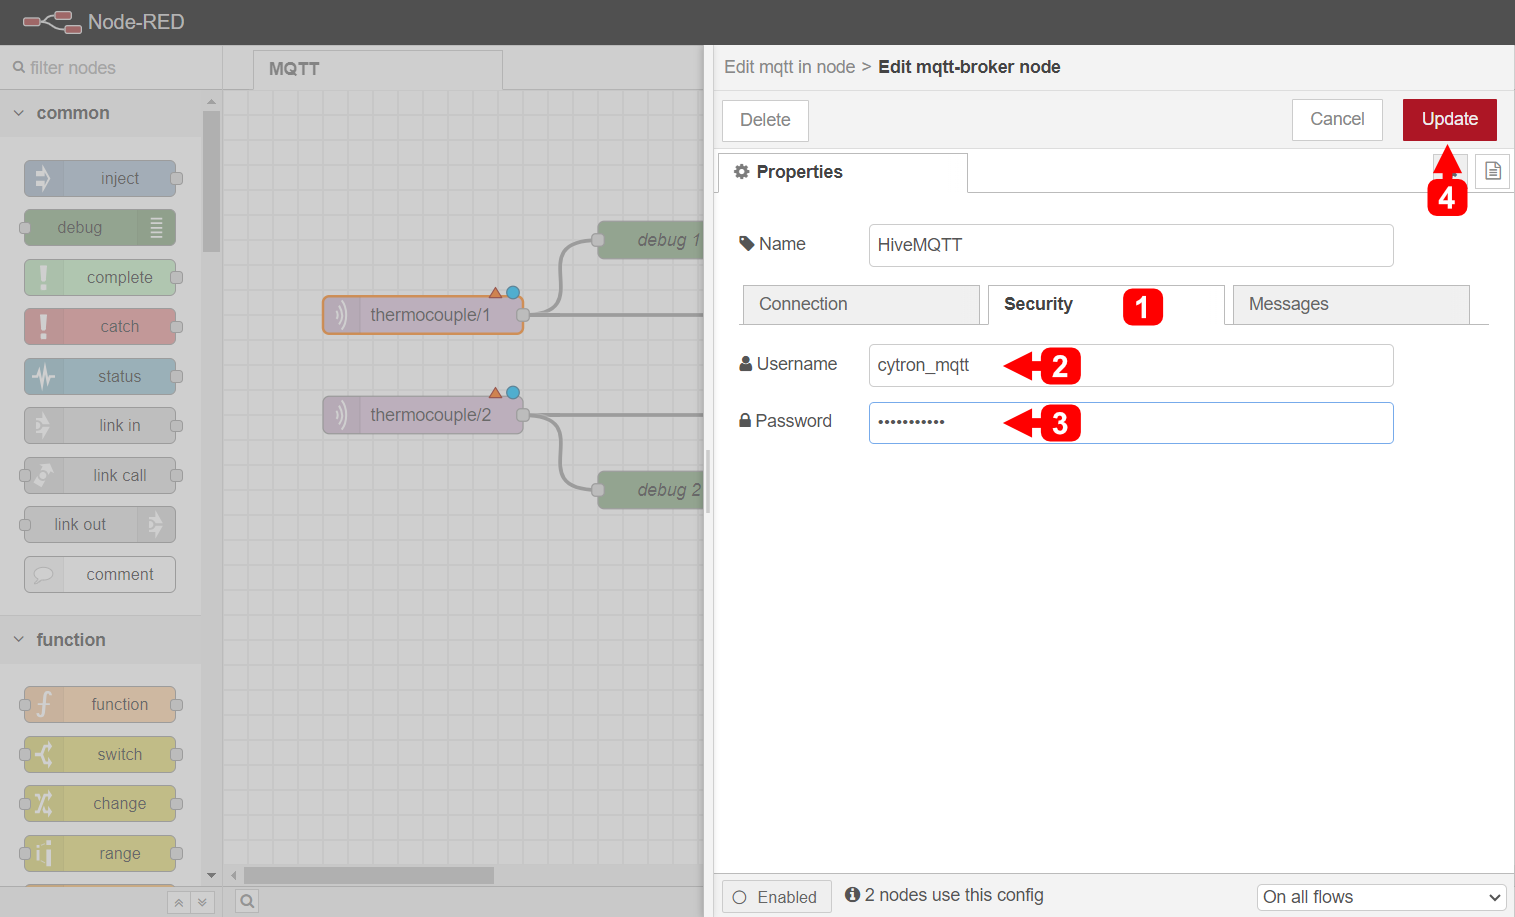
9. Click the "Deploy" button on the top right of the interface.
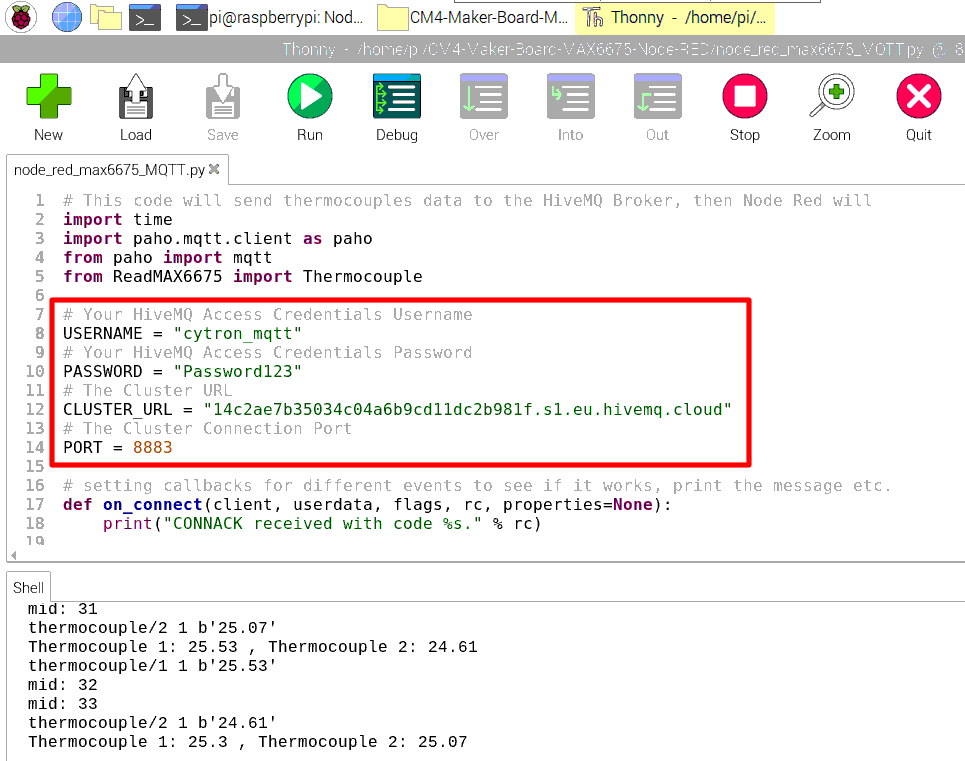
10. Open the Python code 'node_red_max6675_MQTT.py' and edit the USERNAME, PASSWORD, CLUSTER_URL, and PORT as per the HiveMQ details you obtained earlier. Then, run the Python code.
11. If there are no errors in the code, you can access the Node-RED dashboard by adding 'ui' to your URL.
Note: For the MQTT connection, Node-RED does not need to be on the same device as the sensor. The Python code will send sensor data to the MQTT broker (HiveMQ), and Node-RED will fetch the data from the MQTT broker.
Related Posts

Getting Started with CM4 Maker Board
Getting started with CM4 Maker Board, learn how to boot up or install Raspberry Pi OS on the Raspberry Pi CM4 with micro SD card, SSD, and eMMC...