 International
 Singapore
 Malaysia
 Thailand
 Vietnam
Your shopping cart is empty!
")
Getting Started with Mifare RC522 RFID Kit (RFID-RC522)
Last Updated on 5 August 2017
This article is written by internship student Khairul Baihaqi Bin Mohd Jafry
RFID (Radio-Frequency Identification) is commonly used nowadays in security systems such as door locks. RFID sets/modules can be very affordable, such as the Mifare MFRC522 chip we will be using in this tutorial.
The MFRC522 RFID readers comes with a RFID’s tag card. The MFRC522 communicates with cards or tags up to 1cm using a 13.56MHz electromagnetic field, then sends the data to an Arduino board through SPI communication.
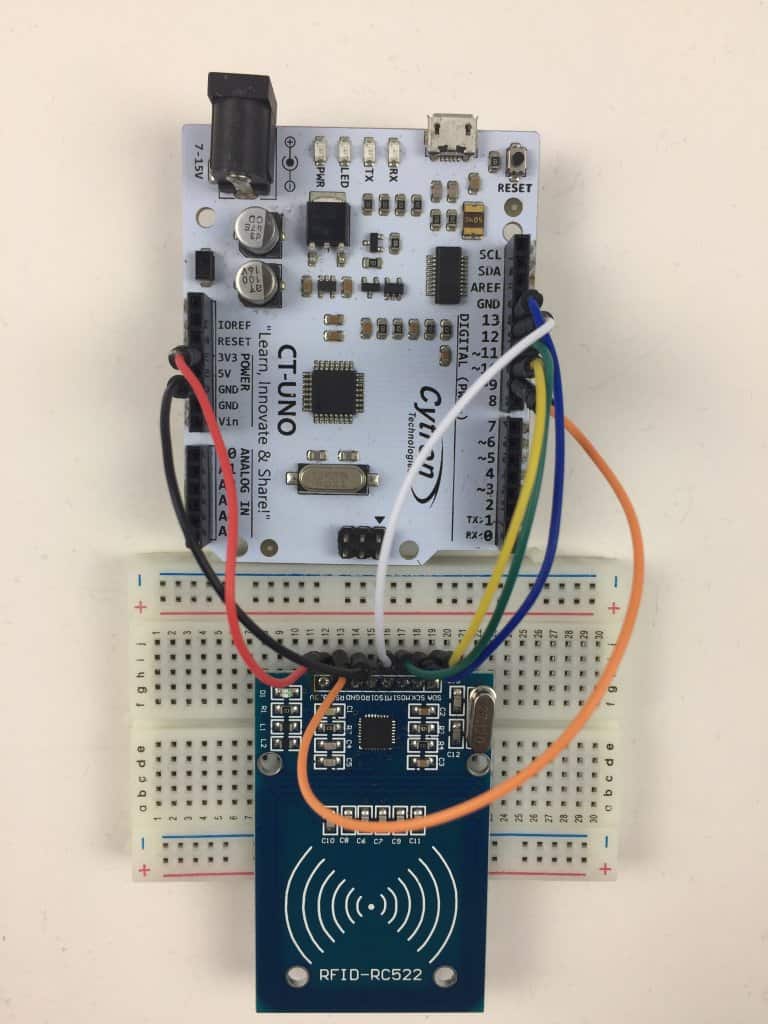
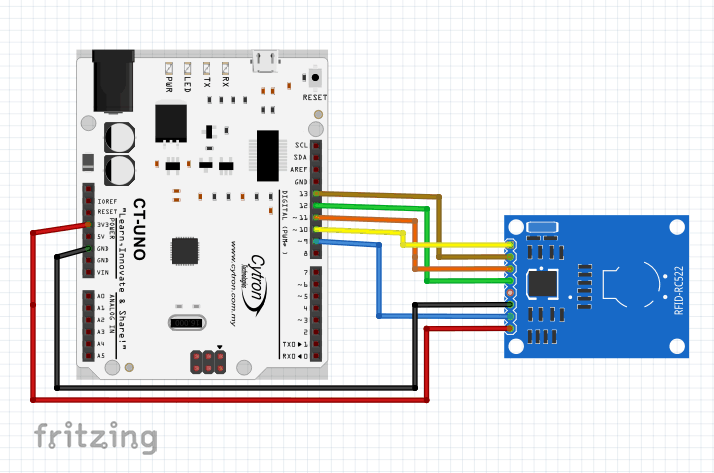
This is the basic setup:
SPECIFICATION
- MFRC522 chip based board
- Operating frequency: 13.56MHz
- Supply Voltage: 3.3V
- Current: 13-26mA
- Read Range: Approx 3cm with supplied card and fob
- SPI Interface
- Max Data Transfer Rate: 10Mbit / s
- Dimensions: 60mm × 39mm
HARDWARE REQUIREMENT
- CT UNO. (You may use other mainboards such as Arduino UNO and Arduino Mega)
- Mifare RC522 RFID Kit
- USB Micro B Cable (for CT UNO).
- Jumper Wires
- Breadboard
SOFTWARE REQUIREMENT
ARDUINO WIRING
| RC522 MODULE | UNO | MEGA |
| SDA(SS) | D10 | D53 |
| SCK | D13 | D52 |
| MOSI | D11 | D51 |
| MISO | D12 | D50 |
| PQ | Not Connected | Not Connected |
| GND | GND | GND |
| RST | D9 | D9 |
| 3.3V | 3.3V | 3.3V |
STEPS
1. Connect CT-UNO board to the RFID reader.
2.Download and install MFRC522 library on your Arduino IDE.
3. You can try to upload an example sketch. Go to File>Example>MFRC522>DumpInfo.
4. After you’ve done upload the code, open Serial Monitor to see the information from RFID reader.
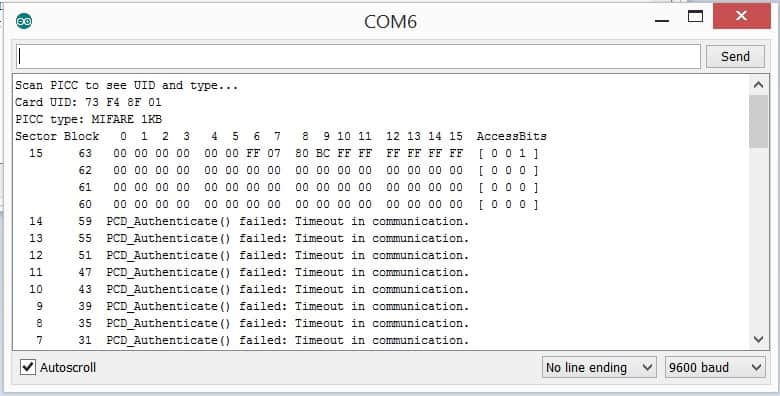
5.You may need this sub-function to get RFID’s unique ID without display it at Serial Monitor first.
void dump_byte_array(byte *Buffer, byte bufferSize)
{
String readRFID = "";
for (byte i = 0; i
REFERENCES
Note: For further inquiries or discussions, please visit our forum.
Related Products
")
RFID/NFC Module Kit (13.56MHz)
S$1.79++ S$1.79
x 1 unit(s)