Your shopping cart is empty!
Argon One M.2 Case Expansion for SATA Storage
- Brands Argon40 Code: BO-RPI4-AG1MD2
Note: These Argon One M.2 Case and M.2 SATA Base with M.2 SATA Expansion kits are only compatible with Raspberry Pi Model 4 Model B boards.
Note: This page contains four different variations of the Argon One M.2 case and the base bundles. Please select the preferred variant:

 |  | ||
| Argon One SATA Case+120GB SATA SSD | Argon One SATA Base + 120GB SATA SSD | Argon One M.2 SATA Case Only | Argon One M.2 SATA Base Only |
Note: Raspberry Pi 4 Model B is NOT included in the packing list.
If you are looking for a perfect and elegant enclosure for your powerful Raspberry Pi 4 Model B single-board computer with M.2 SATA III SSD expansion, you are on the right page! Check this unboxing and review video by SeeedStudio on the new released Argon-One M.2 case :
Argon ONE M.2 is a Raspberry Pi 4 Model B compatible case that is made with aluminum alloy and polished with a modern Space Grey finish for stunning aesthetics and functionality. It offers one of the best cooling solutions for the Raspberry Pi 4 Model B board. The case has an extension that connects to the processor with a thermal cooling pad so that heat from the processor is transferred to the case. This means that the case becomes a heatsink passively cooling the motherboard so that the computer can work without building up much heat. Also, the case comes with a built-in PCB board with a 30mm fan attached to actively cool the Raspberry Pi further. These two cooling systems combined guarantee long-lasting use without overheating. The fan speed can be configured easily at any time via the terminal. Also, it has front and rear vents for better airflow.
This case is compatible with the Raspberry Pi 4 Model B:
Chris from Explaining Computers also made an amazing video about this case, assembly and boot up Raspberry Pi OS from the M.2 SSD:
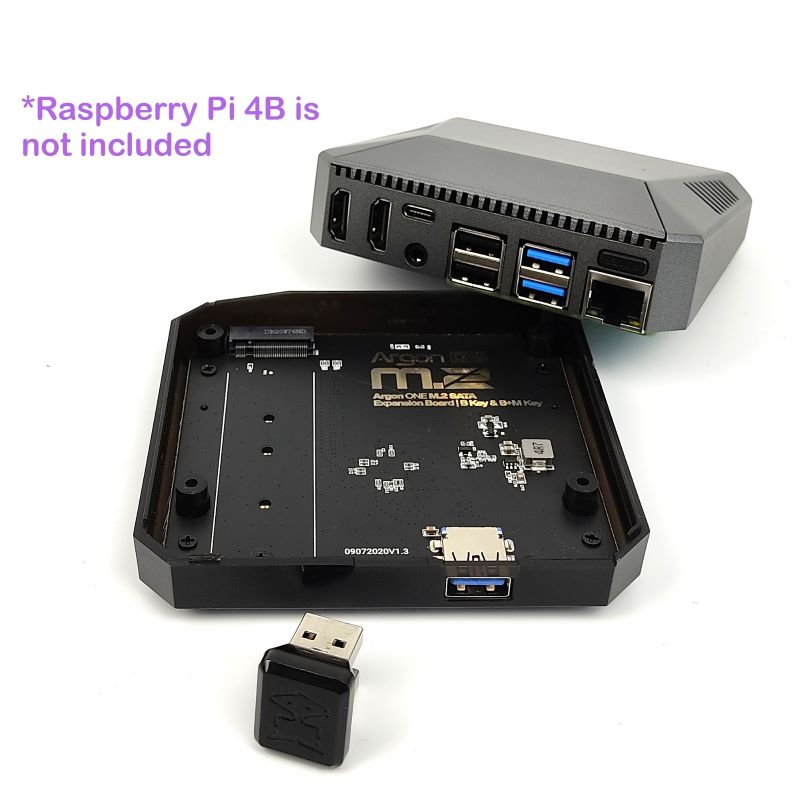
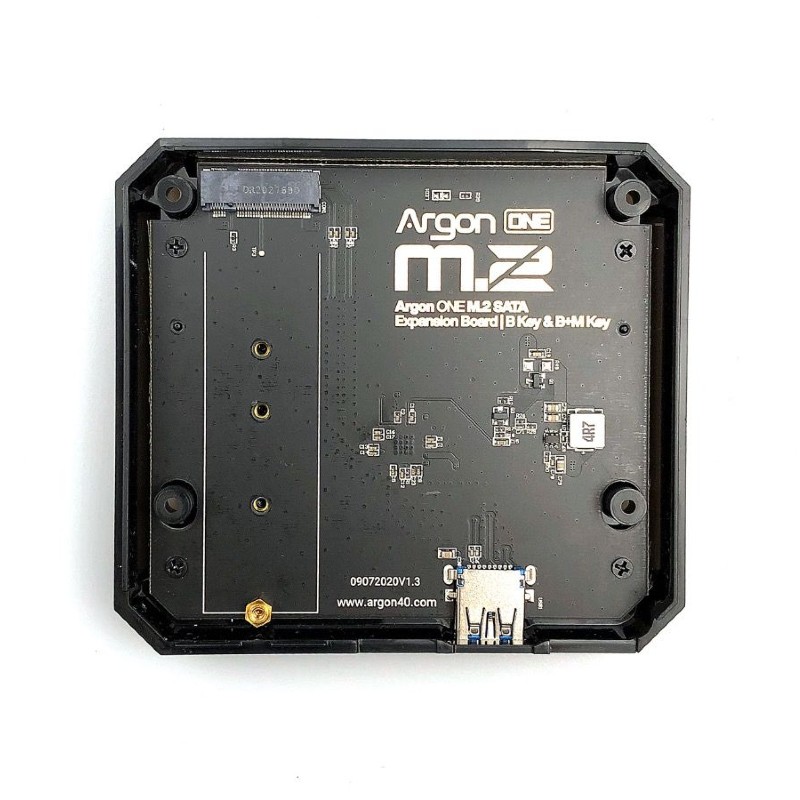
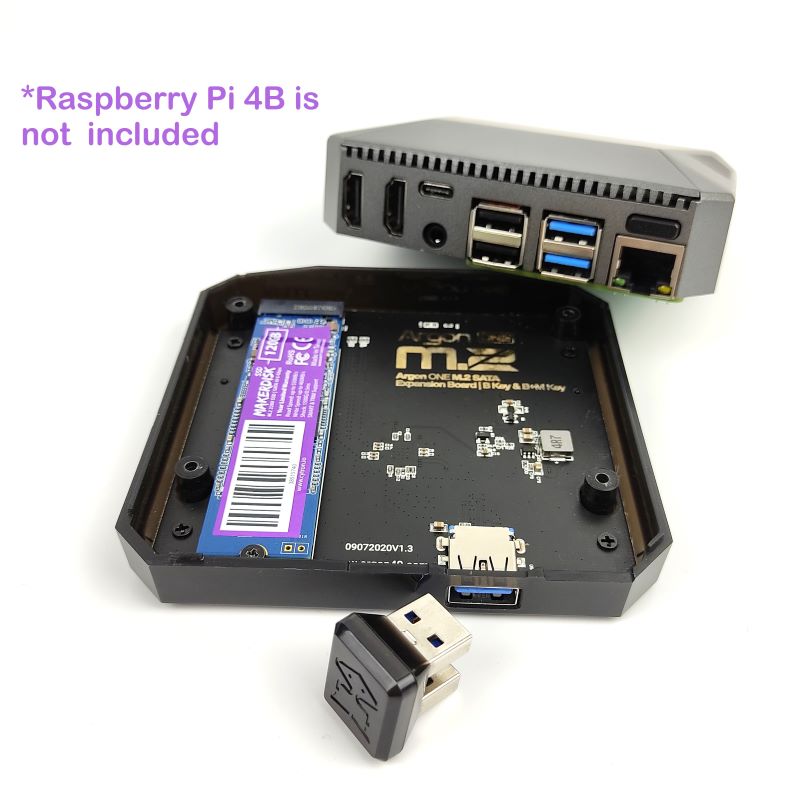
Now you can connect M.2 SATA SSD drives with Key-B or Key-B&M of any size to your Raspberry Pi using this case. It has an M.2 connector inside the case and you can connect the provided USB 3.0 adapter to one of the USB ports on the Raspberry Pi and the USB port on the case for the m.2 to function. The connection is also UASP supported, which means, it allows for high-speed data transfers. This enables the SSD drive to be used as a boot drive for your Raspberry Pi, which can dramatically increase boot times.


Note: This is only Argon One M.2 Case Expansion. M.2 SATA SSD and Raspberry Pi board are NOT included.
The Raspberry Pi 4 Model B generally has two micro-HDMI connectors and it will not be very convenient sometimes to find a micro-HDMI to full-size HDMI cable when you want to connect your Raspberry Pi 4 to an external display. However, this Argon ONE M.2 Case solves this issue by including two full-sized HDMI connectors for your convenience.

Normally a Raspberry Pi gets powered as soon as you connect it to the power supply and does not have a power button onboard. Well…Argon ONE can change the way you interact with your Raspberry Pi 4. With the power button installed on the case, you can easily turn on your Raspberry Pi and perform safe shutdowns, reboots, and forced shutdowns.

How to install Argon One Pi4 V2 power button and fan control/driver:

Power button function:

The default setting of the fan is:

You can also use these commands to configure and uninstall the driver
Note: Remember to always reboot after changing any configuration or uninstallation for the revised settings to take effect.
Assembling the case with the Raspberry Pi is very easy. Install the Argon ONE Script that unlocks the full functionality of the Argon ONE case. All the ports are accessed at the back, making it more manageable with minimal cable clutter and easy cleaning. This also makes it easy to tidy and pack up when on the move without compromising any ports of the motherboard.

The case was designed with one main purpose, protecting the Raspberry Pi without compromising the full functionality of the motherboard. The built-in PCB board extends the GPIO pins of the Raspberry Pi with the pins being color-coded to easily identify the pin functions. Also, the pins are clearly labeled for convenient use. When the pins are not in use, they’re covered and protected by a magnetic removable top. This makes the Pins accessible at all times, allowing the Raspberry PI to be used in various electronics projects.

The case comes with a top and bottom, 4 screws, a built-in PCB Board, a silicon cooling pad, and a PCB Board that extends the audio and micro HDMI ports. Assembling the Raspberry Pi with the case though is as easy as 1, 2, 3 or A, B, C. Combining the parts together is simple and intuitive. All that’s needed is a four-way screwdriver, and that’s just to tighten the screws to the bottom of the case. No special tools needed at all. After placing the Raspberry Pi and installing the OS on the SD Card, a one-line script needs to be typed into the terminal so that the power button and fan can be used.
This case enables two power management modes with automatic booting or “Always ON Mode” and has programmable IR support to the Raspberry Pi with streamlined options.
To configure the Infrared Reciever ON/OFF signal of Argon ONE V2 and M.2, open Terminal on your RPi and type "argonone-ir". Then follow the instruction indicated.
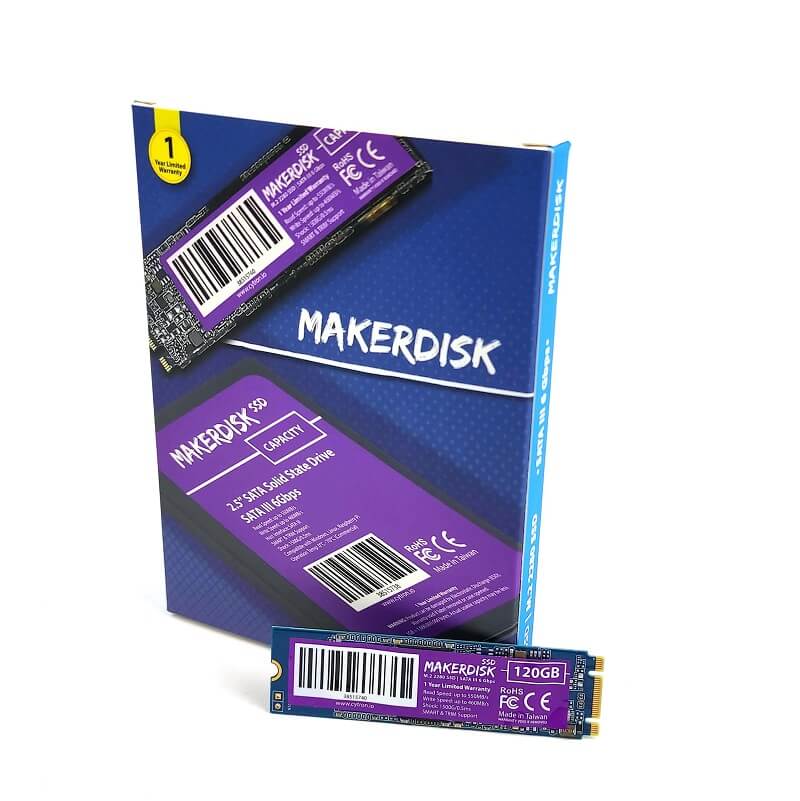
To use the Argon One Case, you will definitely need an M.2 NGFF (SATA) SSD. If you don't already have one, consider getting the expansion board together with a 120GB MakerDisk M.2 SSD, pre-loaded with Raspberry Pi OS.
We, at Cytron Technologies, are pretty excited with the stable release of USB boot firmware and have also released a reliable SSD in M.2 2280 (B+M Key) form factor. We called it MakerDisk! A Disk from Makers to Makers :) It is an M.2 2280 NGFF, SATA III (6.0 Gbps) Solid State Drive (SSD) with a capacity of 120GB.
Everyone is booting the preferred Operating System for the Raspberry Pi 4 Model B from USB :) The USB Boot firmware for Raspberry Pi 4 Model B is now officially released as a stable version. Check out this video by Jeff Geerling talking about the stable release of this firmware:
Booting Raspberry Pi OS and opening Apps/Programs from MakerDisk SSD is faster than the microSD card. Here are the speed test results that we get using Raspberry Pi Diagnostics.
This M.2 2280 MakerDisk SSD has a maximum sequential read and writes speed of up to 550MB/s and 460MB/s respectively. The above results are limited by the USB3.0 to SATA interface.
Note: This MakerDisk SSD is PRE-LOADED with the Raspberry Pi OS, so you can use it with Raspberry Pi 4 Model B or Raspberry Pi 400 right out of the box (if the Raspberry Pi is ready with USB boot). Of course, you will still a SATA to USB bridge, USB3.0 to M.2 NGFF SSD Expansion Board.
Most of the latest Raspberry Pi 4 Model B comes with the latest USB bootable firmware. In case you have an older version of the Raspberry Pi 4 Model B board, or you are not sure, just check it using one of these methods:
Option 1: Do it from Raspberry Pi OS desktop with a monitor, keyboard, and mouse, going into the raspi_config, by leepspvideo:


After the Raspberry Pi Imager loaded the EEPROM firmware into the microSD card, insert it into your Raspberry Pi 4 Model B's microSD card slot and power it up. After just 3 seconds, the EEPROM is updated with new firmware and it is ready for USB boot.
Option 3: Boot it directly if your Raspberry Pi 4 Model B comes with the latest firmware in the EEPROM, nothing needed to be updated :)

In any case, you can always reload the image/Operating System into this SSD using an M.2 to USB3.0 Adapter. We recommend using the official imager: Raspberry Pi Imager. Please check this video out on how to use the Advance features:
If you already have Argon One Case (without M.2 expansion), you can get the Argon One Base and 120GB SSD bundle, or Argon One Base alone.

Note: The M.2 2280 MakerDisk SSD comes in a separate box, please assemble it into the Argon One M.2 base manually.

Note: The M.2 2280 MakerDisk SSD comes in a separate box, please assemble it into the Argon One M.2 base manually.

